Your WordPress website is great as a central hub for your online marketing. One reason is how well it integrates with social media. For example, if you want to embed Twitter content, display TikTok posts, or show Pinterest images in a WordPress post or page, the platforms excels.
WordPress includes a few ways to show content from Pinterest, but there are also ‘official’ methods too. Fortunately, they’re all easy to implement on your site.
In this post, we’ll offer two ways to show Pinterest images in WordPress, and walk you through the steps. Before this, let’s talk more about why Pinterest is a great social media platform to integrate with.
The Benefits of Integrating Pinterest and WordPress
Right off the bat, we’ll admit that Pinterest isn’t going to be a platform that is suitable for every site. For example, legal businesses aren’t going to be active on the platform, and neither are medical companies. This is because of the platform’s key focus on images.
Although Pinterest does have informational content, the primary image format doesn’t align well with more ‘serious’ industries.
Of course, this isn’t an exclusive list. However, you’ll find some niches are well-suited to using Pinterest:
- Fashion sites.
- Lifestyle businesses, such as yoga studios.
- Craft stores and general creative or art-based sites.
If you’re in one of these areas, you’re in good company. The reach of Pinterest is massive, with nearly 460 million users by the end of 2020. Even targeting 0.10 percent of this user base gives you a potential audience of 460,000 people.
Overall, Pinterest is going to be an ideal way to showcase your wares, especially if you’re selling products. Where both your niche and the audience crosses over, there is a lucrative market to promote to.
How to Show Pinterest Images in a WordPress Post or Page (2 Methods)
While there may be more ways to show Pinterest images in a WordPress post or page, we’re going to focus on the following two:
- Create a widget using Pinterest’s official tool.
- Use Jetpack’s Pinterest Block if you already use Automattic’s plugin.
Throughout, we’ll walk you through the steps and take you from zero to Pinterest hero. We’ll also explain why some of the other methods you’ve likely come across (such as WordPress plugins or embed codes) aren’t mentioned specifically in this article.
1. Use the Pinterest Widget Builder
First off, the official Pinterest Widget Builder is a stellar way to embed content within WordPress. Though, it’s worth noting that there’s a similar option that on the surface offers the same functionality, but isn’t going to be suitable.
While browsing Pins, you may come across the Get Pin embed code option within the options menu:
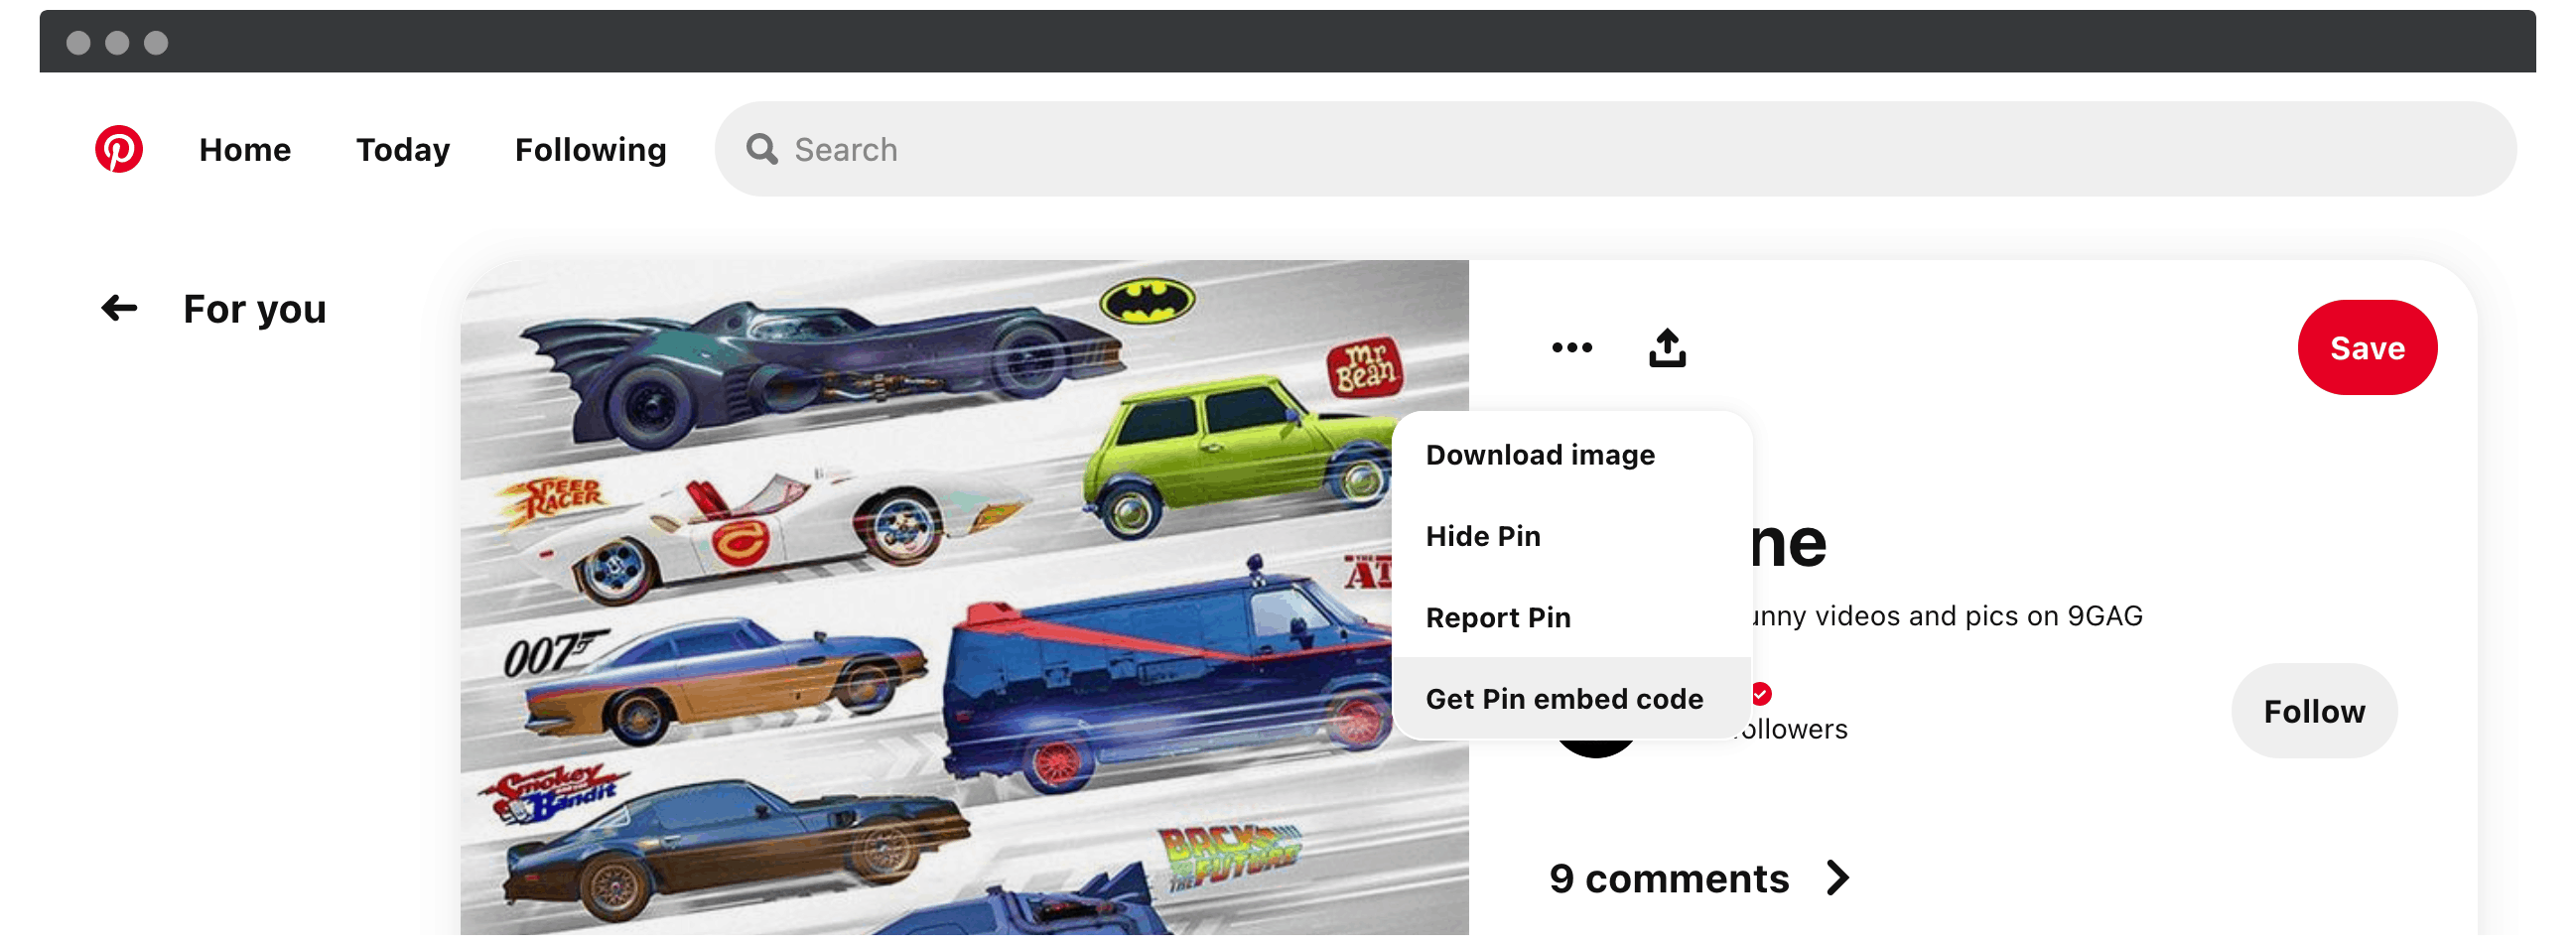
This gives you an iFrame code snippet that you can paste into your website. However, during our testing, we couldn’t get the functionality to work. This is a shame, because for quick single Pins, it would be ideal. We suspect that Jetpack is the way to quickly embed Pins, and we’ll discuss this later.
However, the Widget Builder is a breeze to use, and it’s our recommended approach despite the need to poke around within WordPress’ core files. Let’s take you through how to use it.
1. Find Your Pin’s URL
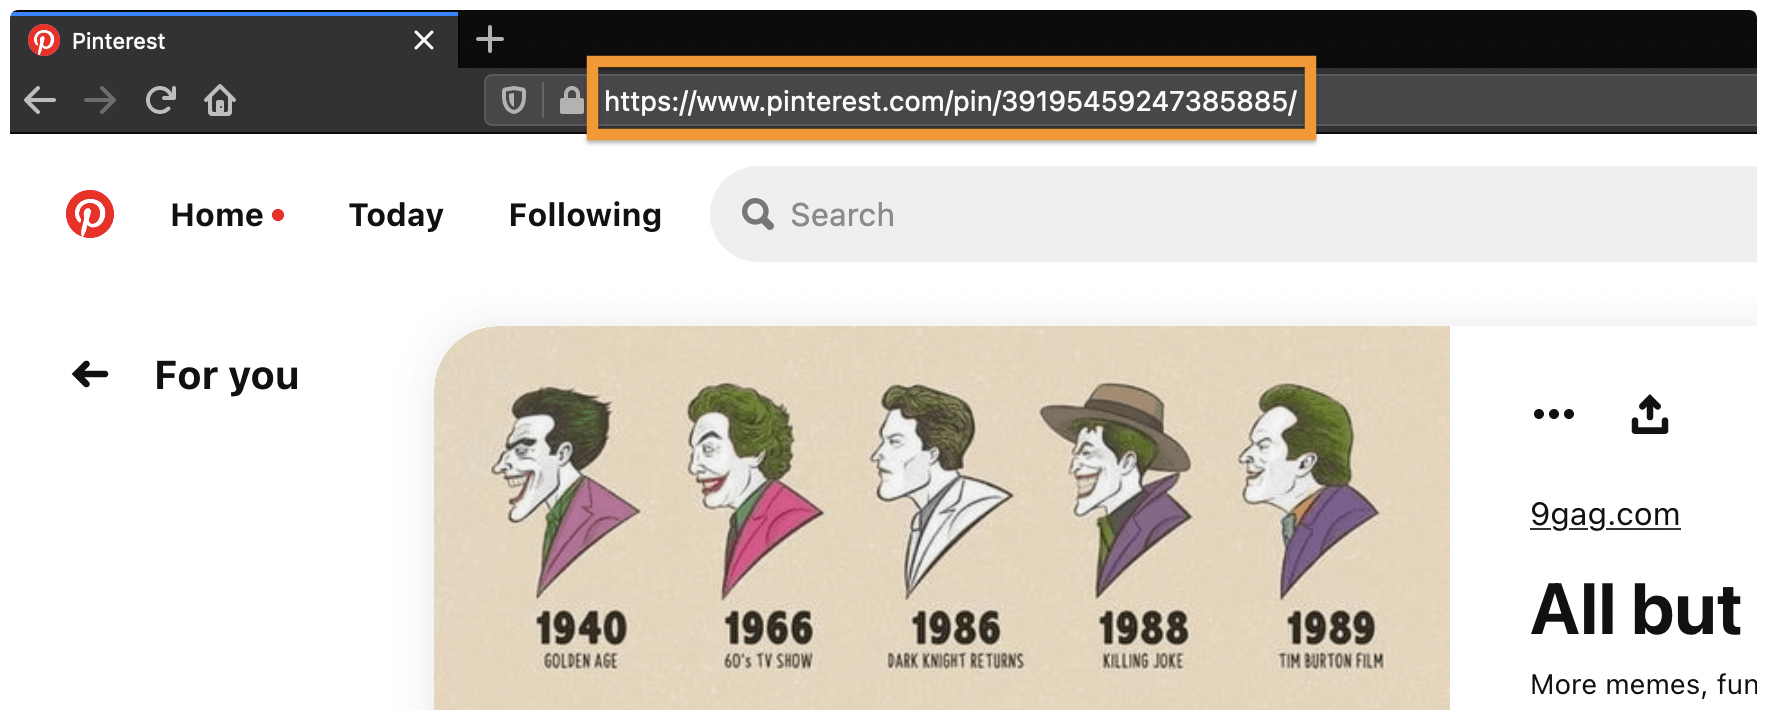
First, you’ll need the URL of your Pin (i.e. the image you want to show in WordPress). It’s as simple as finding the URL of any page on the internet. However, there are a couple of places you can get it from.
Of course, your browser’s address bar is straightforward…
…but there’s also a dedicated Copy link button as one of the options within the Share icon:
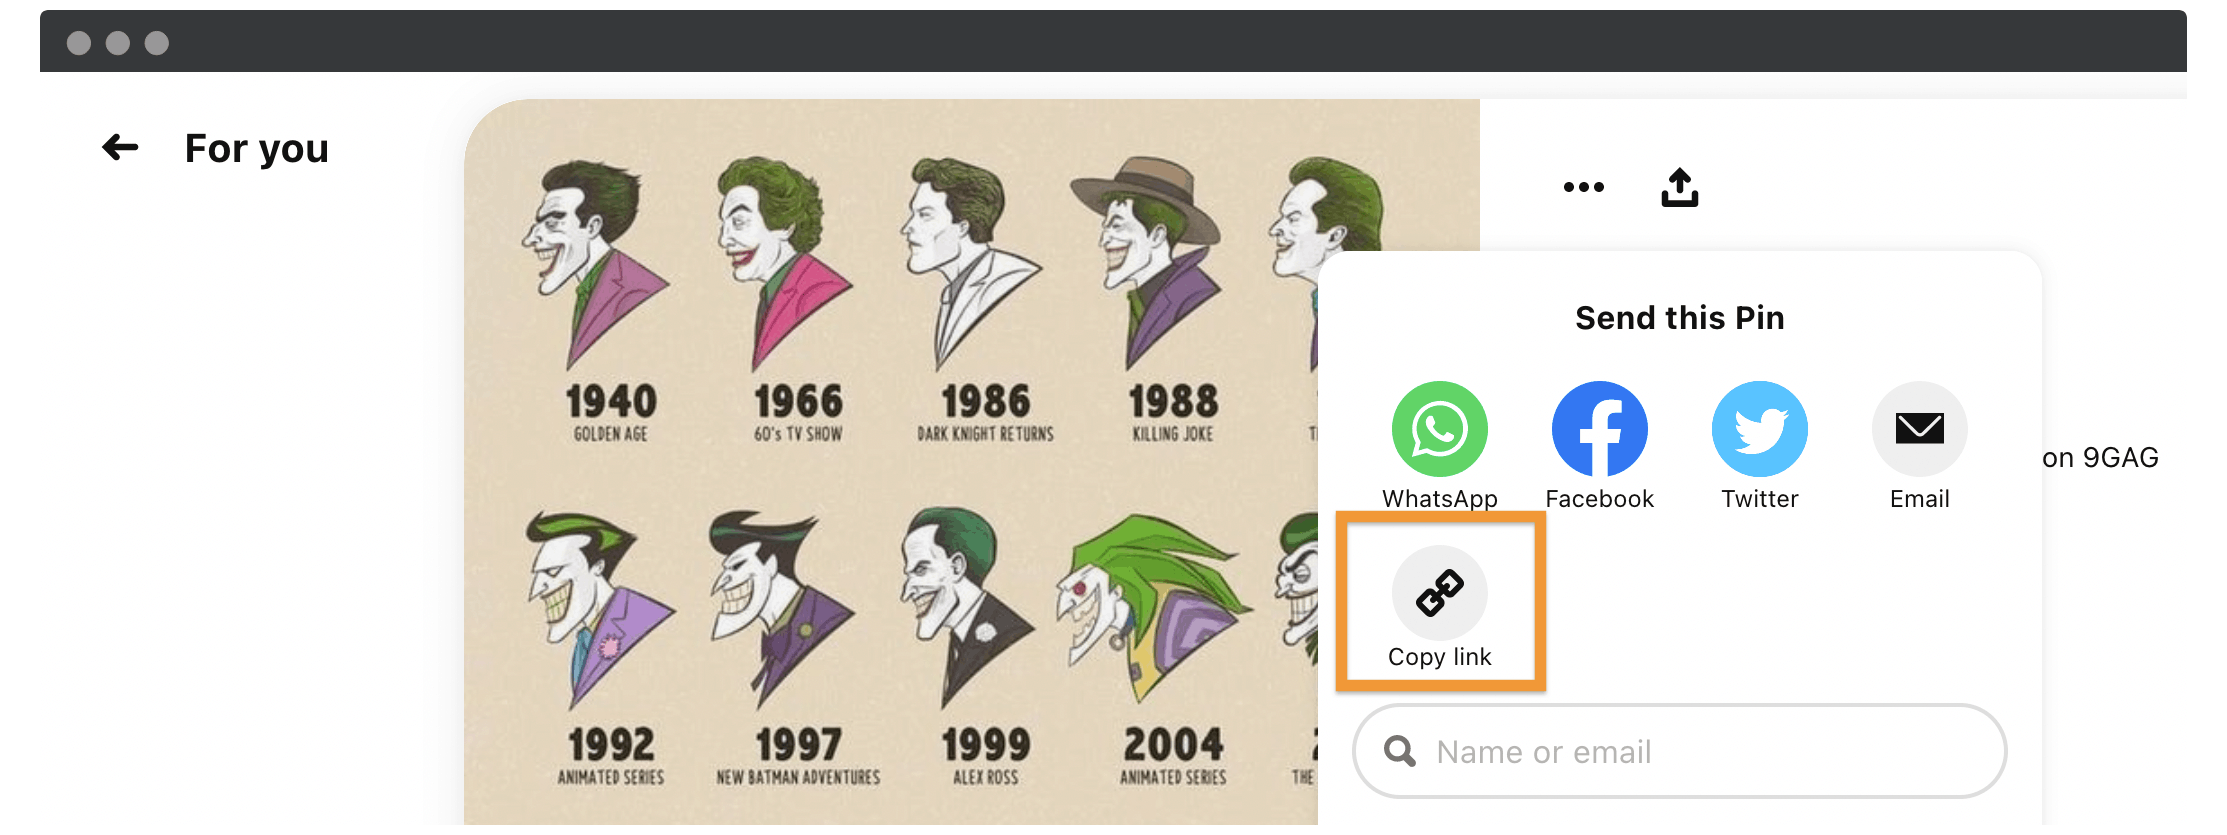
Once you have the URL of your Pin, you can begin creating your widget.
2. Create Your Pin Widget
Next, head to the Pinterest Widget Builder. There are five options to choose from, and while they all have their uses, we’re focusing on the Pin widget:
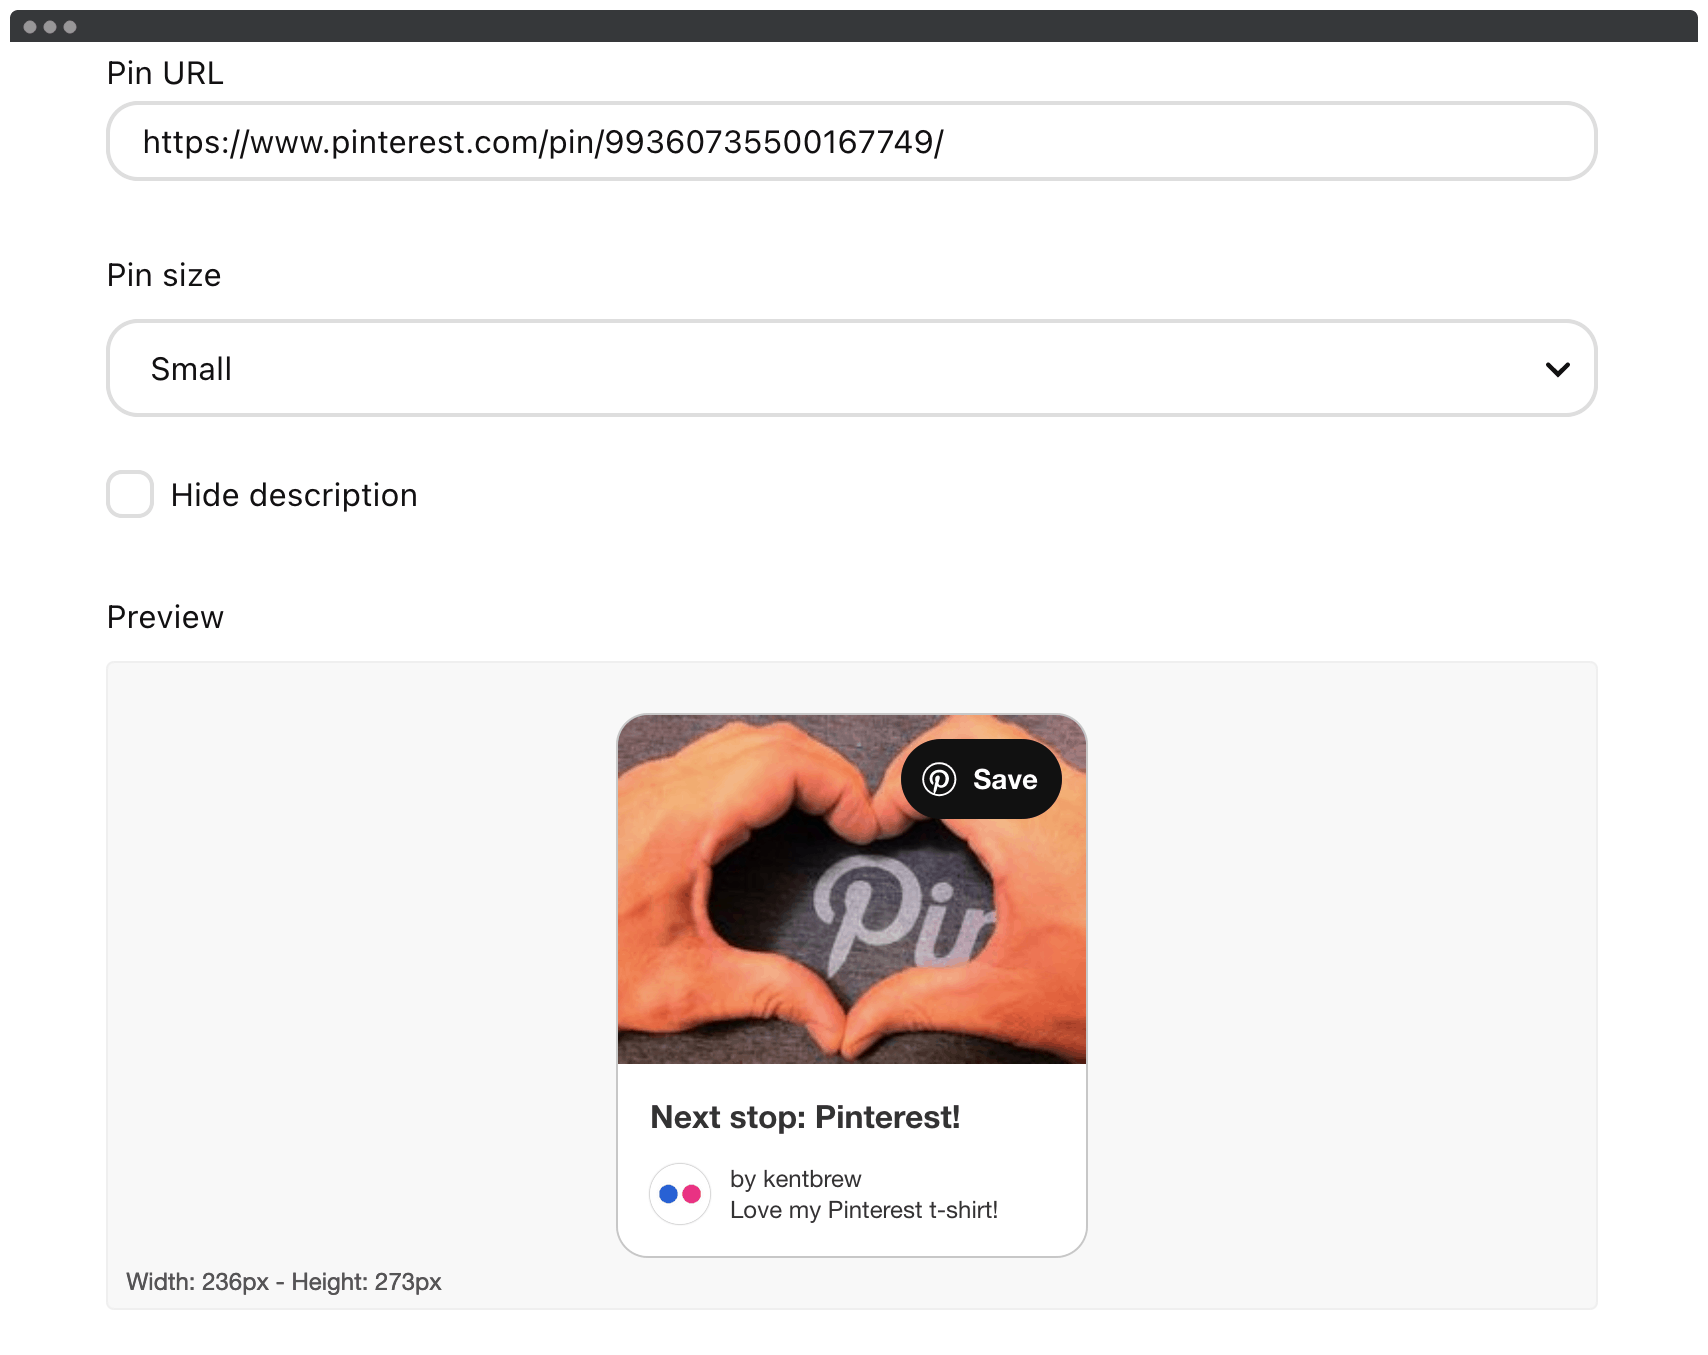
There are a couple of fields here to help whip your widget into shape:
- Pin URL. This is the web address of your Pin, and you should paste it in here.
- Pin size. You can choose Small, Medium, or Large for your Pin, and you can also hide the description here too.
Once you’ve made your choices, you’ll see the Preview pane update. This gives you a sneak peek at how your widget will look on the front end:
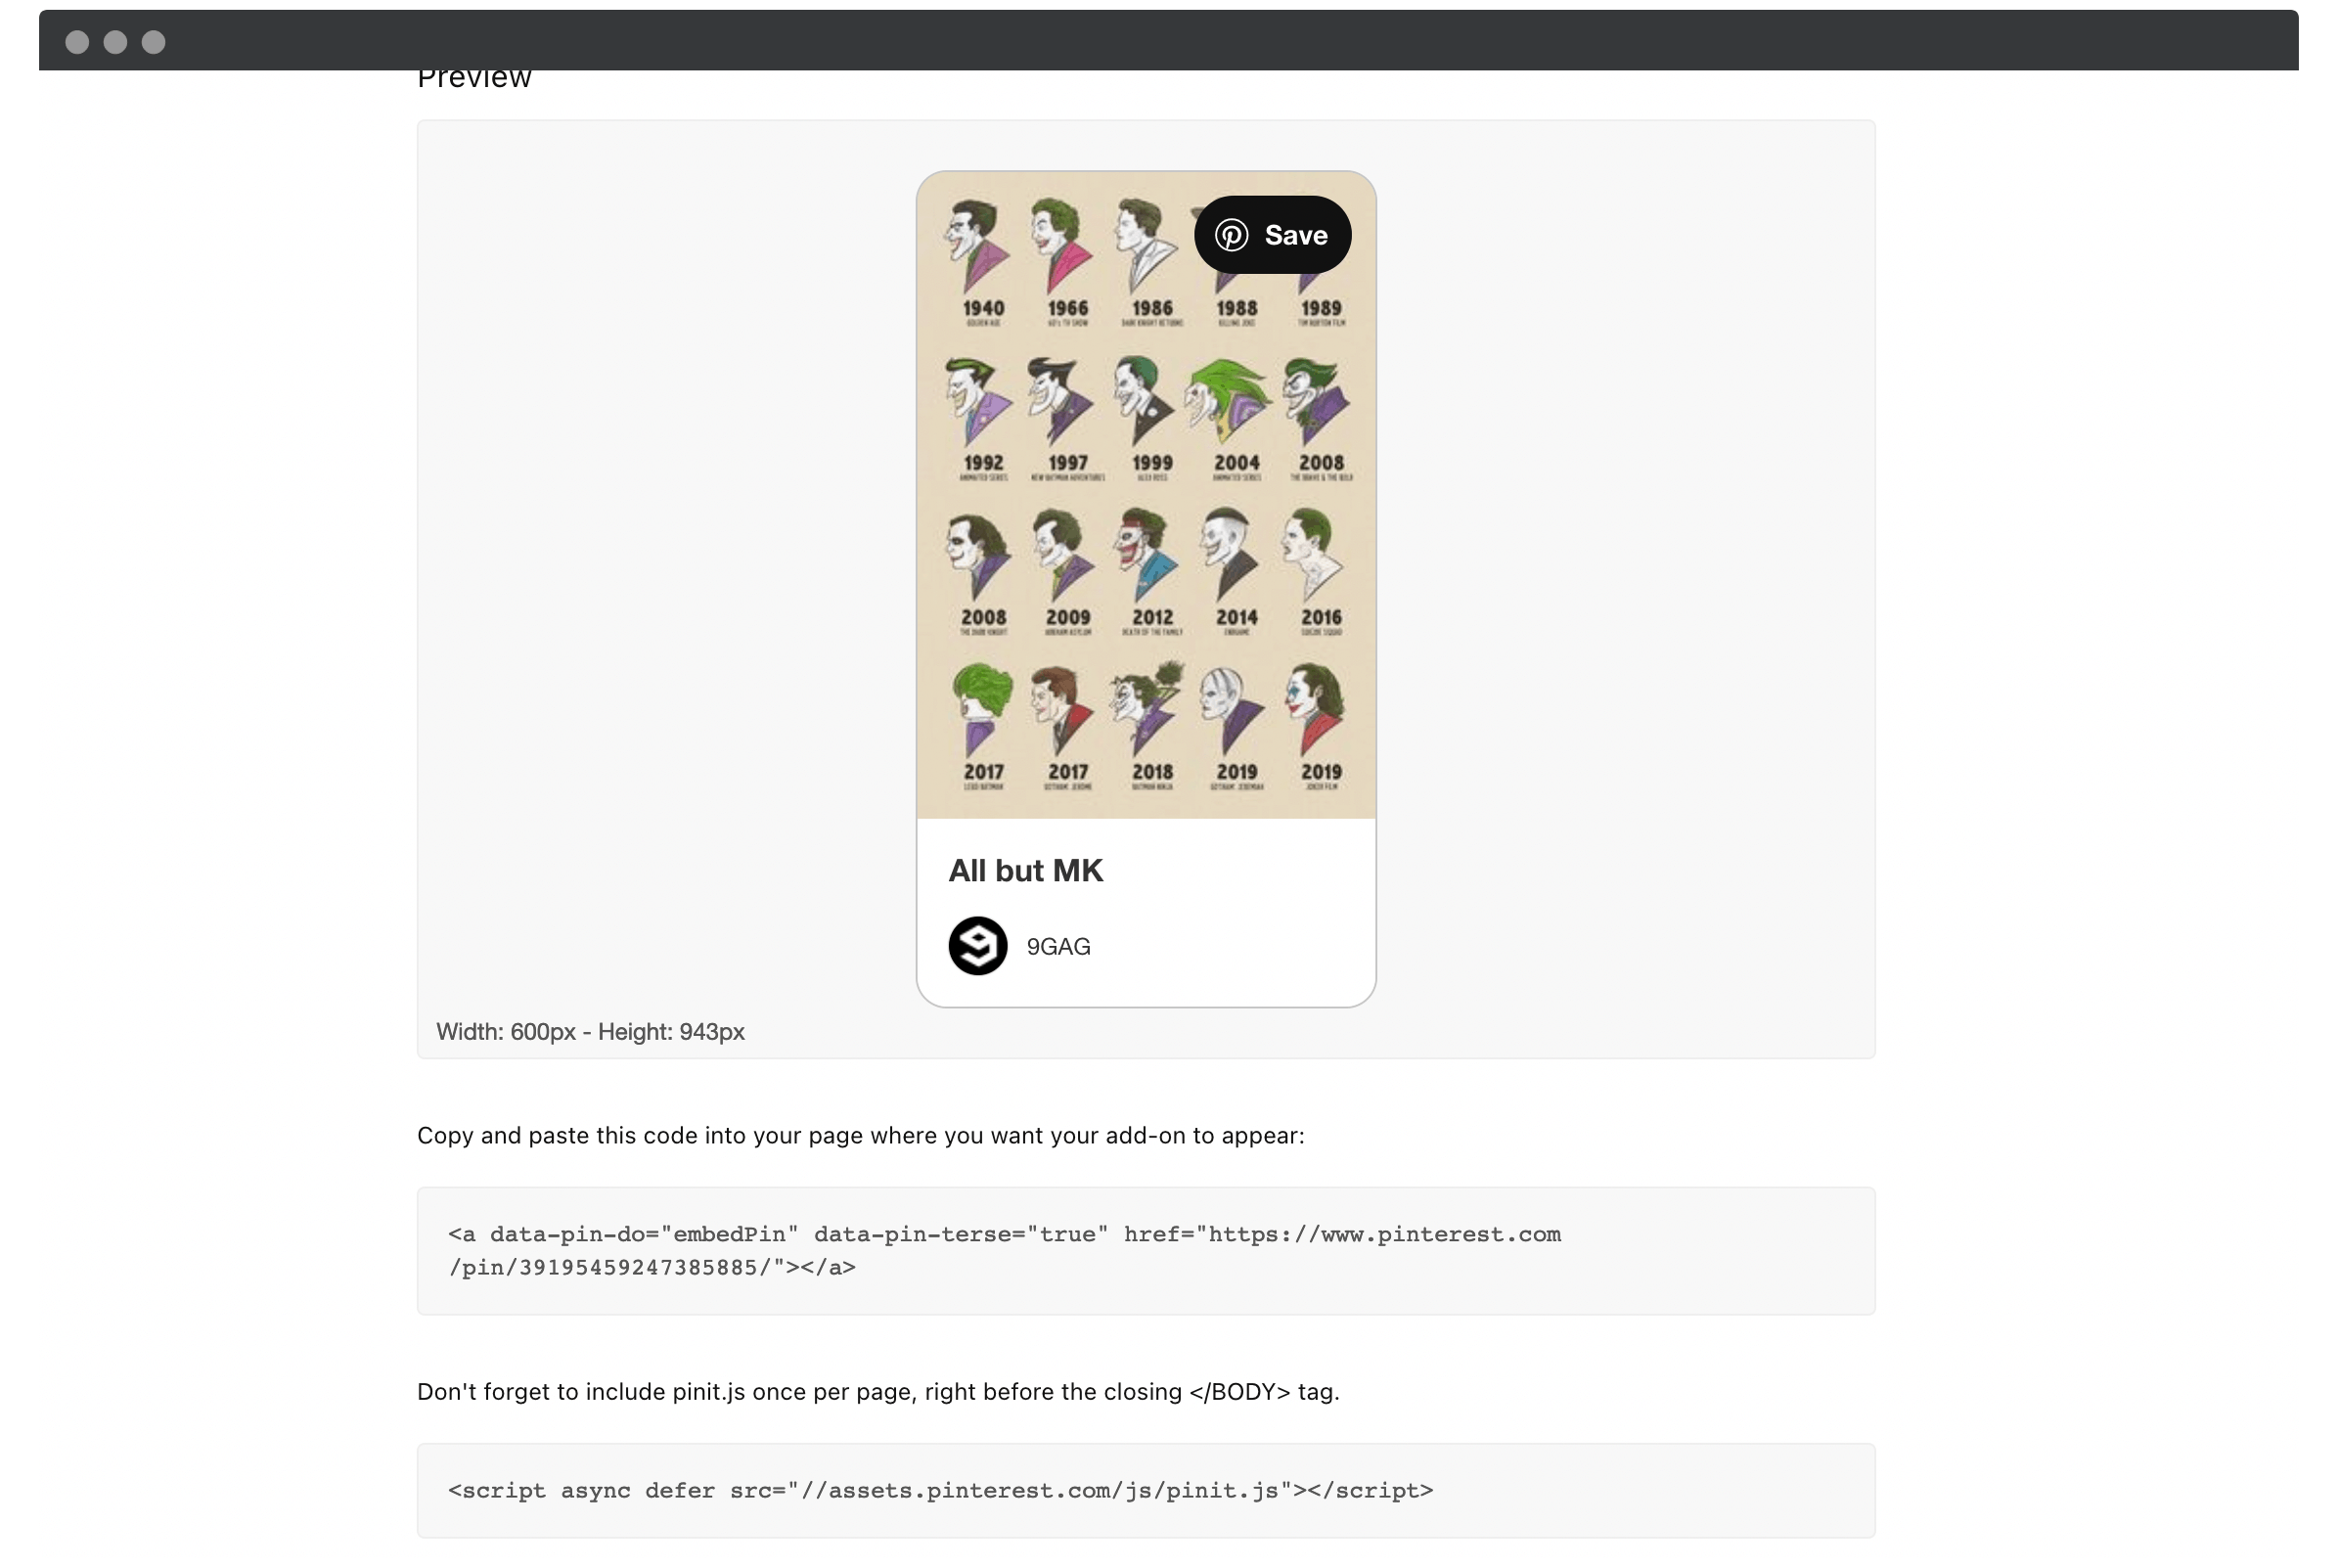
Below this, you’ll see a couple of code snippets. We’ll need these next, so keep the widget builder open and move onto the final step.
3. Add Widget Code to Your WordPress Core Files
To show Pinterest images in a WordPress post or page, you’ll need to insert the two code snippets found in the Pinterest Widget Builder. This used to involve third-party plugins, but WordPress now has its own editor that is perfect for one-off tasks like this.
Before you begin, it’s important to have a clean and current backup in place, and a child theme. This helps to preserve your site when there are updates, and gives you a way back if the worst happens.
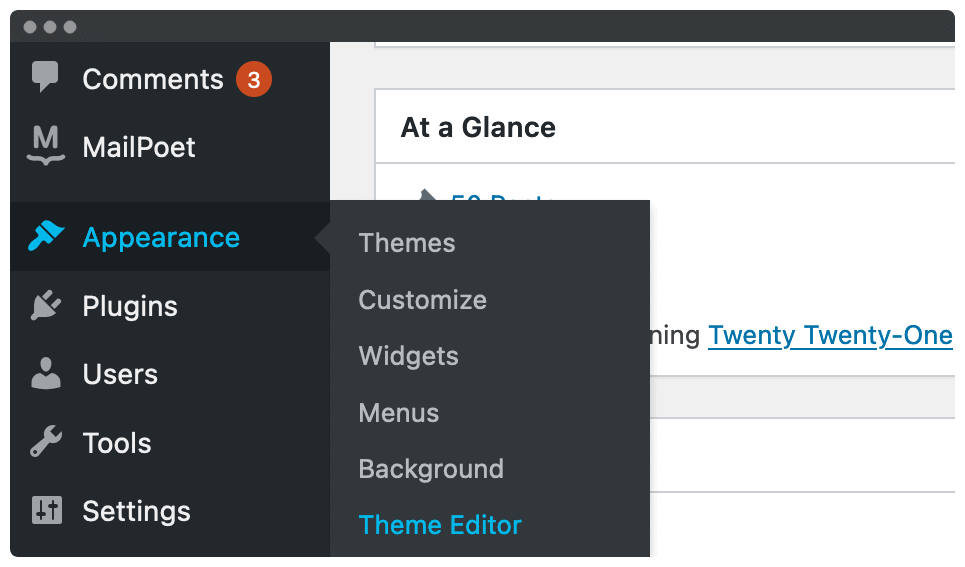
You can find the code editor at the Appearance > Theme Editor screen within your WordPress dashboard:
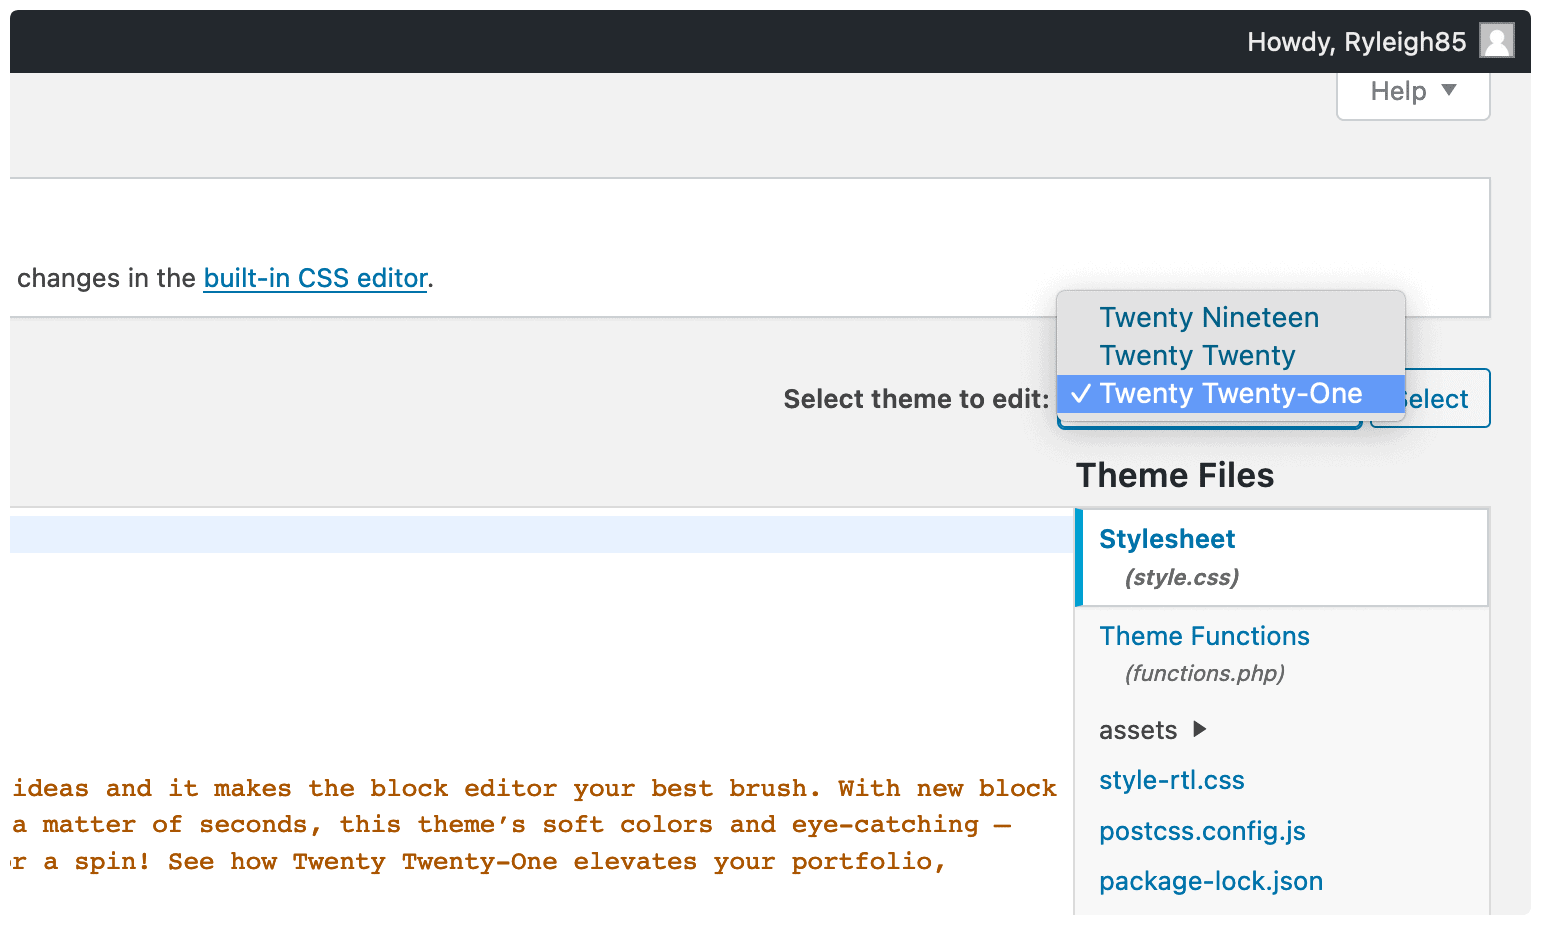
Once you’re here, select your child theme in the top right-hand corner:
Next, find the Theme Footer file in the list on the right-hand side of the screen, and scroll down to the </body> tag. Before this, paste in the following code:
<script async defer src="//assets.pinterest.com/js/pinit.js"></script>
If you’re struggling, look for the <?php wp_footer(); ?> line:
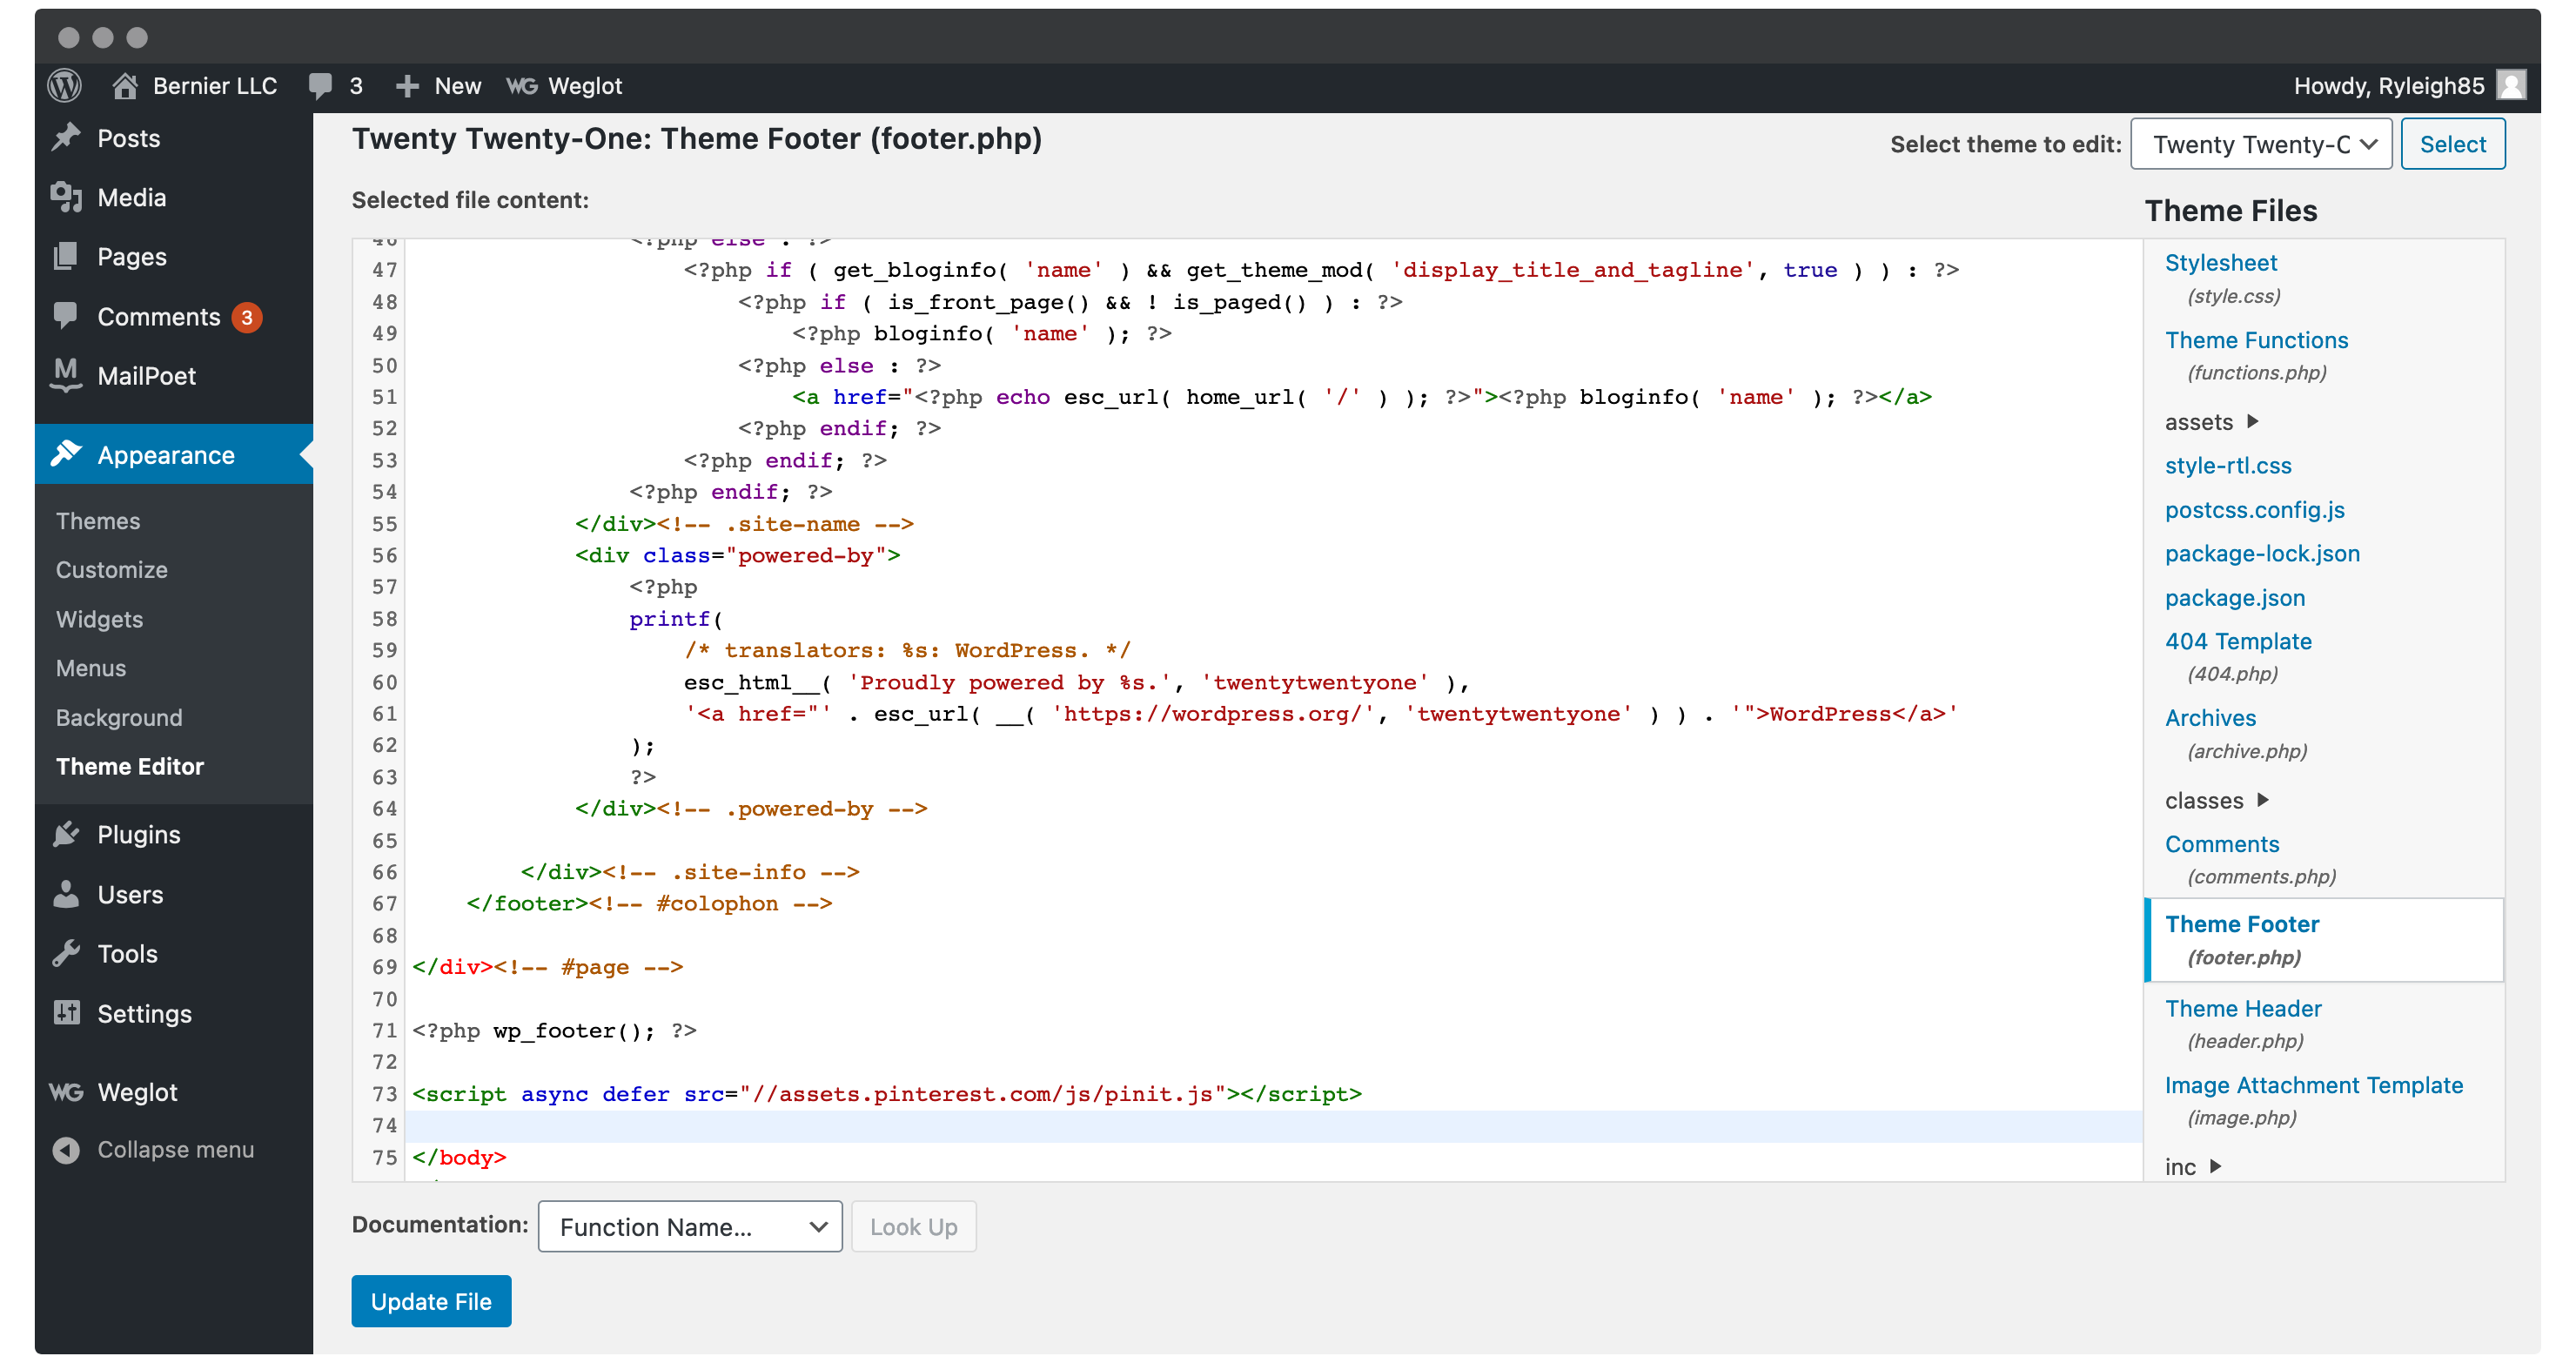
When you’re done, save your changes and head to the post or page you’d like to display your Pinterest images on.
4. Add the Widget Code to WordPress
The final step is to show your Pinterest Pin. To do this, head to the post or page of your choosing, and insert a new Paragraph Block.
While you could use a Custom HTML Block for this, our testing didn’t produce a workable example. Given that the widget is a link, we can use it in a Paragraph Block and work with its functionality instead.
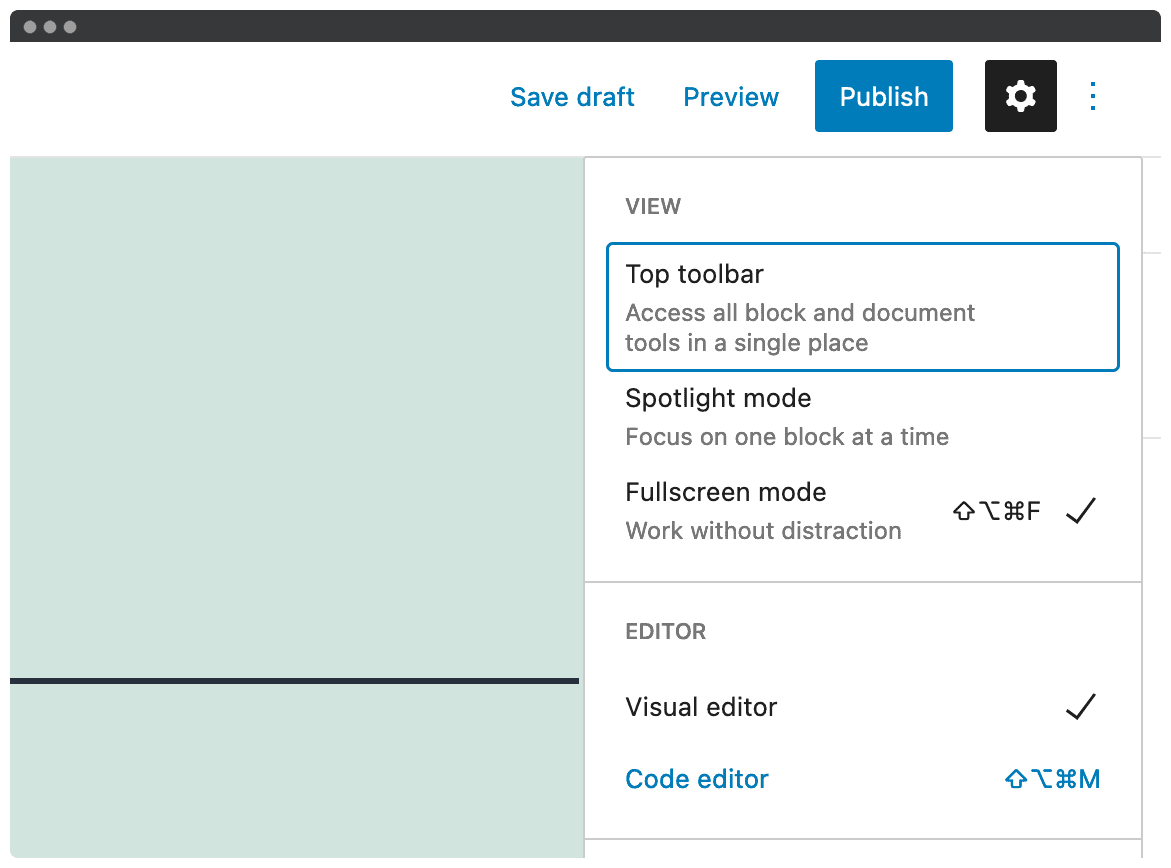
Once you’ve added the Block, you’ll need to open the Code editor from the WordPress menu in the top right-hand corner:
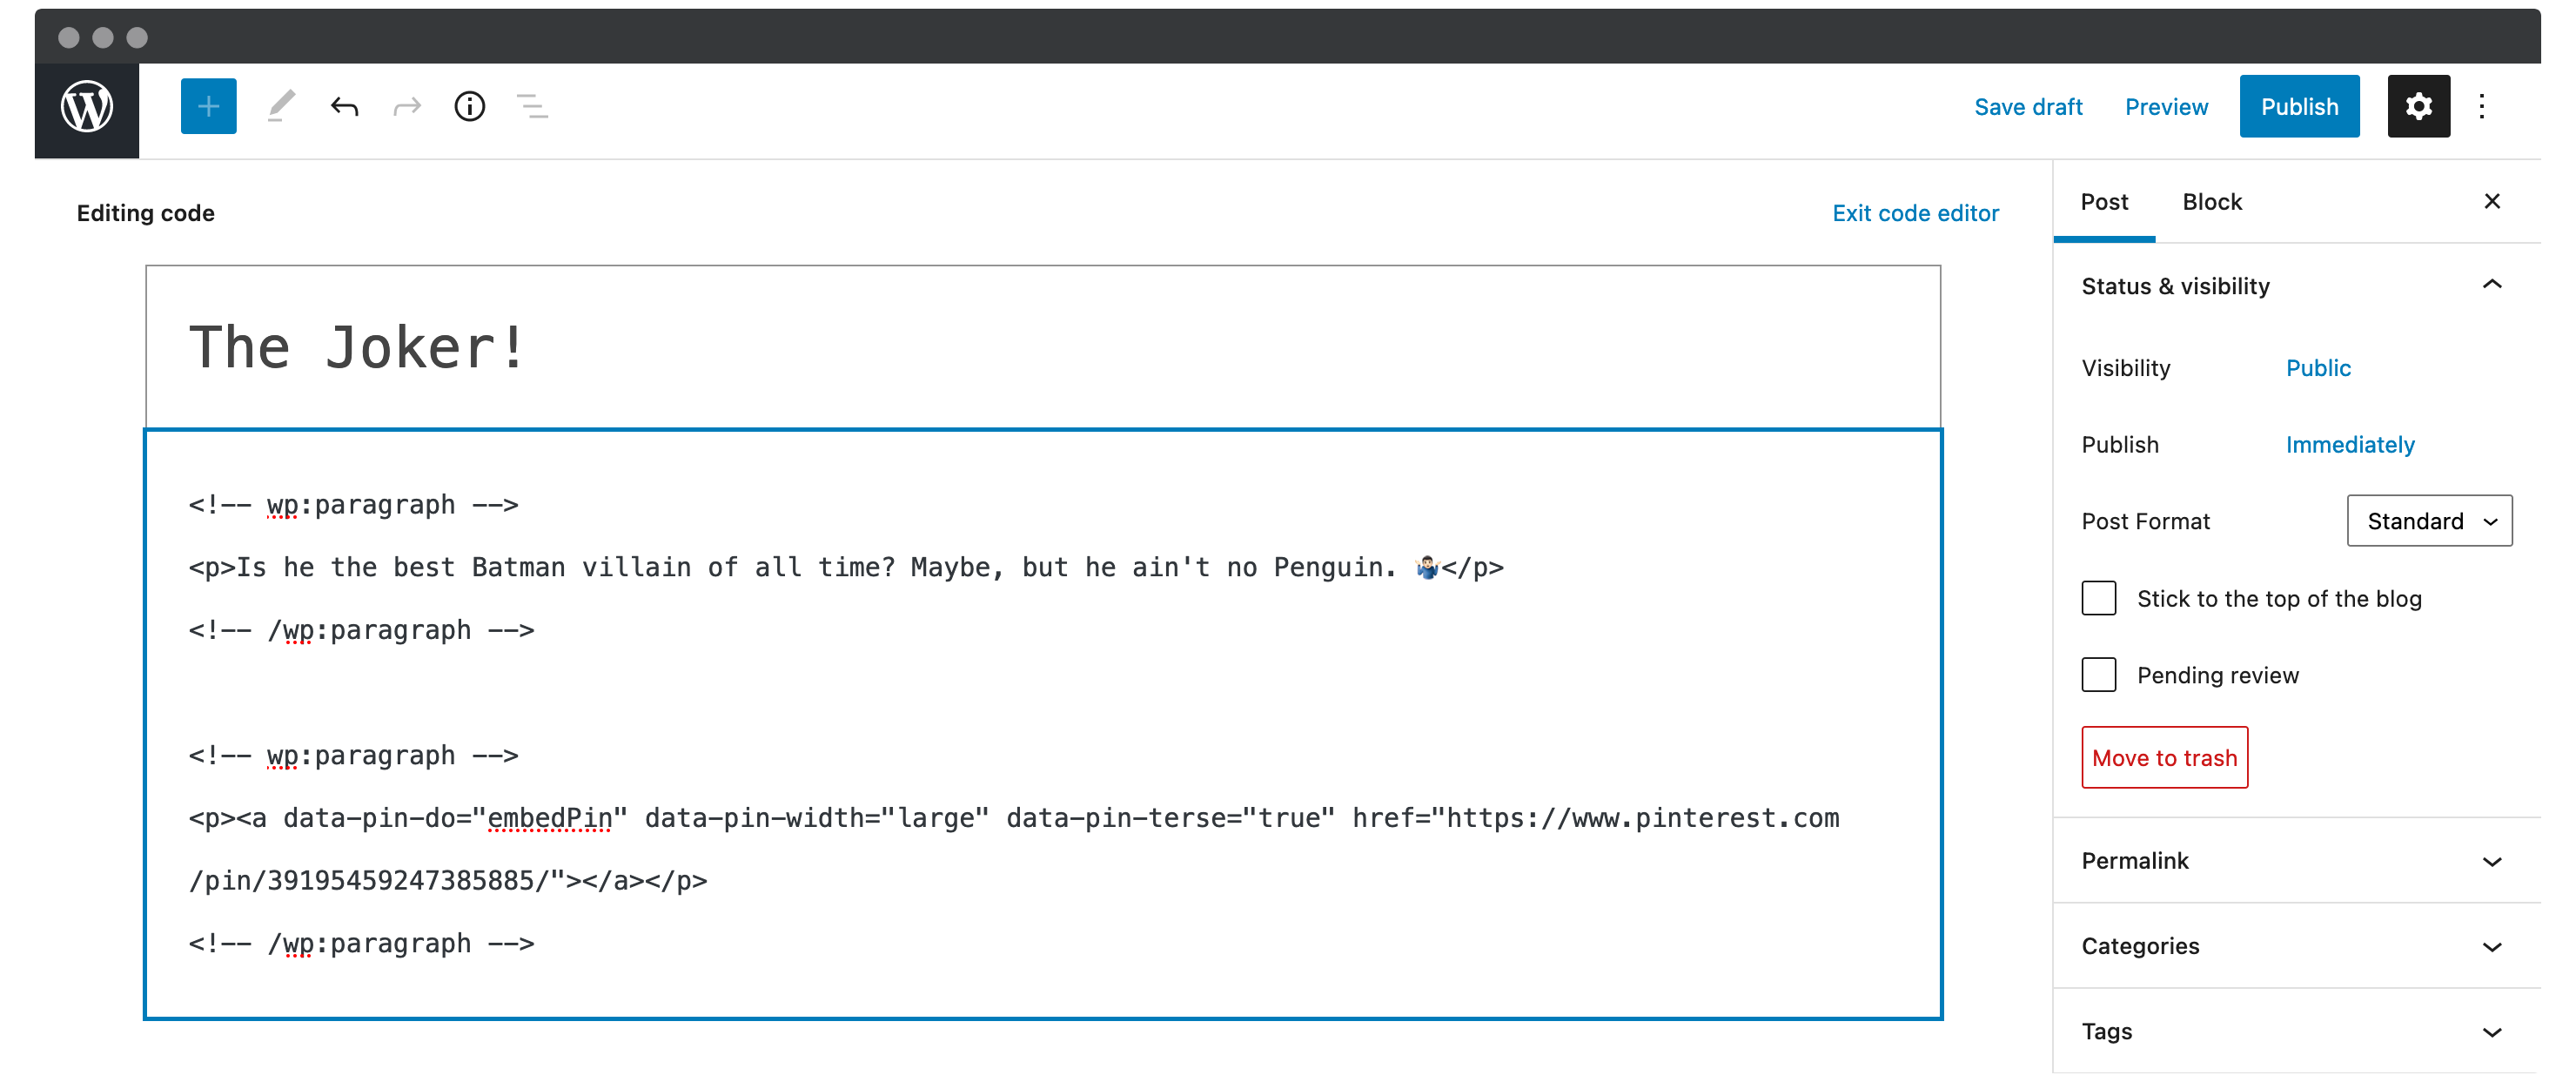
Once it’s open, find your new paragraph, and paste in your code from the Widget Editor output:
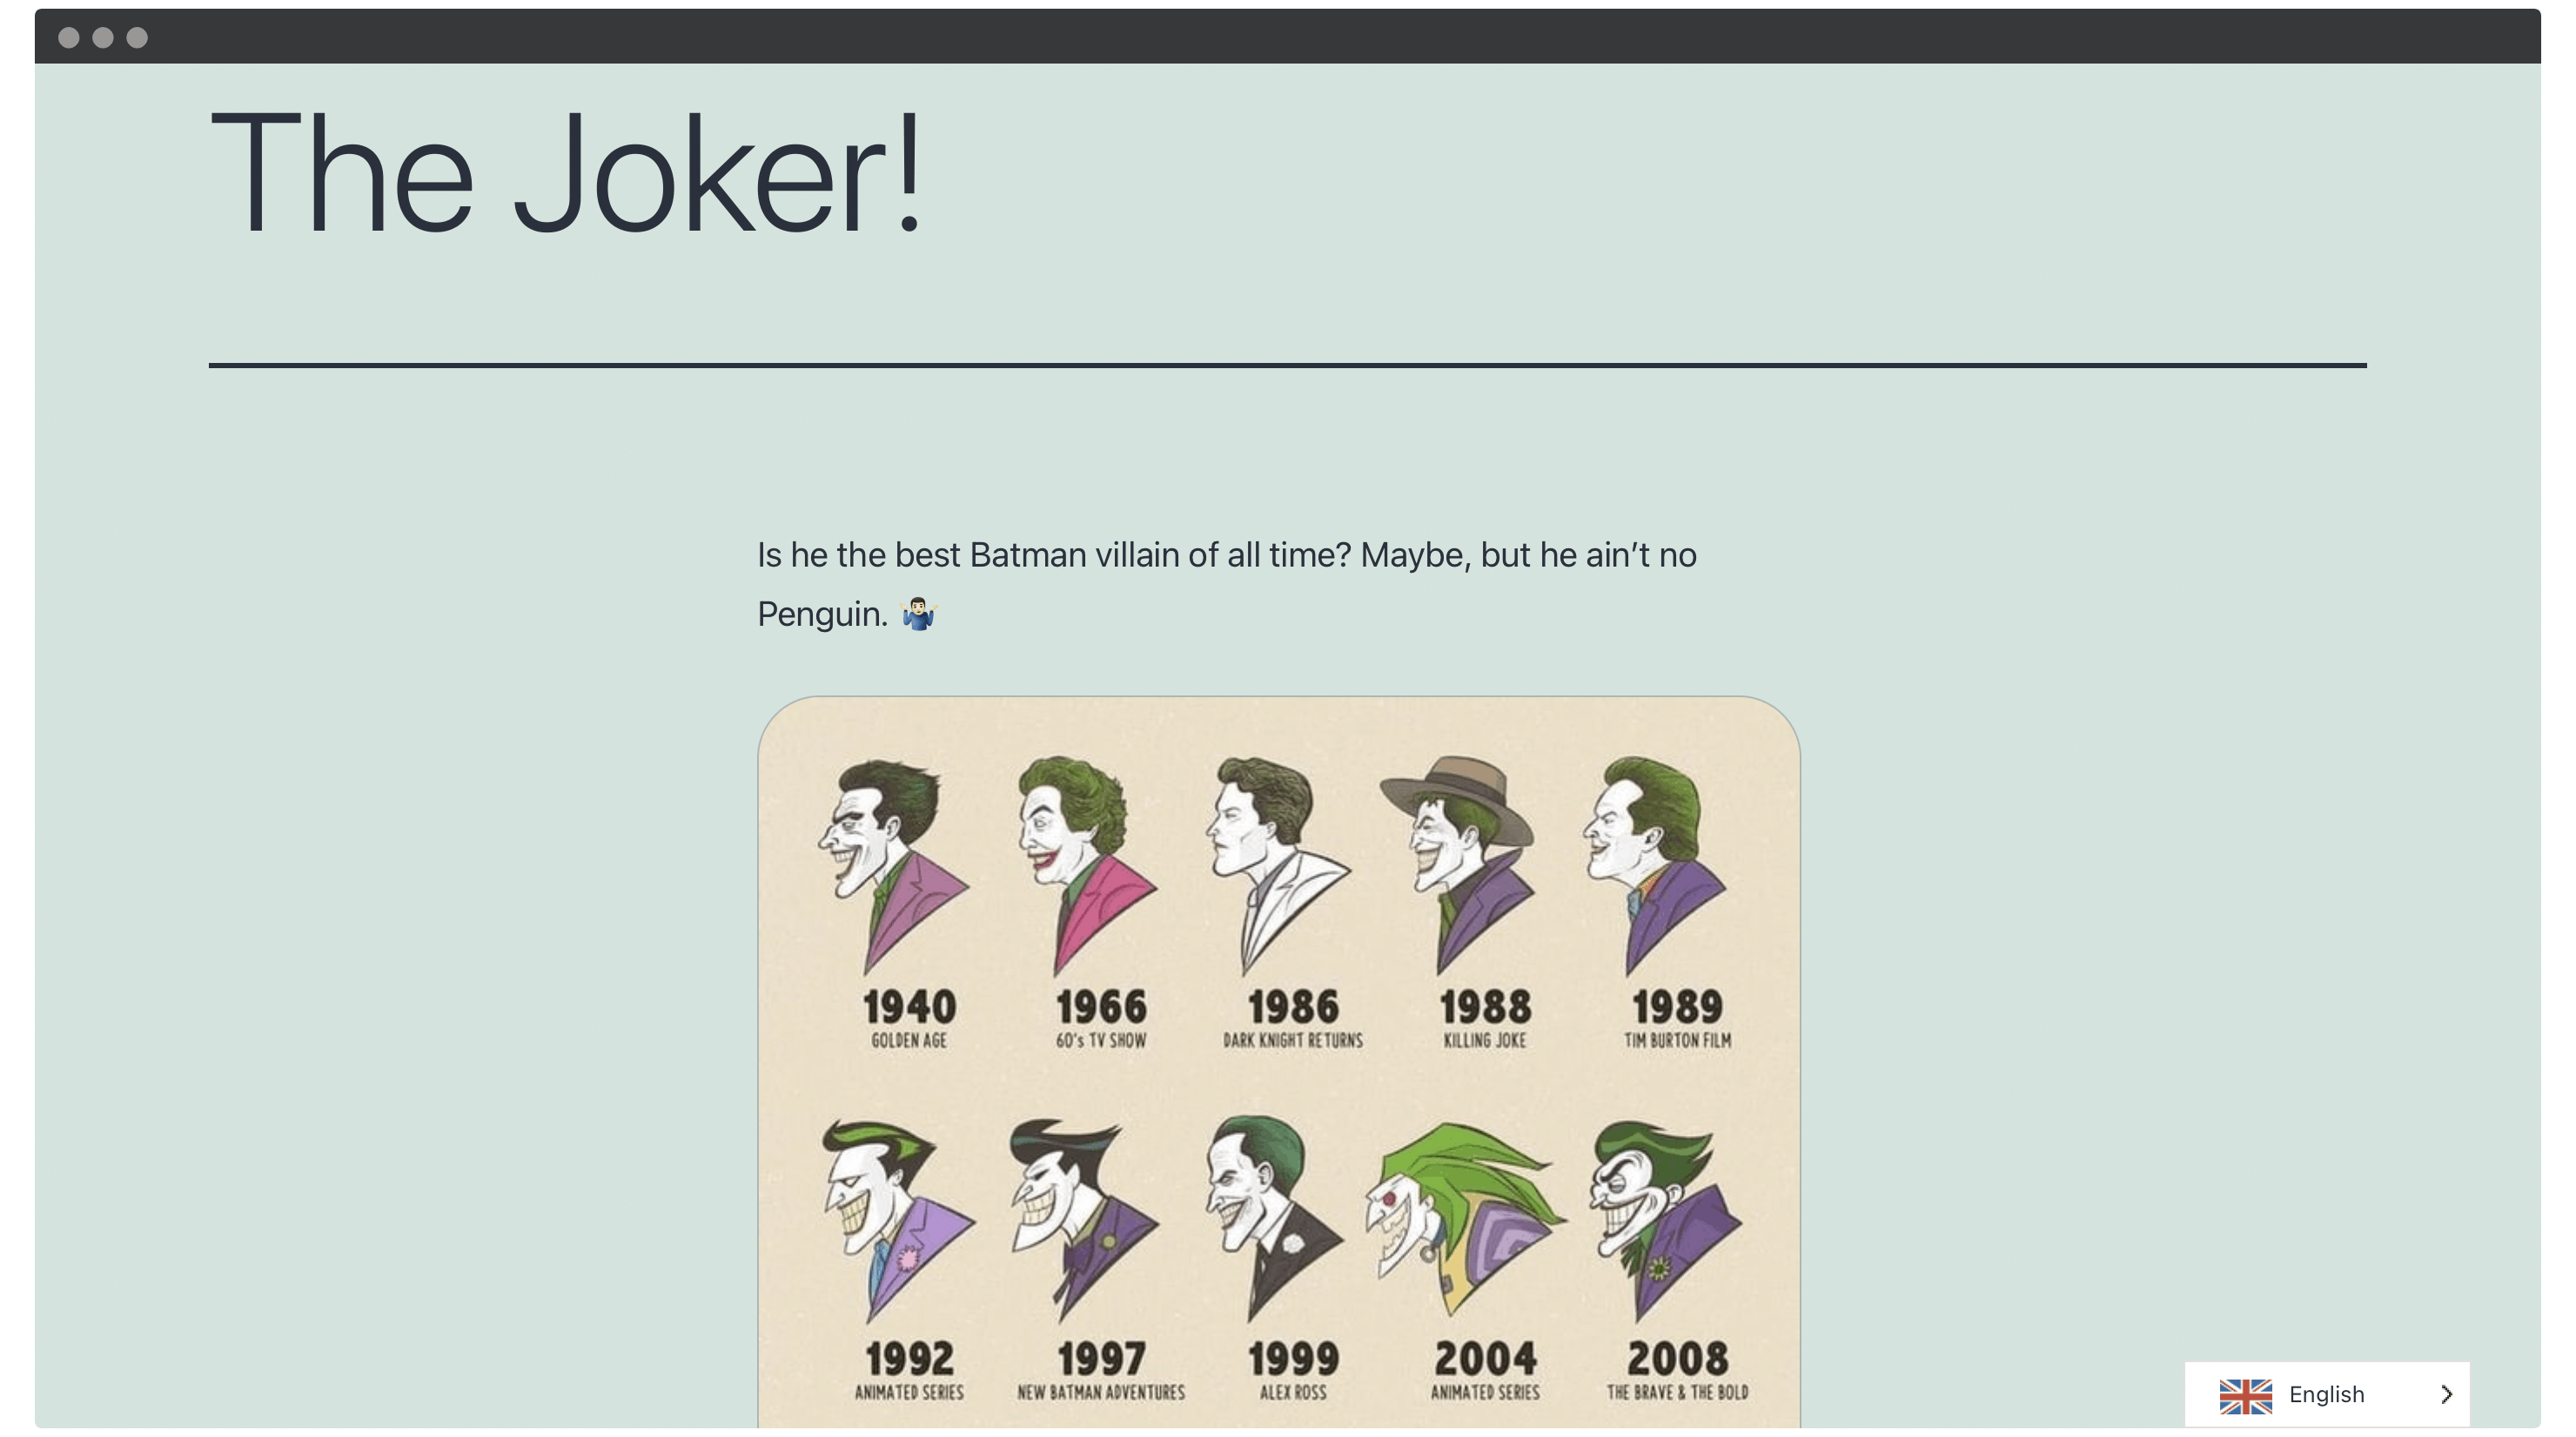
You can now exit the Code editor. Before you save your changes, feel free to use the Paragraph Block settings to align your Pin widget within your post. We’ve chosen to center align it, but you are obviously free to do whatever you wish:
While this is a solid way to show Pinterest images in a WordPress post or page, there are others too. Let’s take a look at a platform-specific approach.
2. Use Jetpack to Show Pinterest Images in a WordPress Post or Page
Unfortunately, there aren’t many suitable plugins available to show Pinterest images in a WordPress post or page.

For example, GS Pins for Pinterest looks like it can do the job, but you’re only able to display single Pins as widgets. This isn’t flexible enough for our needs, despite the plugin being updated regularly, and having good reviews.
Jetpack is the only plugin we know that has the functionality to embed a single Pin on your site, and also meets our requirements.

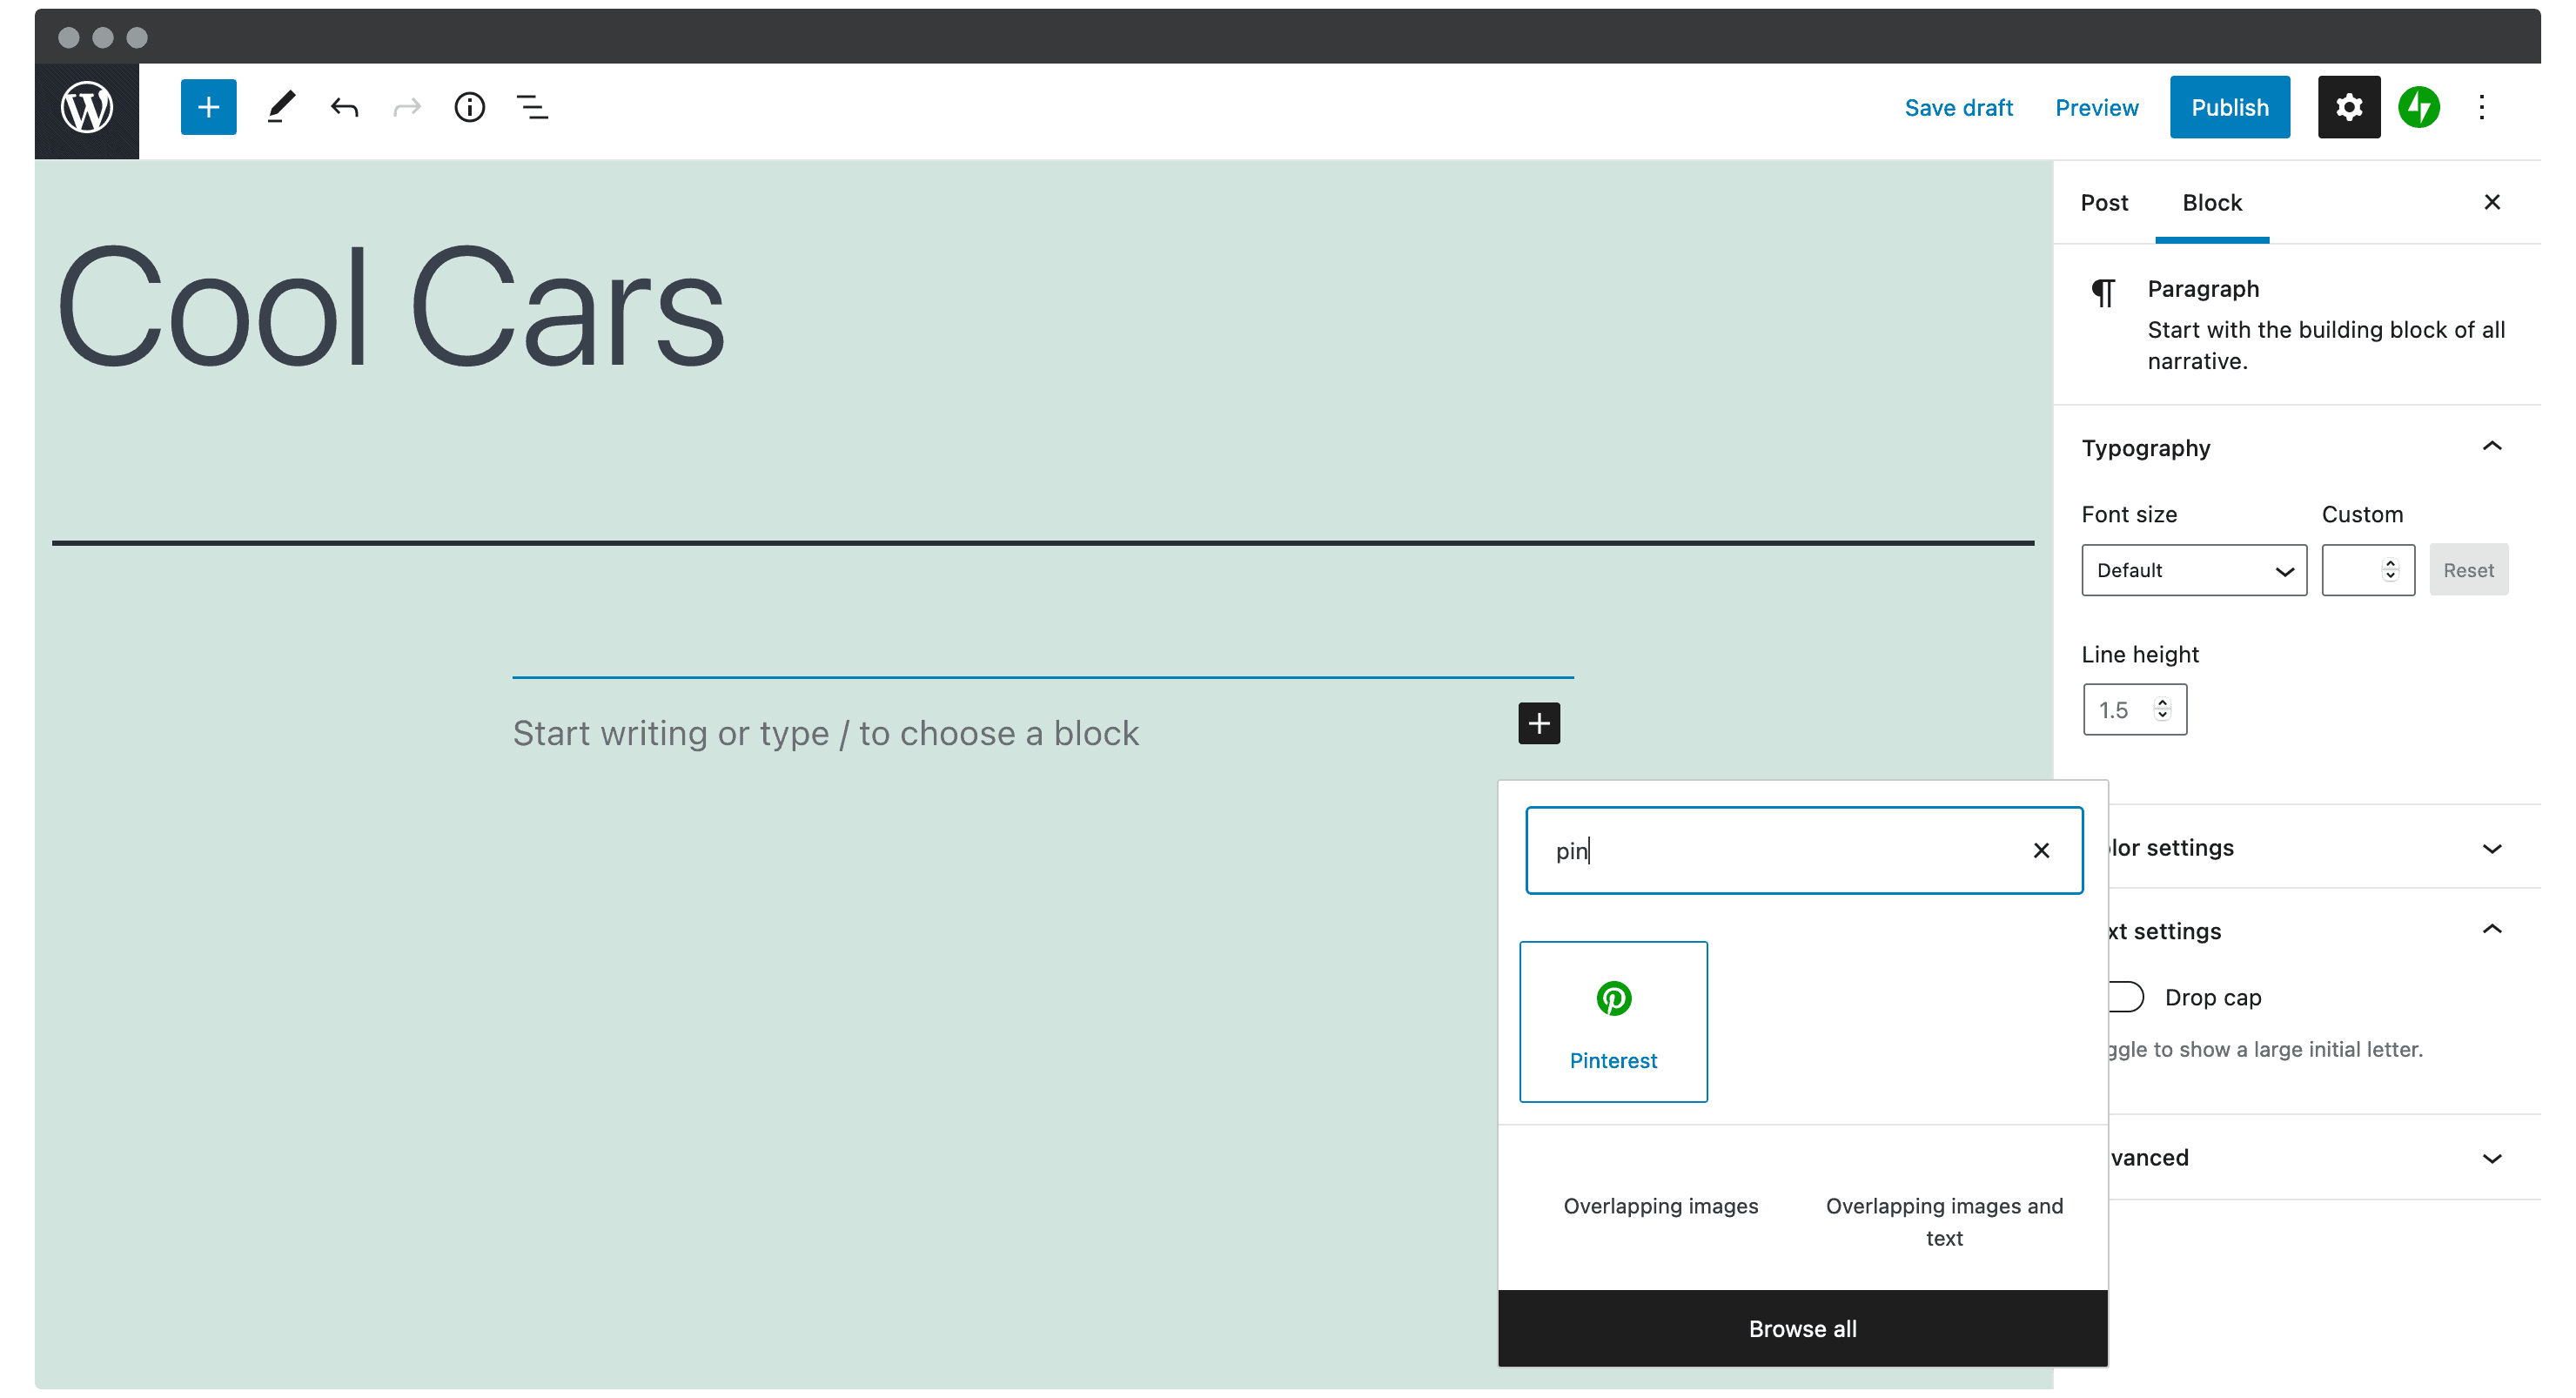
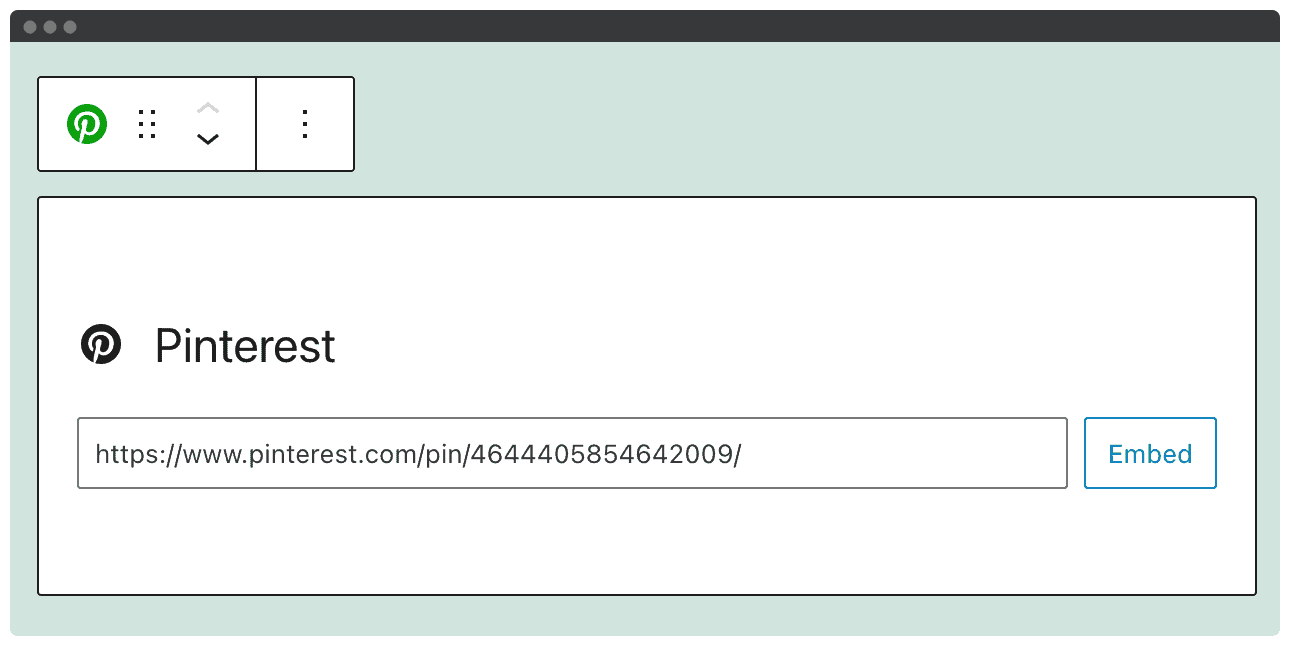
Of course, Jetpack is installed and activated like any other plugin. Once it’s ready, you should grab the URL for your desired Pin as per the first method. Once you have it, head to your post or page, and add a Pinterest Block:
Next, add the URL of your Pin, and click Embed:
Finally, save your changes, and view the Pinterest image on the front end of your site:
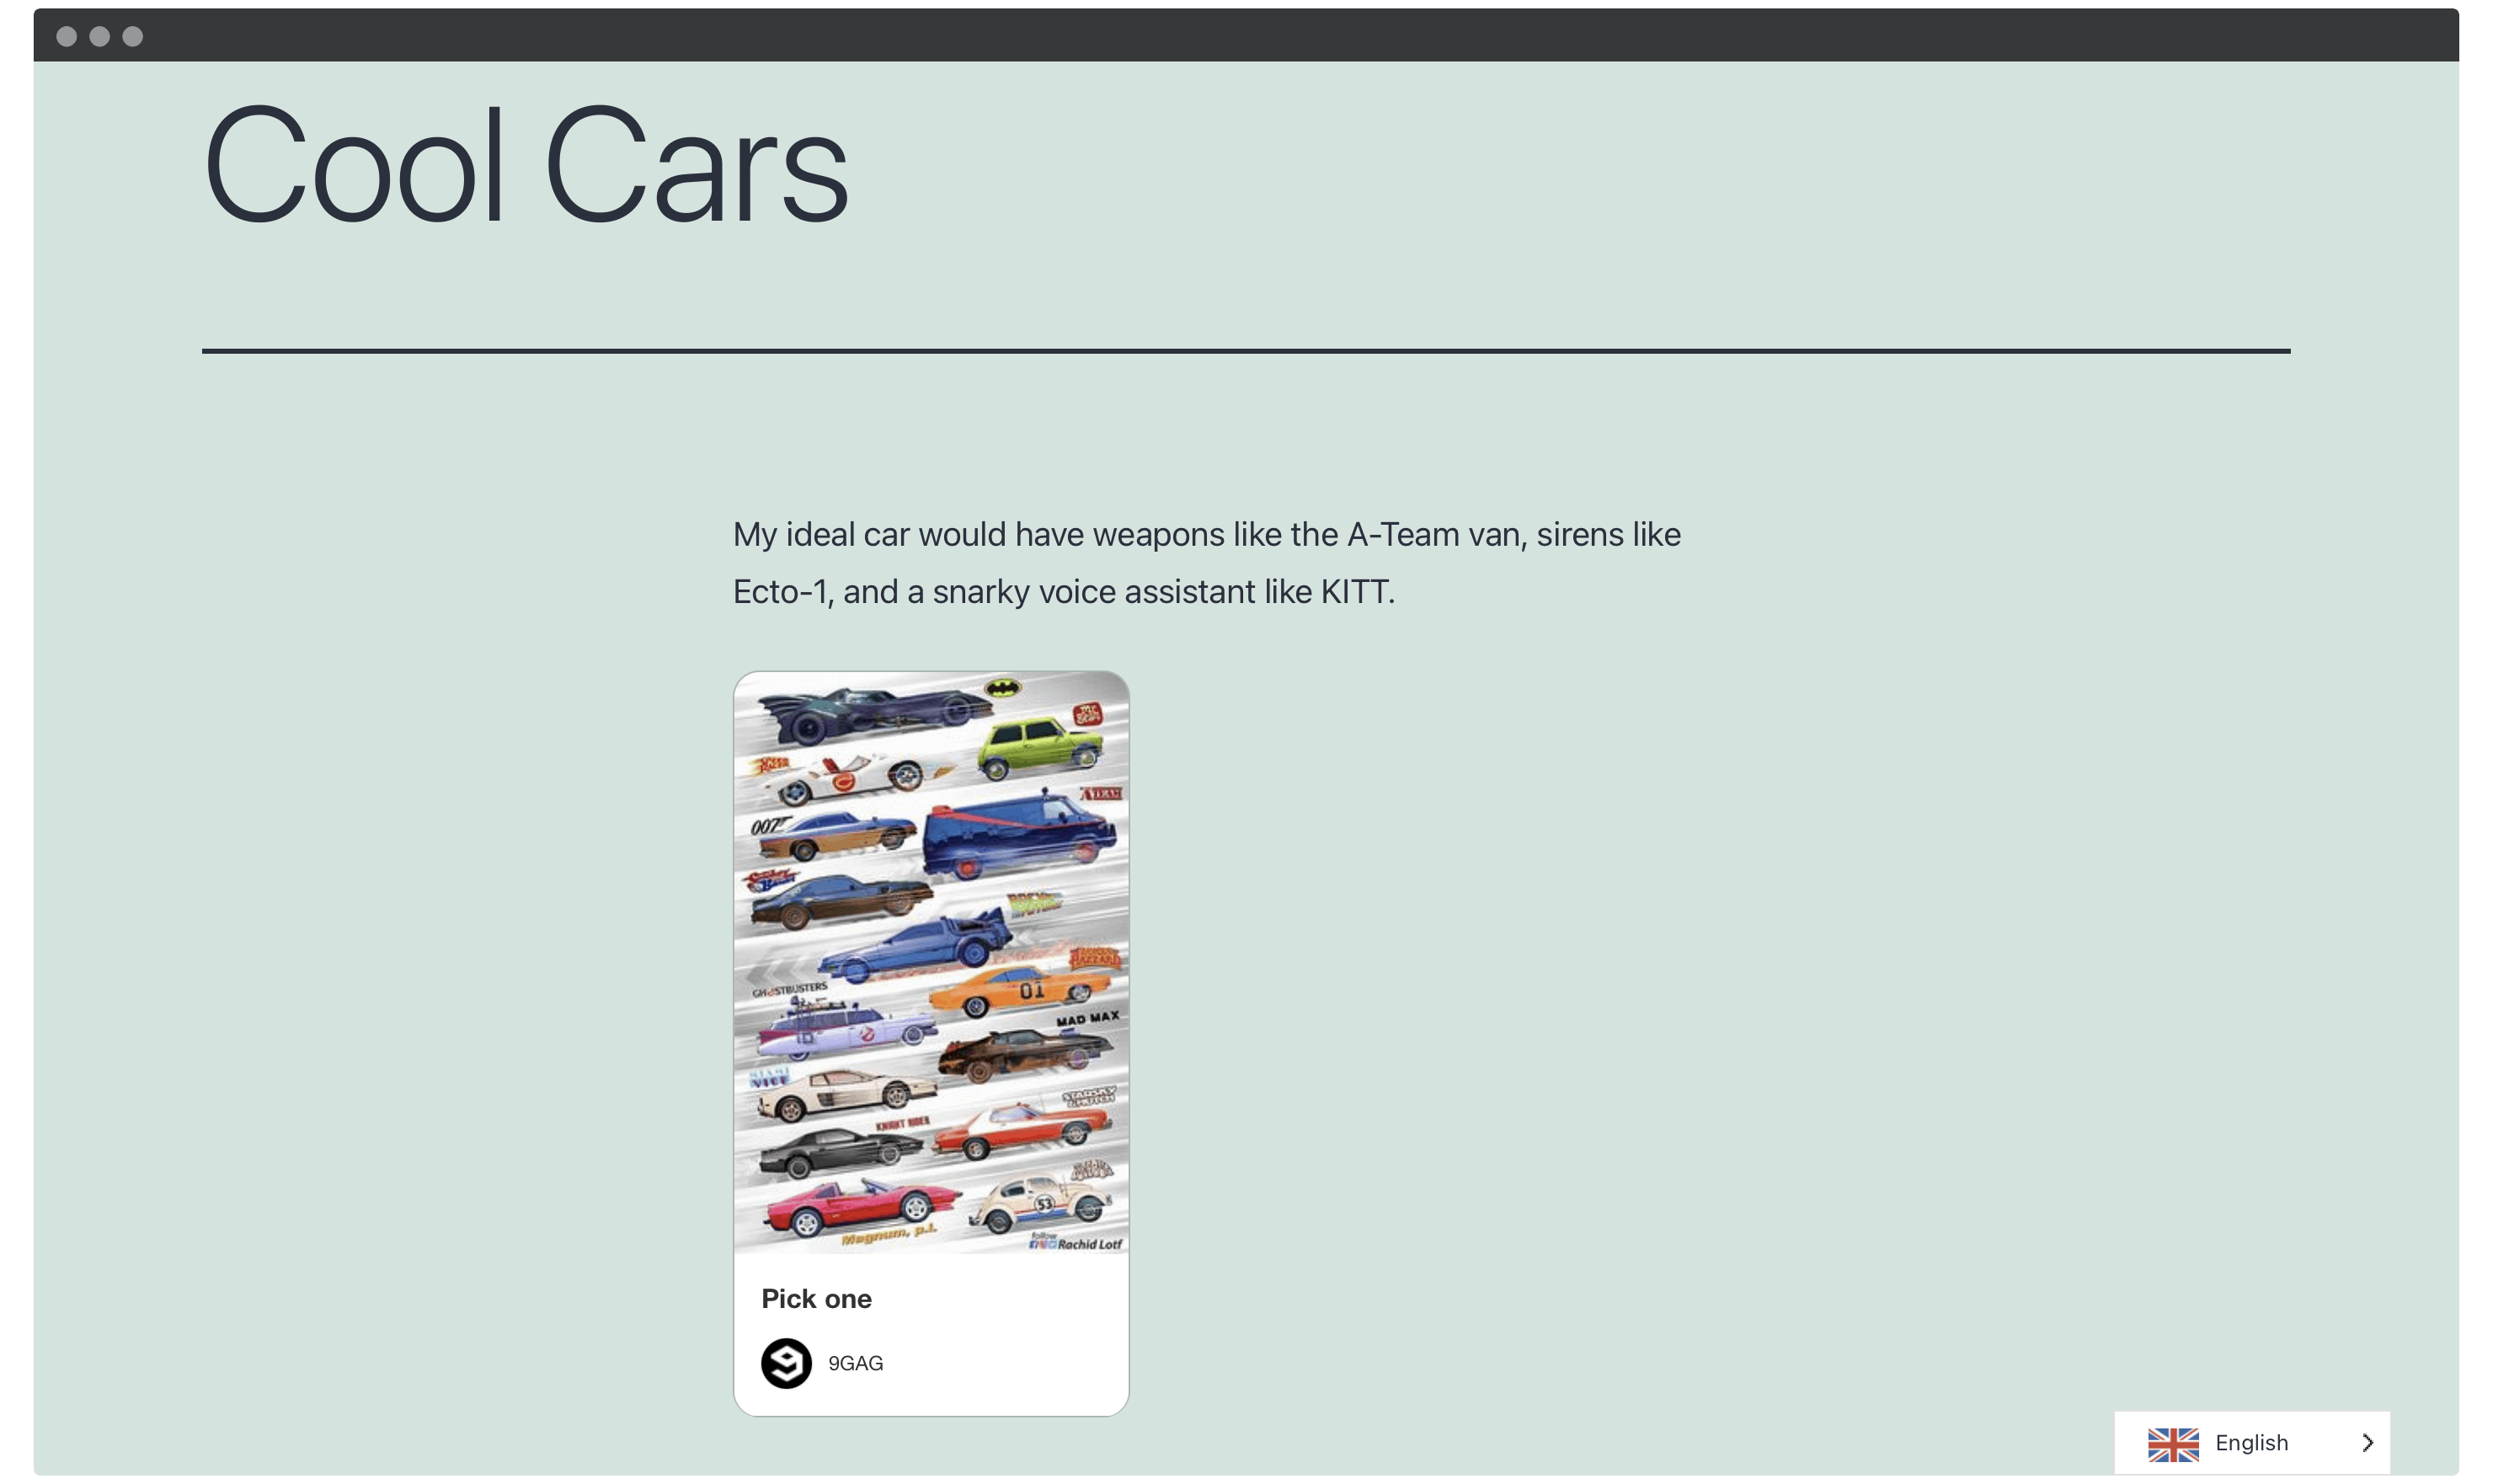
Unfortunately, there isn’t much in the way of customization. This is a shame, because for Jetpack users, this approach will be the first port of call. Unless you want to dig in and add custom CSS classes, it might not be the perfect solution to your needs.
Summing Up
Pinterest isn’t going to be a social media platform that every business will want to use. Even so, the user base for a company that does align with the platform is grandiose – and your potential income could be the same size too.
There are two key ways to show Pinterest images in WordPress posts and pages. Let’s quickly go over them again:
- Use the official Pinterest Widget Builder to create a rich, embeddable widget within WordPress.
- If you’re a Jetpack user, you can use the included Pinterest Block to show images in WordPress posts and pages.
Does your audience use Pinterest, and will any of these methods help you capture more users? Let us know in the comments section below!


Leave a Reply