Want to set up a CDN with your WordPress site but not sure about Max CDN? In love with Amazon Web Services? In this tutorial we cover exactly how to set up Amazon Cloudfront with the W3 Total Cache and the WP Super Cache plugins.
Using a CDN is a great way to cut down the loading speed of your WordPress site around the globe, and CloudFront is one of the cheapest and best all-round options out there.
Before you get started with either plugin you will need to sign up for an AWS account and create a CloudFront distribution.
1. Sign Up For AWS
The first thing you need to do, is to sign up for an Amazon Web Services account. Simply go to their website and sign up for an account. The process is completely straight forward, pretty much identical to any other online sign up process for an online paid service.
The great thing is, if you’re signing up for the first time, you’re eligible for 1 full year of free service, including CloudFront, up to a point. For large volume sites, you might burn through it quickly, but for smaller sites it might last you the full year.
2. Set Up A Cloudfront Distribution
After you’ve signed up, log into ‘your console’ on AWS. Then, click through to CloudFront under ‘Storage & Content Delivery’.
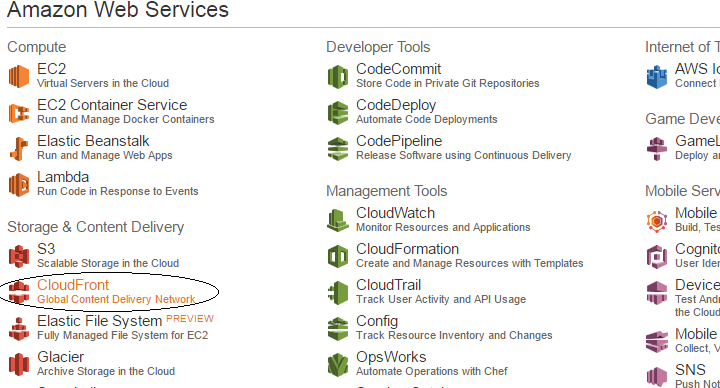
Now click through to create distribution.

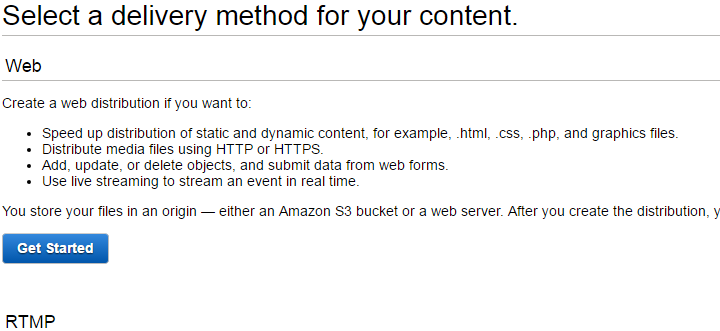
Now you need to click the ‘Get Started’ button under the Web section, not the RTMP section. RTMP is for creating a CDN for streaming media
All you need to do here, is simply enter the url of your site. Cloudfront will then automatically save files from your site onto the CDN whenever they are requested for the first time.
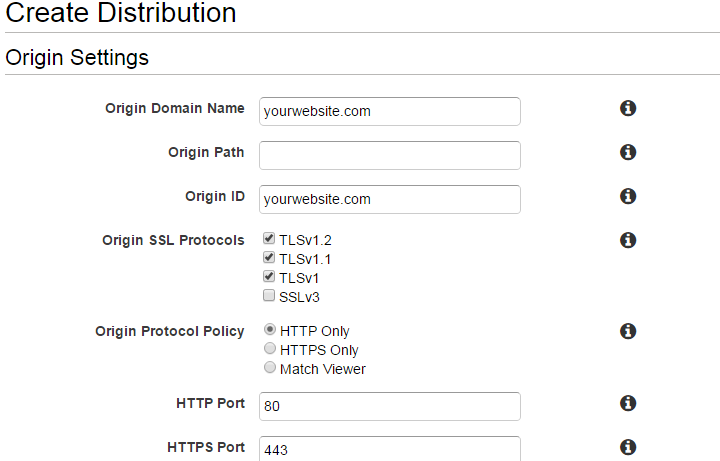
Basically, that’s all the setup you need for your CloudFront distribution, unless you want the url of your files to look fancy.
If you want to add a CNAME to make the url of the files supplied by the CDN look prettier, you can do that. But you will also need to set it up from your DNS dashboard or within your server panel, for example cPanel.
Now let’s move on to how to integrate CloudFront easily with the WordPress plugin W3 Total Cache. There are two ways to do so. The first way utilizes the generic mirror function, and is extremely easy to set up. The second option uses W3TC’s custom settings for CloudFront, and is a little bit more sophisticated and takes more time to set up.
3. Set Up CloudFront With W3 Total Cache (Way 1)
The first thing you need to do (after installing the plugin if you have not already) is head over to the W3TC’s general settings.
Select Generic Mirror and save all settings.
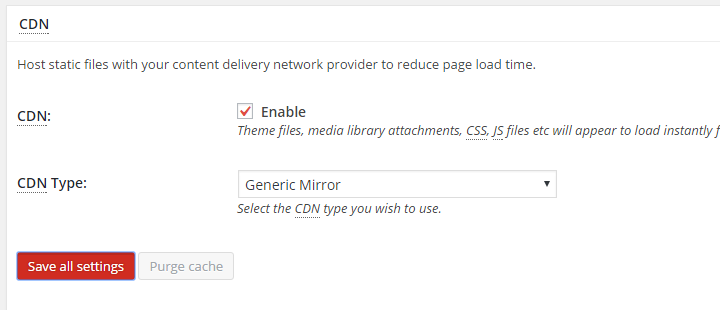
Now head back to your AWS console, and look at your CloudFront distributions. Copy the entire domain name for your distribution.

Now all you need to do, is go back into the W3TC settings inside the WordPress admin dashboard, this time specifically for CDN, and copy and paste the distribution’s URL and save the settings.
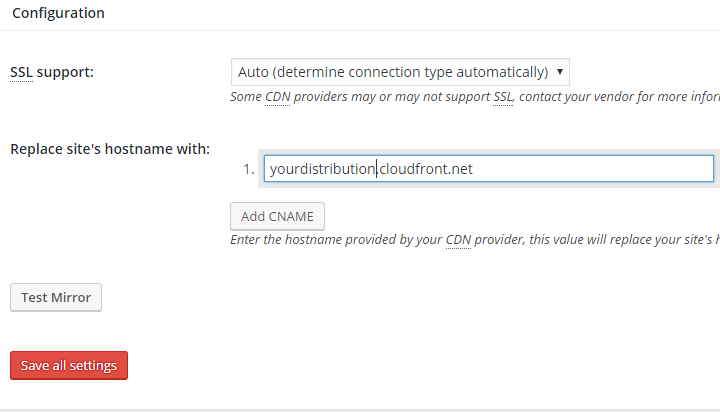
If you refresh your website, you should now see that your browser is pulling files from the CDN. Confirm that it works by opening an image in a new tab and checking that the url shows that it is supplied by the CDN.
This is the quick and easy way to set up CloudFront with W3TC. If you want to do it the recommended way, you will need to set up IAM credentials in AWS.
3.5 Set Up CloudFront With W3TC (Way #2)
Like previously mentioned, there are more than one way to set up AWS CF with W3TC. The second way makes use of the AWS IAM credentials to communicate back and forth betwenn AWS and your site via an API.
This ensures that files are added to CloudFront as they are uploaded or updated, compared to only being pulled into CF the first time they are requested from your website.
If you are willing to put a little more work into it to set it up properly, this is the way to go.
Head over to your AWS console. Click through to ‘Identity & Access Management’ under the ‘Security & Identity’ section.

Once you’re there, click through to ‘Create User’.
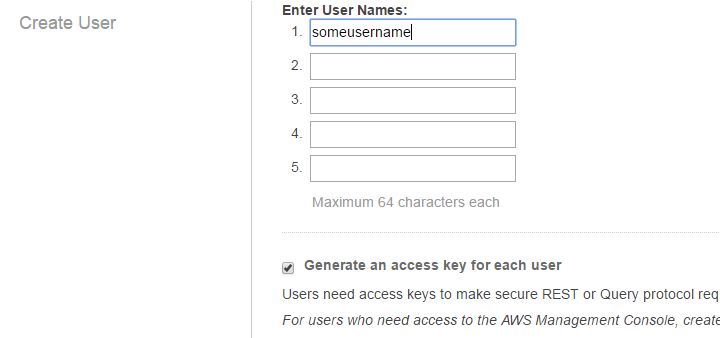
Now you should create an appropriate policy for your new IAM user. You can do this using the AWS policy generator.
If you want your user to only have access to CloudFront, and you only want it to be able to access and modify an existing distribution. Then that’s the input you should give it.
If you don’t mind giving full access to CloudFront with the credentials, you don’t actually need to create a new policy. You can use the pre-existing CloudFrontFullAccess policy for your user.
If you do want the custom policy, finish generating it and create a new policy called cloudfront-user or something else.
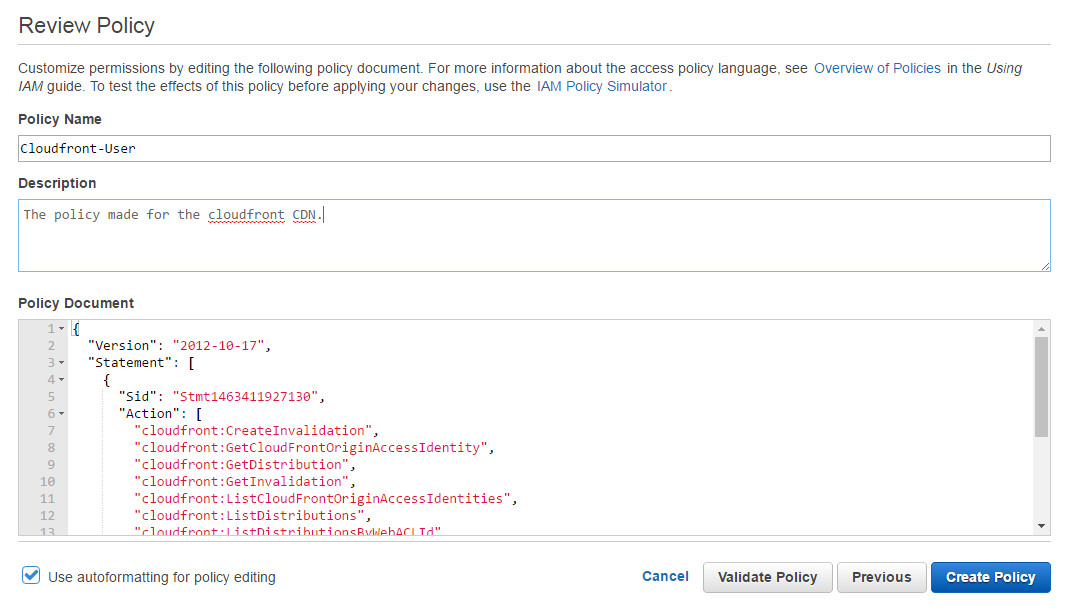
Now look at the policy overview, search for your policy, select it and click attach.
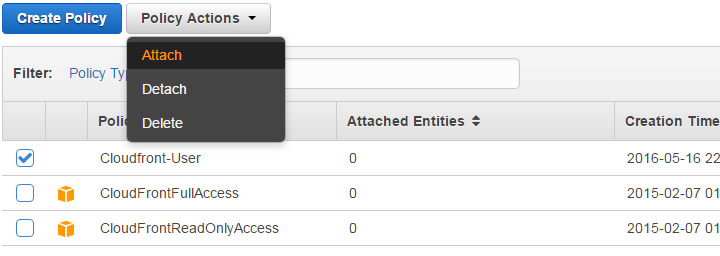
Then all you need to do is to attach the policy to the user you created.
Now you can take the user credentials and use them with W3TC.
Head back to your WP dashboard, and go to W3TC general settings. Scroll down to CDN, then select Amazon Cloudfront.
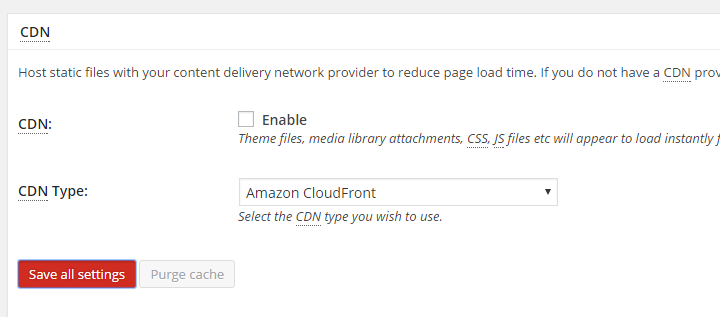
Now head over to the specific CDN settings, and enter the access and secret keys for the IAM user you created earlier. This will give W3TC access to your CloudFront distribution via API.
Now just copy an paste in the first part of the distribution’s URL that is before cloudfront.net.
And you’ve managed to set up CloudFront with W3TC in the recommended way.
3.(Alternative Plugin) Set Up CloudFront With WP Super Cache
If you prefer using the WP Super Cache plugin for your WordPress projects, fear not. You can still easily implement CloudFront with your plugin of choice.
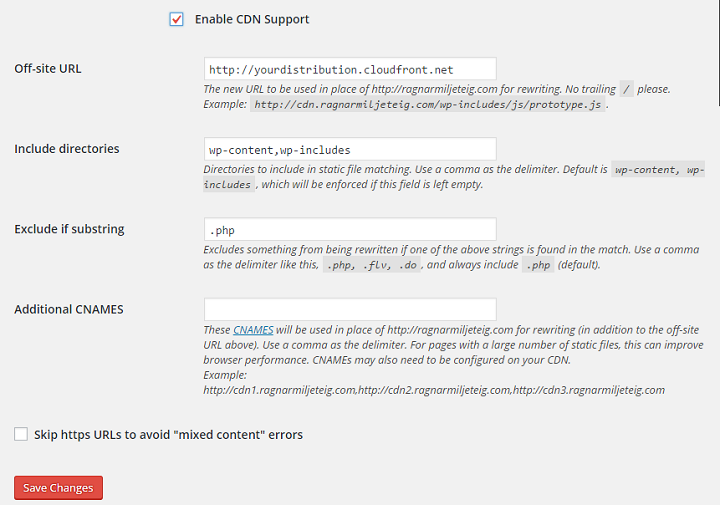
After you have installed WP Super Cache, all you need to do is head over to the WP Super Cache settings, and copy and paste in the CloudFront distributon URL. Then enable the CDN, and save settings.
Refresh your page, and you should be able to see that your site is pulling some content from the CDN instead of your normal server.
Again you can check this by opening an image in a new tab and looking at the url.
While it may look like setting it up with WP Super Cache is a lot easier in this tutorial, setting it up as a generic mirror is only one step longer with W3TC.
The difference is that W3TC also supports an integrated approach that makes use of the AWS API making it a little bit more flexible, compared to just adding it as a mirror and letting CloudFront do it’s own work getting the files.
Conclusion
Setting up a CDN is one of the biggest wins for improving the loading speed of your website. If you have a lot of visitors from around the globe, you can take off entire seconds of load time for people who are very far away from your normal server.
So while it might sound complicated at first, it’s basically mandatory for any WordPress site owner to follow these steps, and set up CloudFront as a CDN for their site. If you haven’t signed up for AWS yet, you’ll even get the first year for free(might not last a full year if you have a fair volume of visitors going to your site.)
Did you successfully set up CloudFront with W3TC or WP Super Cache? Please let us know in the comments.


Let me start by identifying myself as a total website creation newbie. I have a small business on WordPress with an e-commerce setup. I was fortunate to have a friend who is very experienced in website creation volunteer to design my site and get it up and running. I have to manage it myself, and while I’m pretty tech savvy, much of the developer-speak is far over my head. I found out about Cloudfront and then went about trying to set it up alone and it was so far outside of my skillset that I was totally lost. I was very close to giving up and paying for MaxCDN! The instructions on the AWS website was full of developer tech jargon and wasn’t helpful at all. Then I found your site and I was able to do it following along with your instructions step-by-step. I ordinarily wouldn’t have commented but I really wanted to say thank you for taking the time to share this information since I saw no other comments. I wanted you to know that someone is reading and you did help at least one person with your post.
Hey thanks for the awesome tutorial, But I am having a little difficulty.
when I try to Test the settings, it gives me an error
Error: Unable to put object (S3::putObject(): [AccessDenied] Access Denied).
I have added policies to the user and using that user Access key and ID
“Did you successfully set up CloudFront with W3TC or WP Super Cache? Please let us know in the comments.”
Not yet but with your helpful instructions here I now gonna try it! With W3TC.
Doesn’t look like the site owner is reading the comments but if you do, Thank you! This looks like a much needed tutorial, because indeed what’s on AWS itself is clearly only for geeks!
Thank you so much for this!
For awhile now I’ve been interested in using Amazon CloudFront but could not understand how to go about it. I found their console to be overwhelming with options and information – I didn’t know where to look first. I basically gave up on it but found myself doing research once a week on it because I really wanted to use it.
I came across this page on Google and I’m so happy i did. So simple and easy. Thank you so much for taking the time to compile this post and for keeping it live after 2 years.
I never leave comments on posts but I felt I had to with this one in case it helps anyone else that was on the same boat as I was.
THanks again 🙂
Hey there,
Nice post there
We would like to know if google penalizes for duplicate content,
as we do host a separate wp installation at cloudfront-url in the above mentioned case ?
Please help me with answers below, your help will be highly appreciated as i am struggling.
1) Because I have enabled the functionality via W3 Total Cache to transfer files from my media file on wordpress to S3 via cloudfront distribution, would this mean that if I then delete the files in the wordpress media file , this would also delete the files on cloudfront?
2. Is it beneficial to load my wordpress site as a second origin in my distribution? What would this mean for users and how would I do this?