Pop-Ups have a bad reputation from a user experience perspective. Unfortunately, despite the rumors that nobody likes them, they seem to work amazingly well and the data backs it up.
Right here on WPKube we’ve seen the results of using pop-up opt-ins and the numbers are pretty impressive. We’ve been able to increase our opt-in rate by almost 200% using a variety of plugins.
Ninja Forms Review
While there are quite a few different plugins available, we’re going to focus on a Ninja Popups review for today. It’s a premium list building plugin available from Envato Market that allows you to create a user-friendly pop-up opt-in with a lightbox overlay as seen in the image below. Ninja Popups for WordPress also allows for social sharing, footer opt-in bars, and inline opt-ins.

Setup & Installation
Once you’ve completed the purchase process, the plugin is available to download. Installation is simple – just navigate to your WordPress Dashboard >> Plugins >> Add New >> Upload. Select the file from your computer and activate it.
Once activated, Ninja Popups has its own menu that can be found under settings.
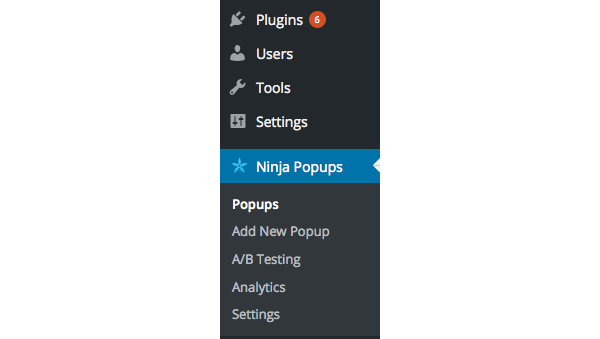
Creating Your First Popup
Located under the Ninja Popups menu is an option to “Add New Popup”. Click it and you’ll be taken to the extensive setup screen. Given the number of options available, we’re not going to have time to run through building a complete opt-in form, but we’ll touch on all of the important options.
Once you’ve named your pop-up, you can either pick from one of the ready-made themes or build your own using the Theme Builder. The ready made themes consist of 20 potential options, many of which offer multiple color choices and a social option.
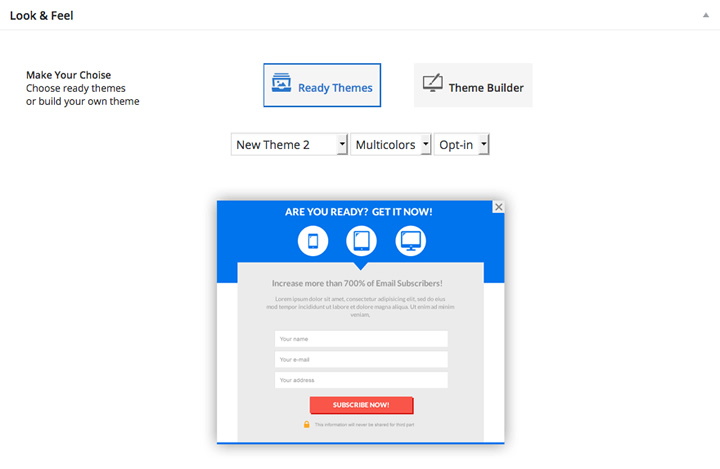
Getting started building your first popup is simple
Ready Themes
By picking a Ready Theme, you’ll be bypassing the need to use the theme editor (we’ll cover that shortly). But that doesn’t mean your pop-up can’t be customized – not by a long shot. By my count, there are a total of 54 options to pick from, not that you will need or want to change them all, but you could.
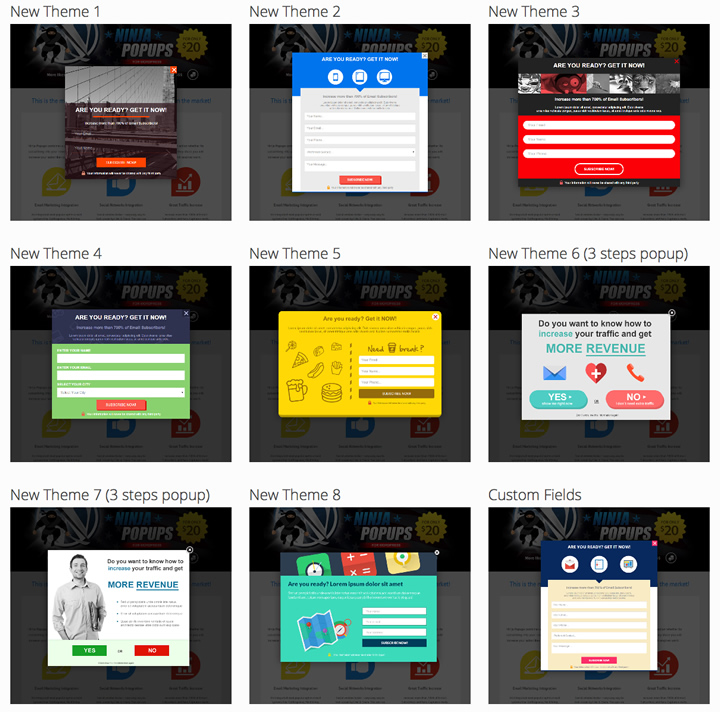
Just a few of the available themes
Content
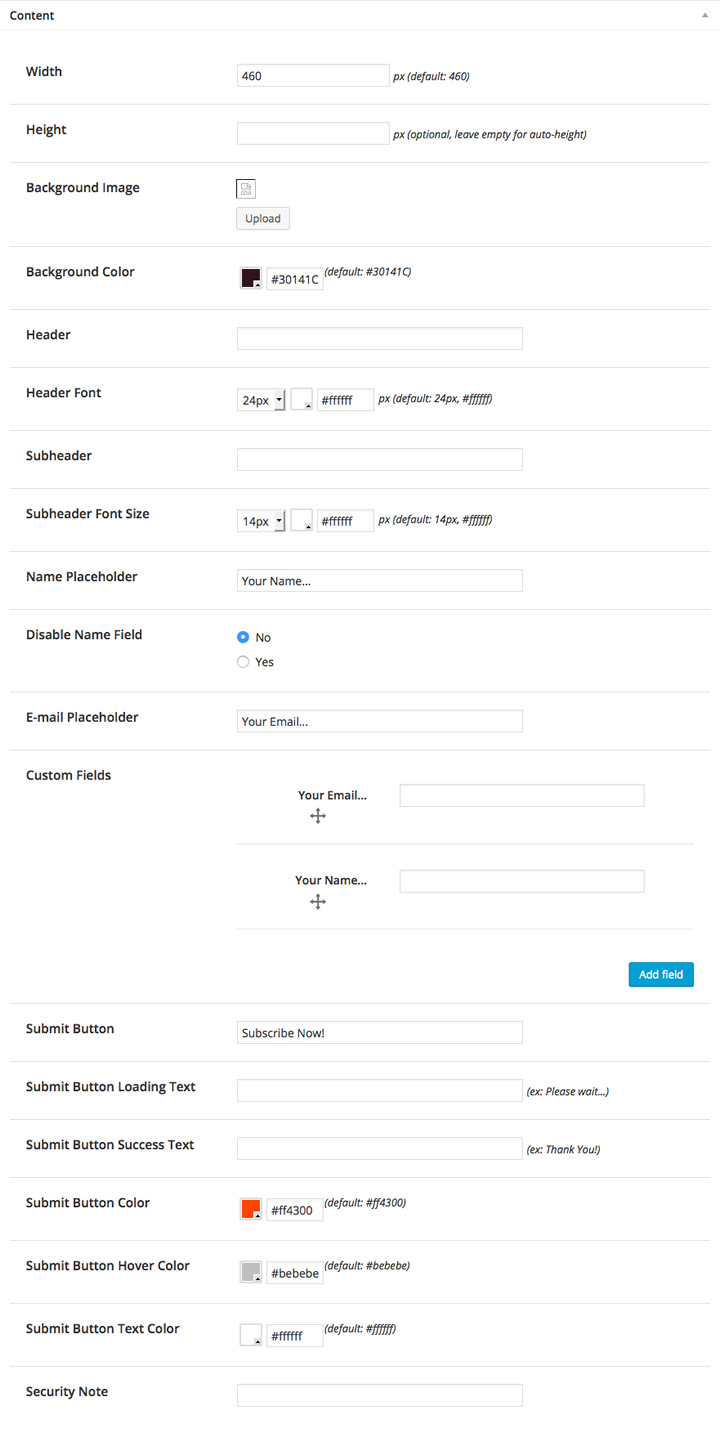
The first series of customizations available are the content options. Ninja Popups allows you to customize the width of your pop-up, plus all of the other elements contained within it including:
- Header text and font size
- A sub-header (bold or normal) and font size
- The main body text
- Bullet lists
- Images & Video embedding
- Custom name and email placeholders
- Custom fields
- Submit button text, loading and success text
- Button color and gradient settings
Overlay
Ninja Popups allows you to control the overlay opacity as well as assign an image. This lets you find the combination that best highlights your opt-in form.
Display Settings
If your opt-in form is date specific, you’ll want to use these fields. Leaving them blank means your pop-up is active all the time. But, filling in these fields means you can specify both a start date and an end date for your form.
Welcome and Exit Settings
The welcome settings provide control over when your pop-up will load with 3 separate options including on page load, after X second of inactivity, or when the user scrolls down the page. Exit setting also provides 3 options for displaying a pop-up that include exiting the page (using a system alert), when the mouse leaves the viewport, and when the user clicks an external link.
Close Button & Delay
Few things are more annoying than a pop-up you can’t seem to find a way to close. To keep visitors happy, there is an auto-close delay that can be set. There is also the option to show a close button (with 7 styles to choose from) as well as a link with customizable text.
Cookies
Ninja Popups gives you control over your cookies as well with 2 options. You can control how long after a visitor converts the opt-in form will be disable for. It can be set for anything from complete disable, or the current session only, to a specified number of days.
If a visitor fails to convert you can control the same possibilities. Keep in mind that this is a setting that has a large impact on user experience. If a visitor closes your opt-in form, think very carefully about when you might want to present it to them again. Nothing is more annoying than a form that keeps popping up even after you’ve closed it.
Redirect
Another feature to be used with caution is the ability to redirect after a user decides to opt-in. Although Ninja Popups lets you do it, always make sure you visitor knows before hand that it’s going to happen. For example opting in to receive access to a specific page or bonus file is ok. Redirecting unexpectedly to a sales page isn’t cool.
Additional Features
For more advanced users, there are two options available for custom CSS and JS. Plus, if for whatever reason you’re not using an auto-responder, you’ll be able to forward opt-ins to your email address.
Theme Builder
A relatively new feature in Ninja Popups is the theme builder which allows you to create your own custom pop-up opt-ins. It’s relatively straightforward to use and provides plenty of control over the styling. Once you’ve set the size, simply drag in the desired elements such as:
- Text
- Bullet point list
- Images
- Boxes
- Buttons
- Input fields, text boxes and selector boxes
- Horizontal lines
Each individual element provides for customizations as well. For example a text element can be repositioned, rotated, font changed, background added, border added, or animation applied. In addition to the individual elements, the pop-up as a whole allows for the same degree of control including the full suite of Animate.css options.
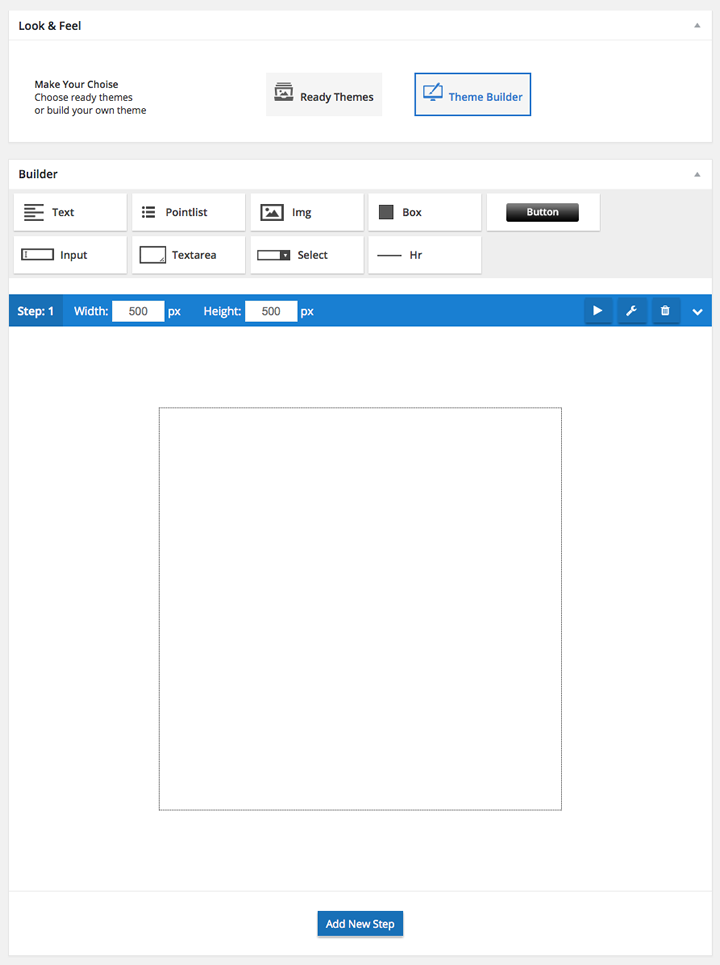
One thing worth noting is that the theme builder felt a little rough around the edges. There were times when the interface just didn’t want to cooperate with smaller window sizes and other times when it was a real challenge to get specific elements to line up properly. The problem could always be resolved, but it was annoying none the less. With a little refinement, the visual editor could be much better.
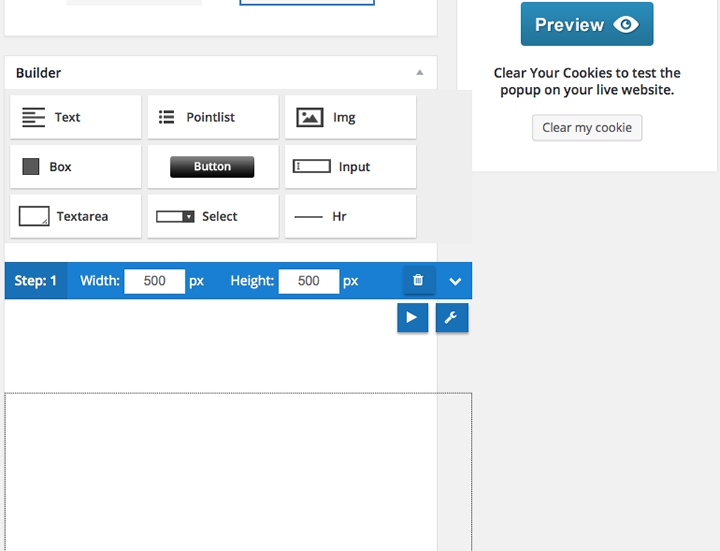
The visual theme builder can be a little buggy.
A/B Testing & Analytics
Although I didn’t have time to test and run any A/B Split tests, Ninja Popups does have built in A/B Split testing – allowing you to select and split test any number of published forms. You also have access to analytics independently for each pop-up form.
Settings
While fairly self-explanatory, the Settings menu contains quite a few things of importance which we’ll run through here.
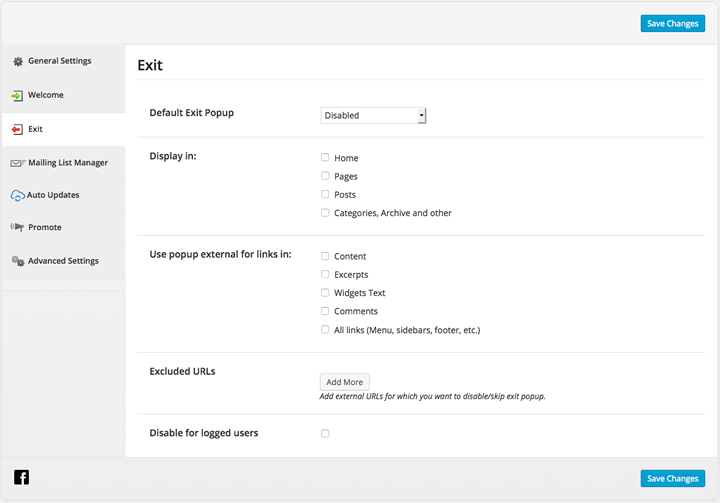
General Settings contains an option to enable or disable the plugin overall. Plus there is an option to disable the plugin on mobile devices, which is generally positive for user experience. Finally, if you’re running Google Analytics on your site, there is an option to enable GA Event Tracking.
Welcome is the first of two important options – how are visitors welcomed to your website? You can select the default pop-up plus decide where it will be displayed (home, pages, posts or categories). There is also an option to disable the plugin for users who are logged in.
Exit options give you a finite control over the popup form when people are exiting your site. In addition to being able to select the individual pop-up, you choose where it will be displayed (pages, posts etc.) You can also disable it for specific and multiple URLs as well as logged in users.
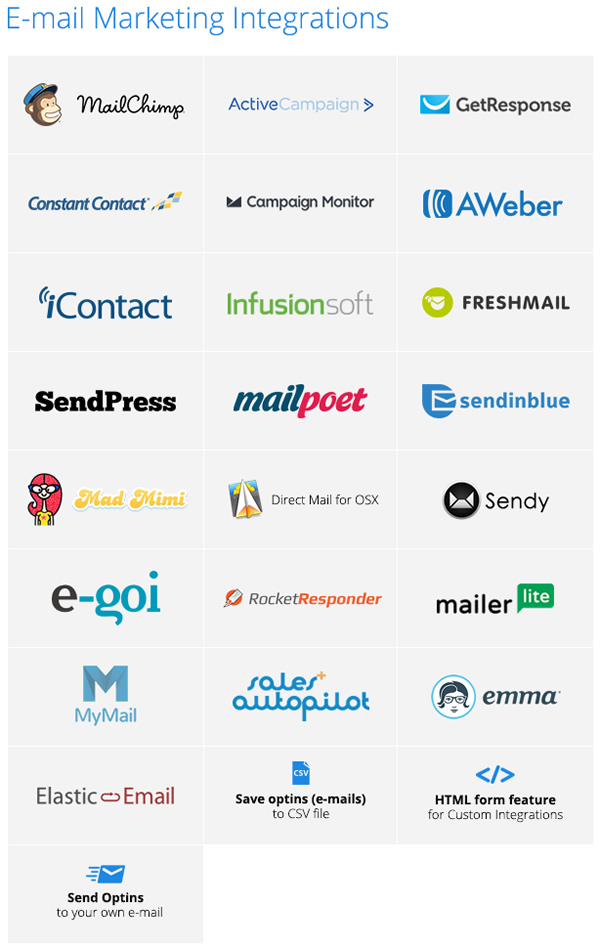
Mailing List Manager is where you can select which email marketing platform you’re using. Ninja Popups offers plenty of options in this department including 19 third party providers plus email, CSV, and HTML. A few of the email marketing platforms included are:
- AWeber
- MailChimp
- GetResponse
- Campaign Monitor
- InfusionSoft
- Sendy
- MyEmma & more
Advanced Settings contains options for more knowledgeable users including the ability to disable many of the included scripts in case of conflict. In case you looking for a way to disable the affiliate notice on your forms, you’ll find that in here as well.
Add-Ons
Ninja Popups offers several reasonably priced add-ons that increase the functionality of the plugin. The first is a 10 Theme Pack for $7. If you can’t find a theme that works for you from the ones that are included, you can grab 10 more for under a dollar each.
Next up is the Optin Bars Pack which will allow you to place footer opt-in forms on your website. This add-on includes 16 pre-built themes with customizable colors and variations for just $7.

The final add-on is Ninja Widget Extra that enables responsive in-line opt-in forms in your pages, posts or sidebars. For only $6, this addition rounds out the feature-set and makes sure you’ve covered all your bases for opt-in form placement.
Pricing & Support
The base Ninja Popups for WordPress is available on the Envato Marketplace for $21 which includes 6 months of support from the developer as well as an option to extend that to 12 months for an additional $6.30. Ninja Popups maintains a high rating with almost 4.5 stars and over 1k reviews.
Final Thoughts
Ninja Popups is a reasonably priced plugin that’s quick to set-up and easy to use. It’s been around for 3-years which means there is a decent, although non-recurring revenue user base.
If I had to pick out a few key frustrations with this plugin there would be two things I would focus on.
- The visual theme builder, while a great idea, needs some refinement. It’s clunky and quite honestly, not that easy to use. Seemingly simple tasks like selecting and aligning multiple elements was challenging to say the least. Luckily, the plugin comes with more than enough pre-built templates to make up for the template builders shortcomings.
- Some users who are new to WordPress may find the plugin more challenging to set up than is necessary. Contextual menus would be a great addition and so would cleaning up some of the grammatical errors. There was more than one occasion where I was left wondering what a specific setting really meant unless I actually tested it.
At this price point, Ninja Popups represents an easy way to get started with growing your email list. It’s affordable, the included themes are attractive and there are lots of little features and settings that allow you to fine-tune the user experience.
If you’re still unsure about which list building plugin to go with. See our comparison of top 10 list building WordPress plugins.


Hello Mr. Devesh,
Thanks for your good sharing the post.I hope it is most importance and helpful to the blog user.It’s great new to all user.You continue to us.
All the best.
Hi Devesh,
I think this is a great idea if it converts to more subscribers. My concern would be that it can be annoying and drive what followers you have away. Can you share your experience?
Hey Reneé,
It does convert and I’m getting a lot of new subscribers. In last few weeks, I got a good number of emails from people asking about popup plugin I’m using here, and yet no one said anything bad about it.
Although, I’m pretty sure it would annoy some users, and I might have lost a few followers because of it. But the thing is a) No one said anything annoying about the plugin. b) I’m getting 5-10 new subscribers (double opt-in) every day. c) Once a user subscribes or clicks the close button, the popup won’t appear for next 365 days.
-Dev
Hey Dev,
Nice review. Does it allow you to ask for first name as well or just email address?
Glad you liked the review, Michele. And yes, it does ask for both first name and email address.
Thanks for stopping by :).
Just bought it, Devesh. Was looking for something like this to use on one of my blogs and that integrates with iContact.
Will let you know how it works for me – thanks!
I now have a quick question for you on this plugin. I am setting it up and in the (mailing list manager) field it’s asking for an app ID from my email provider. Did you need to create an app to get this ID?
Let me know.
Hey Missy,
No, you don’t have to create any app or anything. Which autoresponder service you’re using?
Thanks,
Dev
I am using iContact for my autoresponder, did you want me to take a screenshot of what I am referring to?
Let me know.
Got it! For iContact you would need to register a new app and here’s the step by step tutorial for that – http://developer.icontact.com/documentation/register-your-app/
Oh boy! That looks terribly confusing, guess I will have to email iContact and see if they will help me set that up. Grrrr, but thanks for your help.
I also use this plugin and it’s awesome 🙂
Hello 🙂
Do you manage to send an automatic email (using mailchimp) when visitors provide their email adress?
Thank you for the post!
Hi Devesh,
Good Job with the review! what do you think can icegram be contender to Ninja popups?
Thanks.
Hi Devesh, Under Mailing List Manager and ‘Send Optins to Email”, is it possible to have more than one email address?
Hi Claire,
I don’t think that is possible, though you may want to contact their support, and see if there is a workaround.
Ninja popups is a porly nonworking product.
The company just steal your money for something not working.
Don’t buy this plugin envato even block my account because i ask for refund
This product is terrible and their support is even worse. I’ve been working with (trying to) for a couple of weeks. Several problems, but the one that was the deal-breaker: they do allow you to add “custom fields” to the form; however, only a few “standard” fields will actually transfer to your mailing list form. For instance, I have a form that includes “City”, “State”, and “Zip” fields that need to be collected on the form and then connected to my iContact mailing list. It won’t work – I emailed the plugin author, I sent their (dismal) online form/ticket, I contacted them on Facebook. It took five days to get my first response back! They gave me several “work arounds” that didn’t work and then finally admitted that they only support certain “custom” fields – not all fields! How is that custom? I’m working on trying to get a refund right now, wish me luck!