Struggling with how to bulk upload files to WordPress via FTP? Sometimes you’re dealing with so many images that the regular WordPress media library uploader isn’t cutting it.
Or, you might be working with a file that’s so large you can’t upload it through the Media Library uploader without hitting the maximum upload limit. In fact, some WordPress sites have an upload limit that’s just 2MB, which can easily be exceeded by high-resolution images.
No matter whether you’re trying to upload hundreds of images or just a few huge files, FTP often provides an easier approach than trying to do it through your WordPress dashboard.
But here’s the problem with doing that:
As you may have already figured out, you can’t just upload files to your server and start using them on your WordPress site right away. Don’t worry, though. There is still a way to do it – and I’m going to show you how!
Here’s Why Files You Upload To WordPress Via FTP Don’t Show Up
If you’ve already tried to upload files to your WordPress media library via FTP, you might be confused why the files aren’t showing up in your Media Library.
Here’s the deal:
In order for you to be able to use media files inside your WordPress dashboard, those files need to actually be registered in WordPress.
When you upload files via FTP, you put them on the server, but you don’t do anything to actually register them to your WordPress site. To register them with your WordPress site and start actually using them in your Media Library, you need to perform a few additional steps.
Here’s the entire process:
How To Bulk Upload Files To WordPress Via FTP
In order to make this as helpful as possible, I’m going to start with how to actually upload files to your server via FTP.
If you’ve already uploaded the files to your server via FTP, though, you can click here to skip straight to Step 3, where you’ll actually register those files to your WordPress site.
Step 1: Connect To Your Site Via FTP
To connect to your site via FTP, you’ll need:
- Your FTP username and password – if you don’t know these already, you can get them from your host (consult your host’s documentation or support for more information).
- An FTP program – FileZilla is a good free option and what I’ll use for my tutorial screenshots.
Once you have those two things, open your FTP program and enter your credentials at the top:

Here’s what the various input boxes mean:
- Host – the actual URL to your website (or your server’s IP address)
- Username – the username for your FTP account, which you get from your host
- Password – the password for your FTP account, which you get from your host
- Port – usually you can leave this as the default, but sometimes your host will specify a different port
Once you successfully connect to your site, you should see something like this:
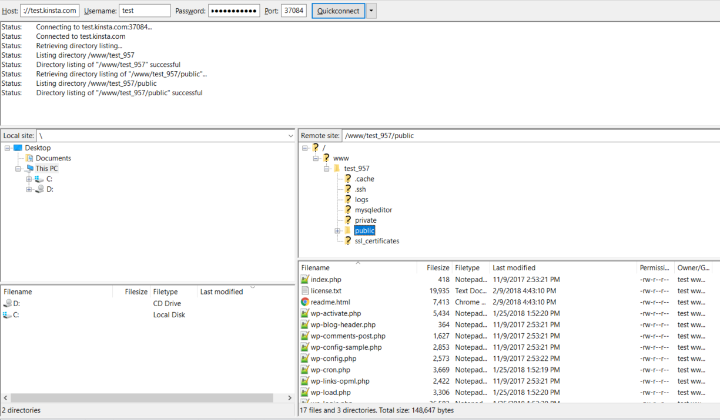
Step 2: Upload Files To wp-content/uploads Folder
To upload files to your WordPress site, you need to browse to the wp-content/uploads folder on your server.
To do that, use the folder tree in your FTP program:
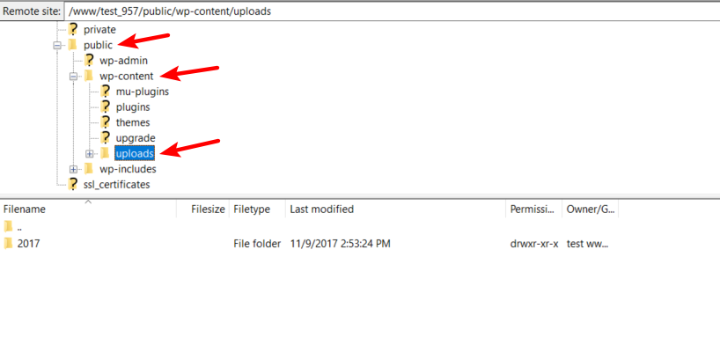
Now, you can either upload your files directly to this folder or you can:
- Use the date folders that WordPress automatically creates
- Create your own folder
It doesn’t really matter as long as you’re uploading your files in the uploads folder or in a subfolder therein.
To upload files, just drag them from the Local site tab to the Remote site tab:
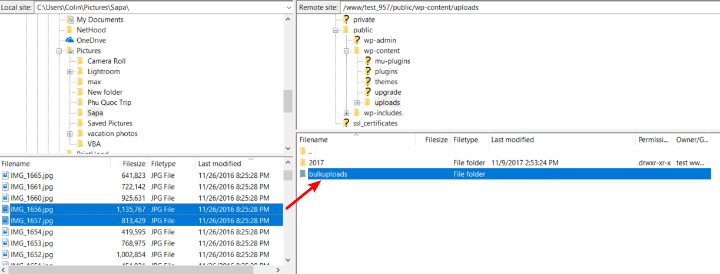
Step 3: Install The Free Add From Server Plugin
At this point, the files that you want to upload should be on your server. But if you try to find them in your Media Library, they’re nowhere to be found:
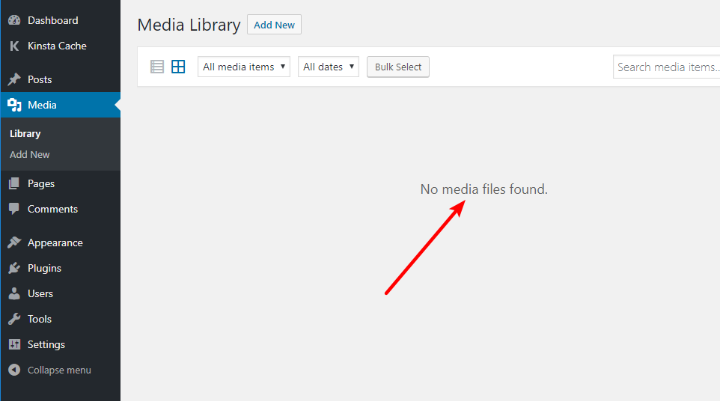
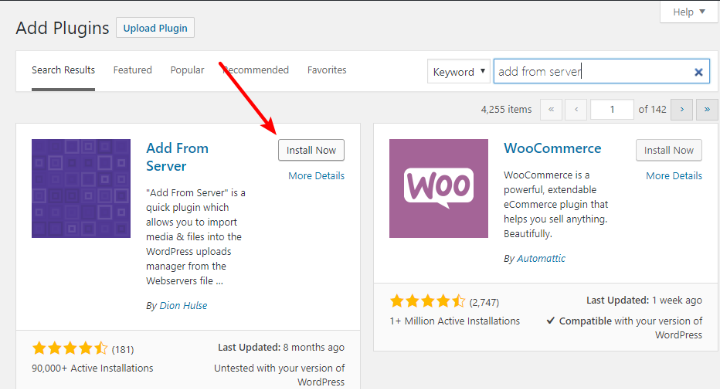
Let’s fix that! To register the files that you uploaded, you need a free plugin called Add From Server.
It’s listed at WordPress.org, so you can install it right from your dashboard by searching for it:
Step 4: Import Files To WordPress Media Library Using Add From Server
Once you’ve installed and activated the Add From Server plugin, go to Media → Add From Server to access its interface.
Initially, you should see a listing of all the folders/files in your wp-content folder. Click to access the uploads/ folder:
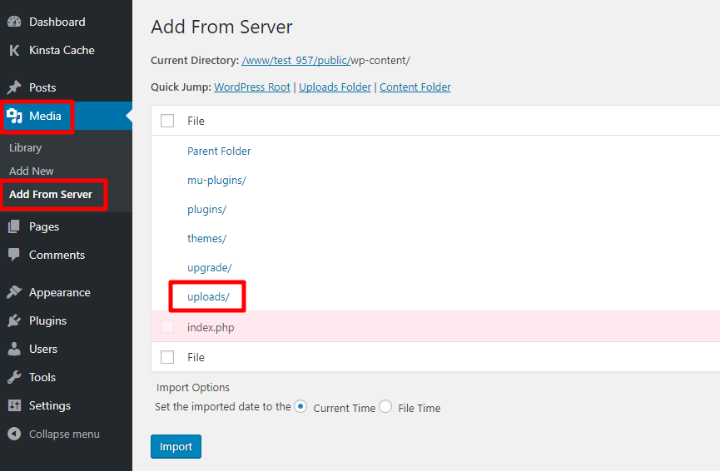
Then, browse to the folder where you uploaded your files via FTP.
Once you’re in that folder, you should see a list of all the files that you uploaded via FTP:
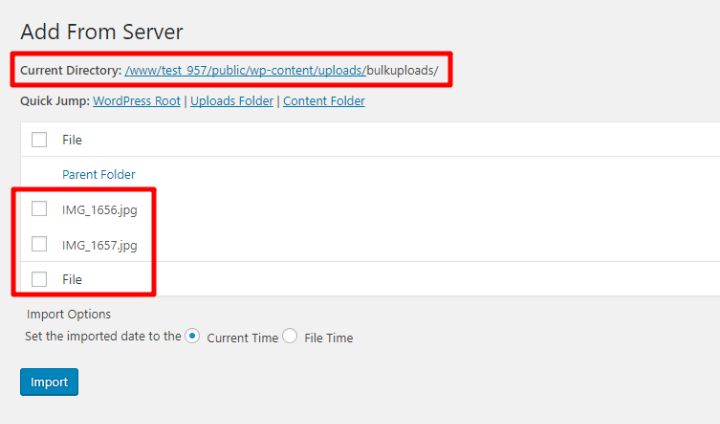
Use the checkboxes to select:
- All files
- Individual files
Then, click the Import button:
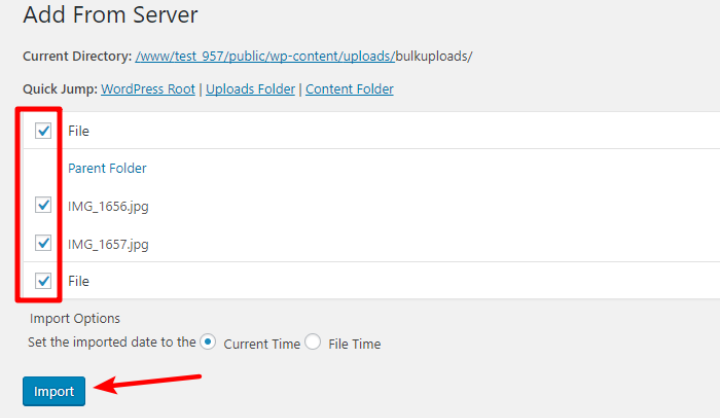
Depending on how many files you have, the process might take a little while. But once it finishes, you should see a success message. And you’ll also notice that you now have all the WordPress default image sizes in the folder:
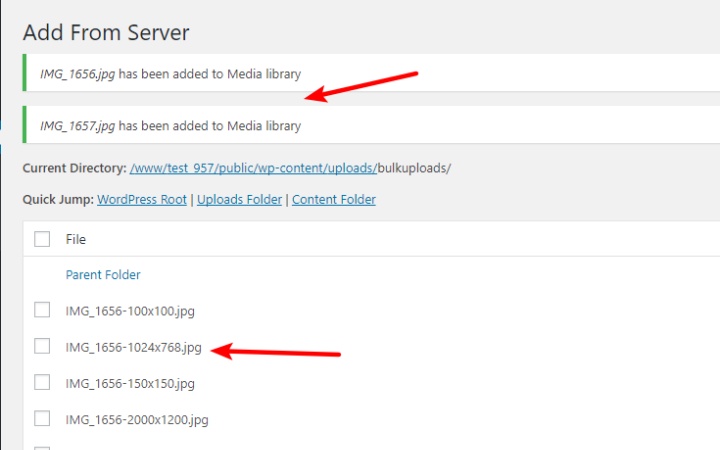
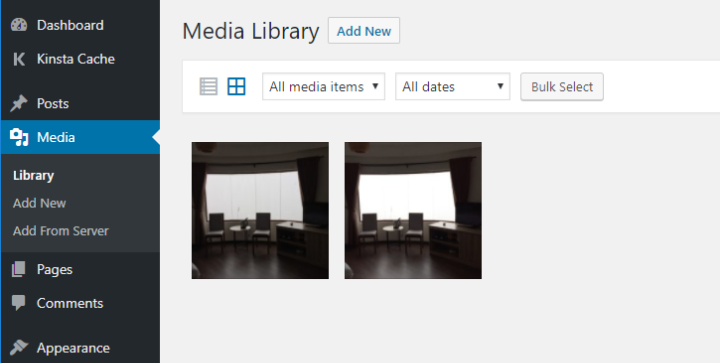
And that’s it! You can now start using those files in your Media Library:
Use WP-CLI As An Alternative To Add From Server Plugin
This method isn’t beginner-friendly. But if you’re a developer and/or you’re familiar with WP-CLI, you can actually use WP-CLI commands to register files on your server to your Media Library.
Specifically, you’ll need to use the wp media import command.
The nice thing about this method is that it gives you a little more flexibility than Add From Server. With it, you can:
- Automatically assign title, caption, or alt text to files
- Attach the files to a specific post
- Import files from other websites into your Media Library (as opposed to just files on your own server)
And you can also use Regex to programmatically choose only files that meet specific criteria.
If you’re technically savvy, to take advantage of this method you’ll need:
- A host that supports WP-CLI – most managed WordPress hosts do
- The wp media import command
Other Solutions To Bulk Upload Files To WordPress
If you can’t connect to your site via FTP, here are two other solutions to upload files to your WordPress site.
They aren’t quite as flexible as the FTP method above, but they can still be more convenient than using the regular WordPress Media Library uploader in some cases.
Use cPanel File Manager And Add From Server Plugin
As an alternative to FTP, you can also upload files via cPanel File Manager if your host uses cPanel.
This isn’t a great option for bulk uploading files, but it can be helpful if you have a large file that exceeds your WordPress site’s upload limits.
To access it, look for the File Manager option in your cPanel dashboard:

Then, you can use the Upload button to upload files (only one at a time, though, which is why this method isn’t good for bulk uploads):

Once you upload the files to your wp-content/uploads folder, you can use Add From Server to actually import them to your WordPress site.
Use Upload Media by Zip Plugin
As another alternative, Upload Media by Zip is a free plugin that lets you upload ZIP files directly to your WordPress Media Library.
This plugin won’t help with large files (or getting around your WordPress site’s upload limit), but it is a handy way to bulk upload lots of smaller files.
Essentially, it lets you upload a single ZIP folder containing a bunch of different images. Then, it opens the ZIP folder, extracts all those images (or other media files), and adds them to your media library.
To use it, install and activate the free plugin.
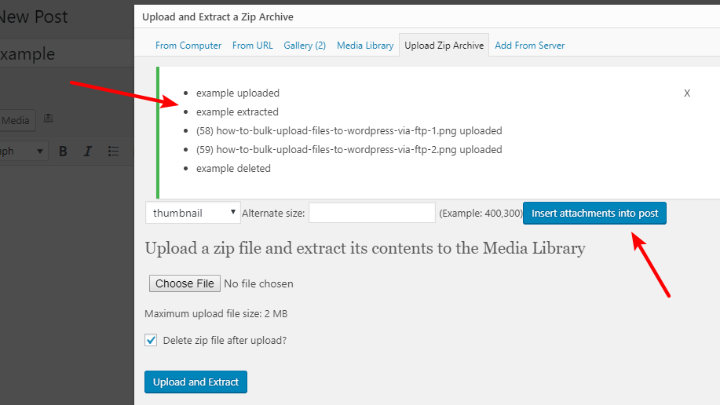
Then, you’ll get a new Upload and Extract a Zip Archive button in the WordPress Editor:
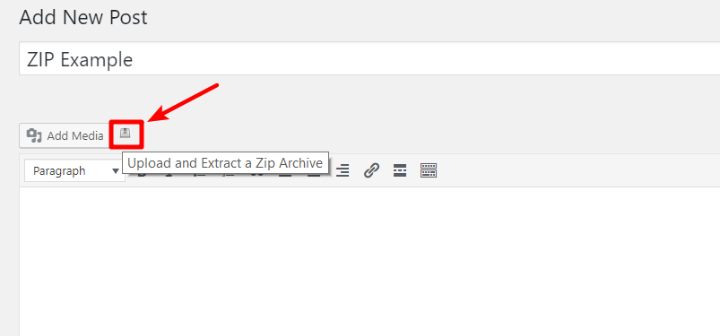
When you click it:
- Select the ZIP file on your computer
- Choose whether or not to delete the ZIP file after the process finishes
- Click Upload and Extract to start the process
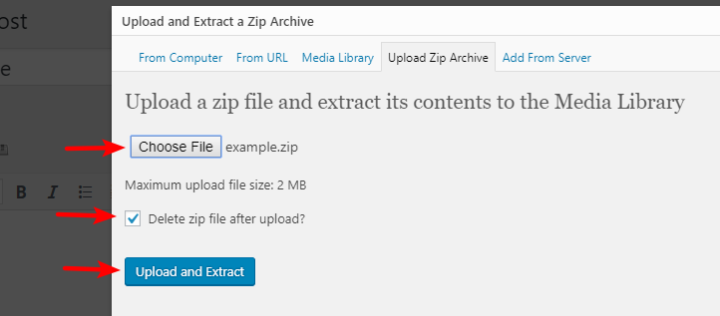
Then, you should see a success message, as well as an option to insert those files into your post:
Enjoy More Flexible File Uploads
If you want the benefits of both:
- Bulk uploading lots of files
- Uploading files that exceed your WordPress site’s upload limit
Then, the FTP method that I spent the majority of the article on is going to be your best bet. Remember – here’s all that you need to do:
- Upload the files to the uploads folder via FTP
- Import the files to your Media Library using the Add From Server plugin
But if you’re unable to use FTP for some reason, you can also take advantage of two other limited options:
- cPanel File Manager is good for uploading a single, large file
- The Upload Media by Zip plugin is good for uploading lots of small files at once (remember – it’s still limited by your WordPress site’s max upload limit, though)
And while we’re on the topic of images, you might also be interested in some tools to help you work with images or optimize them for performance.


Great post on bulk file uploading. I’m new to blogging it will help me a lot.
Thanks
Wow you should start making wp templates and builders and sell them with these instructions. I have made 3 separate purchases and never once has the vendor explained this to me
many many thanks
Thank you so much!
Effortless, great plug in still works with WordPress 5.24
Wow! I can’t thank you enough for these instructions!!! I have no clue as to why I didn’t find this site sooner, because I have been trying to upload squeeze pages for about 2 months…in between other things too!
Thank you, thank you, thank you!!! You made my day!!!!
I love you, man! You helped me a lot! Cheers!
That was really helpful for me.
I’m struggling a huge problem that is “missing a temporary folder” . I have tried all the way to solve this problem. Then i found this article and applied. It’s working.
Thanks a lot again.
it’s working thanks alot.
Thank you very much!. Very well explained. with details. I uploaded my files via FTP to my host account and then I was looking for information about this, and your post is vey helpful. I downloaded the plugin and selected 14 MP3 audio files and the process of import them to my media library was under a minute. All of them are now showing up in the library.
That was very usefull, indeed.
Best!
Thank You Sir