In this post you will learn how to easily turn text links into attractive buttons in WordPress. By following this how to guide you will find out how to add a dropdown menu to the WordPress visual editor that allows you to apply custom CSS styles to your post content.
These custom CSS styles can be applied to text in your posts to decorate and format it. A great use for this is to create attractive and attention grabbing buttons for your posts. This guide will also cover generating the button CSS styles. If you want an easy way to add attractive buttons to posts and pages then this guide is for you.
The End Result
The end result of this how to guide will enable you to select some text in your post, and then apply a style to it via the dropdown menu on the post editor. This is great for creating the kind of buttons you see here on WP Kube as well as adding any other kind of formatting to your post content.
Once we’ve finished, the Visual Editor will look like this, and contain a Styles dropdown menu item:

Using the new menu it will be possible to apply a CSS style to a text link in your post, in order to create a button effect without using any images. The links could look something like this, although the appearance is up to you:
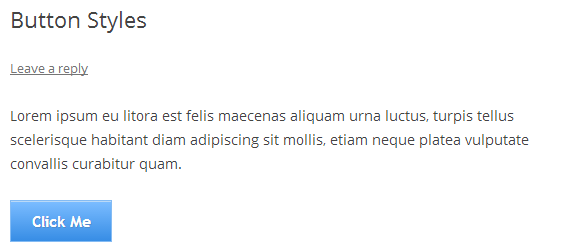
This approach not only saves you time when creating a post, but also makes it easy for all the contributors to your blog to be able to consistently use the same styles to decorate buttons or any other post elements.
Safety Precautions
In this tutorial we are going to be editing the following files:
- functions.php
- style.css
Both of these files are part of your theme, so we will work working with the versions that are associated with the theme currently active on your site. Firstly, it’s important to make a backup copy of these files in case something should go wrong.
Secondly, it’s good practice to create a child theme of your current theme. If you don’t know how to create a child theme, check this guide by Rachel Adnyana. Using a child theme will ensure that should you update your current theme, what we do in this tutorial won’t get overwritten. It’s also worth pointing out that should you switch themes, these changes will be lost too.
However, if you are working on a development site or local installation of WordPress it’s not entirely necessary to create a child theme.
Adding the Styles Menu Item
The Styles dropdown menu item is actually part of the WordPress Visual Editor already but it’s been disabled by default. To enable is, you just need to add some code to the functions.php file of your current theme.
To open the file for editing, you can go to the Appearance menu and then click on Editor from the submenu.
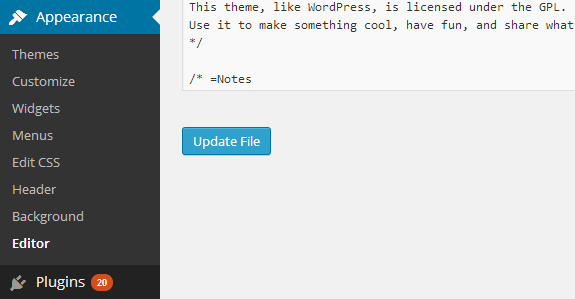
First check that the theme your WordPress site is currently using is selected on the dropdown menu at the top of the right of the page. I’m currently editing the functions.php file for the Twenty Twelve theme but for you it may be a different theme.

Next click on the functions.php file from the file list on the right-hand side of the page, to begin editing that file.
Then copy and paste the following code into the file. For convenience I recommend pasting at the end of the file so you can easily keep track of what you’ve added to the file.
// Enable the Styles dropdown menu item
// Callback function to insert 'styleselect' into the $buttons array
function my_mce_buttons_2( $buttons ) {
array_unshift( $buttons, 'styleselect' );
return $buttons;
}
// Register our callback to the appropriate filter
add_filter('mce_buttons_2', 'my_mce_buttons_2');
// end of part I
Reference: http://codex.wordpress.org/TinyMCE_Custom_Styles
Once the code has been added to the file, click the Update File button to save the changes. If all went well, you should see the styleselect dropdown menu has been added to the WordPress visual post editor.
However, we are not finished yet. If you look at the menu items on this new dropdown list, they are the styles connected to the Visual Editor’s other buttons. We want to add our own styles to the list.
Creating the Button CSS Styles
In this tutorial we are creating a button for our text links, but you could just as easily create the decoration and formatting for any other type of page element.
Now we need to create the CSS styles for the button. You can either create your own CSS or use one of the many online button generator applications out there. CSS Button Generator is a good choice so visit the site and quickly create a button and then copy the CSS or use the example below.
Now go back to the Appearance > Editor page and click on the style.css file from the list of files on the right-hand side.
Again, scroll down to the end of the file and paste in the below button CSS or use your own CSS:
.linkButton {
-moz-box-shadow:inset 0px 1px 0px 0px #bbdaf7;
-webkit-box-shadow:inset 0px 1px 0px 0px #bbdaf7;
box-shadow:inset 0px 1px 0px 0px #bbdaf7;
background:-webkit-gradient( linear, left top, left bottom, color-stop(0.05, #79bbff), color-stop(1, #378de5) );
background:-moz-linear-gradient( center top, #79bbff 5%, #378de5 100% );
filter:progid:DXImageTransform.Microsoft.gradient(startColorstr='#79bbff', endColorstr='#378de5');
background-color:#79bbff;
-webkit-border-top-left-radius:0px;
-moz-border-radius-topleft:0px;
border-top-left-radius:0px;
-webkit-border-top-right-radius:0px;
-moz-border-radius-topright:0px;
border-top-right-radius:0px;
-webkit-border-bottom-right-radius:0px;
-moz-border-radius-bottomright:0px;
border-bottom-right-radius:0px;
-webkit-border-bottom-left-radius:0px;
-moz-border-radius-bottomleft:0px;
border-bottom-left-radius:0px;
text-indent:0;
border:1px solid #84bbf3;
display:inline-block;
color:#ffffff;
font-family:Trebuchet MS;
font-size:15px;
font-weight:bold;
font-style:normal;
height:40px;
line-height:40px;
width:100px;
text-decoration:none;
text-align:center;
text-shadow:1px 1px 0px #528ecc;
}

.linkButton:hover {
background:-webkit-gradient( linear, left top, left bottom, color-stop(0.05, #378de5), color-stop(1, #79bbff) );
background:-moz-linear-gradient( center top, #378de5 5%, #79bbff 100% );
filter:progid:DXImageTransform.Microsoft.gradient(startColorstr='#378de5', endColorstr='#79bbff');
background-color:#378de5;
}

.linkButton:active {
position:relative;
top:1px;
}

/* This button was generated using CSSButtonGenerator.com */
Update the file to save the changes.
Adding the Style to the Dropdown Menu
Now click on the functions.php file again and paste in the code below at the bottom of the file.
// Add the Button CSS to the Dropdown Menu
// Callback function to filter the MCE settings
function my_mce_before_init_insert_formats( $init_array ) {

// Define the style_formats array
$style_formats = array(

// Each array child is a format with it's own settings
array(
'title' => 'Link Button',
'selector' => 'a',
'classes' => 'linkButton',
),
);

// Insert the array, JSON ENCODED, into 'style_formats'
$init_array['style_formats'] = json_encode( $style_formats );
return $init_array;
}

// Attach callback to 'tiny_mce_before_init'
add_filter( 'tiny_mce_before_init', 'my_mce_before_init_insert_formats' );
// end of part II
Notice these lines inside the array:
- title – this is the title that will be displayed on the dropdown menu
- selector – the ‘a’ refers to anchor, signalling this styles is for links
- classes – this is the name of our button CSS class
If you were to use your own CSS, then the classes entry would be whatever you called your own CSS class. In the example above though, the button CSS style is called linkButton.
Once you’ve pasted in the code, click the Update File button to save the changes. Once the file is saved, go to the WordPress post editor and refresh the window for the changes to take effect. Now click on the styles dropdown menu and you should see an entry entitled Link Button.
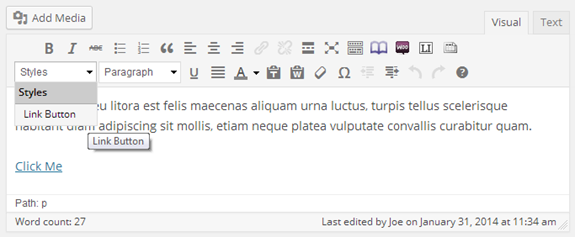
To apply the CSS style and create the button, simply create a text link in your post, highlight the text and then select the Link Button style from the menu. The styles won’t be visible in the post editor window. You must preview the post to see the formatting, which should look something like this:
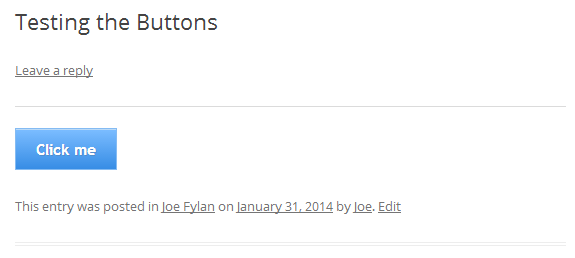
Now whenever you need to insert an eye-catching and attractive button into your posts or pages, just create a text link and then select that style from the dropdown menu.
Advanced Options
Hopefully you can think of some other great uses for this feature. If you want you can add additional styles to the menu. These can be for different styles of buttons, or formatting the appearance of text, or anything else you can do with CSS.
If you want to create an additional button style and add it to the dropdown menu, simply create another entry in the array (that was added to functions.php) and change the title and classes lines:
array(
'title' => Bigger Button',
'selector' => 'a',
'classes' => 'biggerButton',
),
Then add a new CSS style to the style.css file. If you want to create styles for elements that aren’t links then you can do that too. This requires changing the second line to suit the area you want to apply the style to. You can find more information on this page.
Shortcuts
If all the above sounds great in theory, but you would like a quicker way of implementing it without editing any code, then these two plugins might be of interest:
Conclusion
Now you can easily create great looking buttons in WordPress simply by selecting an option from a dropdown menu on the WordPress Visual Editor. If you run into any difficulty or have any questions, just leave a comment below.




Thanks for this post.
What if we want to add a ‘rel=”nofollow”‘ to the link without using any plugin?
Apart from adding the tag manually in the Text/HTML view you could try this:
http://stackoverflow.com/questions/9571210/how-to-set-nofollow-rel-attribute-to-all-outbound-links-in-wordpress-any-plugin
Although I’ve not tried that approach myself as I’ve never needed to nofollow all links.
If you don’t mind using a plugin, there are many to choose from:
http://premium.wpmudev.org/blog/7-follow-nofollow-wordpress-plugins-links/
Good luck!
Thanks Joe for the answer,
Actually, I don’t want to nofollow all links. Sometimes I want to put nofollow some button links (affiliate links, not so related links, and so on ..). So I was wondering if there is a way to put it as an option to check or uncheck to follow or nofollow the button link. It seems to be a little bit complicated : p Thanks anyway !
Good tutorial that just helped me build the exact buttons I wanted on the project I am working on. Thankyou very much, I appreciate it.
Thanks Steve, glad you found it useful.
Just what I needed. Thanks for the great tutorial.
Thanks a ton, Joe. This is one that I’m saving in my snippets for client work – almost a better solution than adding classes to links. Thanks again!
Thanks for this great function! I edited both files, and while the Formats items show up in a dropdown, they are greyed out and not clickable. Any idea where my mistake might be?
Wonderful, thank you! Just, could you please add how to make the new styles visible in the editor?