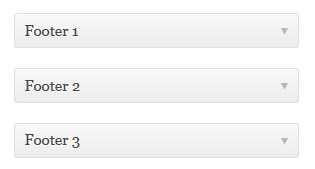
Note: The latest version of Genesis theme comes with 3 columns widget, so no need to add any extra code.
Genesis is one of the most popular theme frameworks in the WordPress industry. Around half of my sites are running on Genesis framework including WPKube. If you want to learn more about Genesis and frameworks, in general, you should check out our in-depth post on theme frameworks.
By default Genesis doesn’t come with a widgetized footer, to add the footer you have to manually insert the code in the child theme.
In this post I will show you how to add a widgetized footer in your Genesis child theme. This tutorial will only work if your site is running on Genesis theme by StudioPress.
A widgetized footer provides site operators with a low maintenance section of footer-area widgets that can be administered from within the WordPress interface.
Add a three-column set of widgets in Footer
You need to edit 2 files:
- functions.php
- style.css
Step 1: Add the following code in your functions.php file (at the bottom of it). You can increase the number of columns you want to show by changing the number 3 to 4 or 5 in the code. Though, generally 3 column widgets work best.
//* Add support for 3-column footer widgets
add_theme_support( 'genesis-footer-widgets', 3 );
The PHP above registers three new widget areas in the footer area.
Step 2: Now you want to add some styling or custom css to the widget, so it looks well designed and match the main styles of your theme. Add the following code in the style.css file.
/* ---
Footer Widgets --- */

.footer-widgets {
	background: #333;
	color: #999;
	clear: both;
	font-size: 14px;
	font-size: 1.4rem;
	padding: 40px 0 16px;
	padding: 4rem 0 1.6rem;
}

.footer-widgets-1,
.footer-widgets-3 {
	width: 350px;
}

.footer-widgets-2 {
	width: 360px;
}

.footer-widgets-1 {
	margin-right: 40px;
}

.footer-widgets-1,
.footer-widgets-2 {
	float: left;
}

.footer-widgets-3 {
	float: right;
}

.footer-widgets a {
	border-bottom: 1px solid #666;
	color: #999;
}

.footer-widgets a:hover {
	color: #ccc;
}

.footer-widgets .widget {
	margin-bottom: 24px;
	margin-bottom: 2.4rem;
}

.footer-widgets .widgettitle {
	color: #fff;
}

.footer-widgets li {
	list-style-type: none;
	margin-bottom: 6px;
	margin-bottom: 0.6rem;
	word-wrap: break-word;
}

.footer-widgets .search-form {
	width: 100%;
}
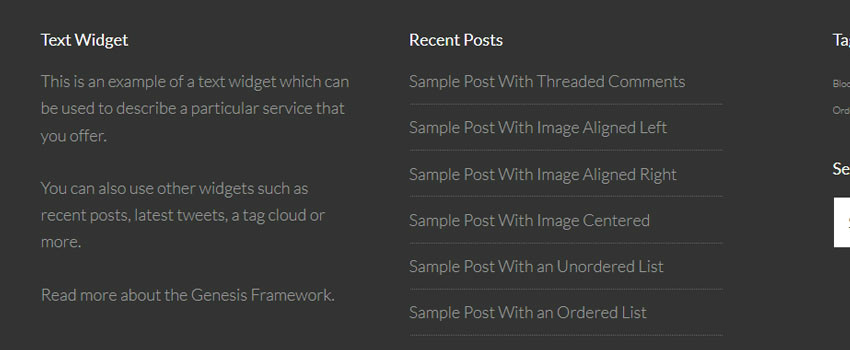
Step 3: The code part is done. Now visit your WordPress Dashboard > Appearance > Widgets and add some widgets to the new areas you’ve created. The new widgets / section would look something like this:
That’s all there it is. If you have any questions or comments, please let us know in the comments section below.


Thanks Dev, was looking all over for this! 😀
Glad I could able to help you, thanks for stopping by Sourav :).
Just tried it out. Worked like a charm! 😀
wonderful post, should i just add the 3 footer widgets without any code on it?
Cool, Thank you for this guide on how to create a three column widget. Perfect help for beginners.
Hello there,
It is not working. Only my footer 1 (left) is working properly.
:s
Thank you very much for your help. It saved several hours of my time.
Hey! Thanks for writing this post – very helpful! I’ve had one strange issue come up though where the third column is outside the .footer-widgets div. Any thoughts on why that is? Thanks!
Hi Thanks for your post this is easy way for adding footer Genesis Theme, it is a helpful for all Genesis Theme user. i try this tricks for my website.
Glad I could be of help, Arif. Thanks for the comment.
Looks like i did something wrong
I had a backup file of my function.php file and styles.css in a notepad. After following the process, i updated to save the recent changes and my site refuses to come up again. Just showing a blank page (no error messages). SIte is currently down and I cant even log in to my dashboard. Any suggestion?
No need to worry, Olusola. You can easily fix it by uploading the function.php and style.css file to your server via FTP or cPanel.
FYI doesn’t work with Altitude Pro.
Look for
//* Add support for 1-column footer widgets
add_theme_support( ‘genesis-footer-widgets’, 1 );
replace with
//* Add support for 3-column footer widgets
add_theme_support( ‘genesis-footer-widgets’, 3 );
Really A Helpful Post 😀 😀 😀
You Saved My Dollars!
Thanks Dear 😀 😀 😀
Hi, thaks for sharing. but after i tried, the widget on footer still only one. Whats wrong? im using genesis latest version
Thank you so much. It really helped me.
Thank you so much. It really helped me.
Thanks.. tutorial is awesome but i have 1 problem With these codes i am able to get 3 footer widget but in mobile site 3rd widget is getting very ahead. Please help me. My website is undercoverapk.net please see in mobile version
Hello 🙂
Thank you!
I could add the 3 to the functions.php file but I cannot find the footer widget paragraph where to add the “break” in my style.css…. Can someone help me maybe? 🙂
Thank you very much!!
The code doesn’t work in the Essence Pro theme in 2018 and I just hate that……..