Need to set up a multiple author WordPress blog?
Unless you have a personal blog, you’ll probably want to start working with multiple authors as your website grows. This helps you publish more content, showcase different viewpoints, and delegate the time-consuming work of creating content. In fact, the very blog you’re reading right now is a multi-author WordPress blog…about WordPress.
WordPress is used by tons of huge publishers, so it’s well-suited to a multiple author setup. However, if you want everything to go smoothly, you’ll need to have processes in place to ensure that your multiple author WordPress site is a success.
In this post, we’ll share some tips for working with multiple authors using both core WordPress features, as well as some useful plugins to extend things where needed.
Seven Tips to Set Up a Multiple Author WordPress Site
Let’s start with some core WordPress features and then work our way into plugins and tools to help you work with multiple authors…
1. Use and Understand WordPress Roles
One of the most fundamental parts of creating a WordPress site with multiple authors is understanding WordPress roles and capabilities. These let you control what each user can do on your WordPress site:
- Capabilities – these are individual specific actions a user can take. Examples are “Publish the user’s own blog posts”, “Edit the user’s own blog posts”, “Edit other users’ blog posts”, “Edit already-published content”, “Install new plugins”, etc.
- Roles – these are collections of capabilities that you can quickly assign to users. For example, WordPress comes with default roles for “Author” and “Editor” that include multiple capabilities. As the site admin, your role is “Administrator”, which gives you access to every single capability.
Basically, when you create WordPress accounts for additional authors on your site, roles let you:
- Make sure they have permission to perform all the actions they need, like creating a new blog post draft (for authors) or editing other users’ posts (for editors).
- More importantly, make sure that they don’t have permission to do things they shouldn’t be able to do. For example, you probably don’t want random authors to be able to install new plugins on your site.
You can view a table showing all the roles and capabilities here. However, for a multi-author site, you’ll likely rely on these three roles:
- Editor – can publish content and edit new or existing content from any author on your site. Only give it to trusted people who need to be able to work with content from other authors.
- Author – can only publish and edit their own content. This is what you want to give to most people on your site.
- Contributor – a very limited role. They can only create new drafts. They cannot publish content or even upload images. Usually, you won’t use this role unless you don’t trust the author for some reason.
You can set an author’s role when you create or edit their account:
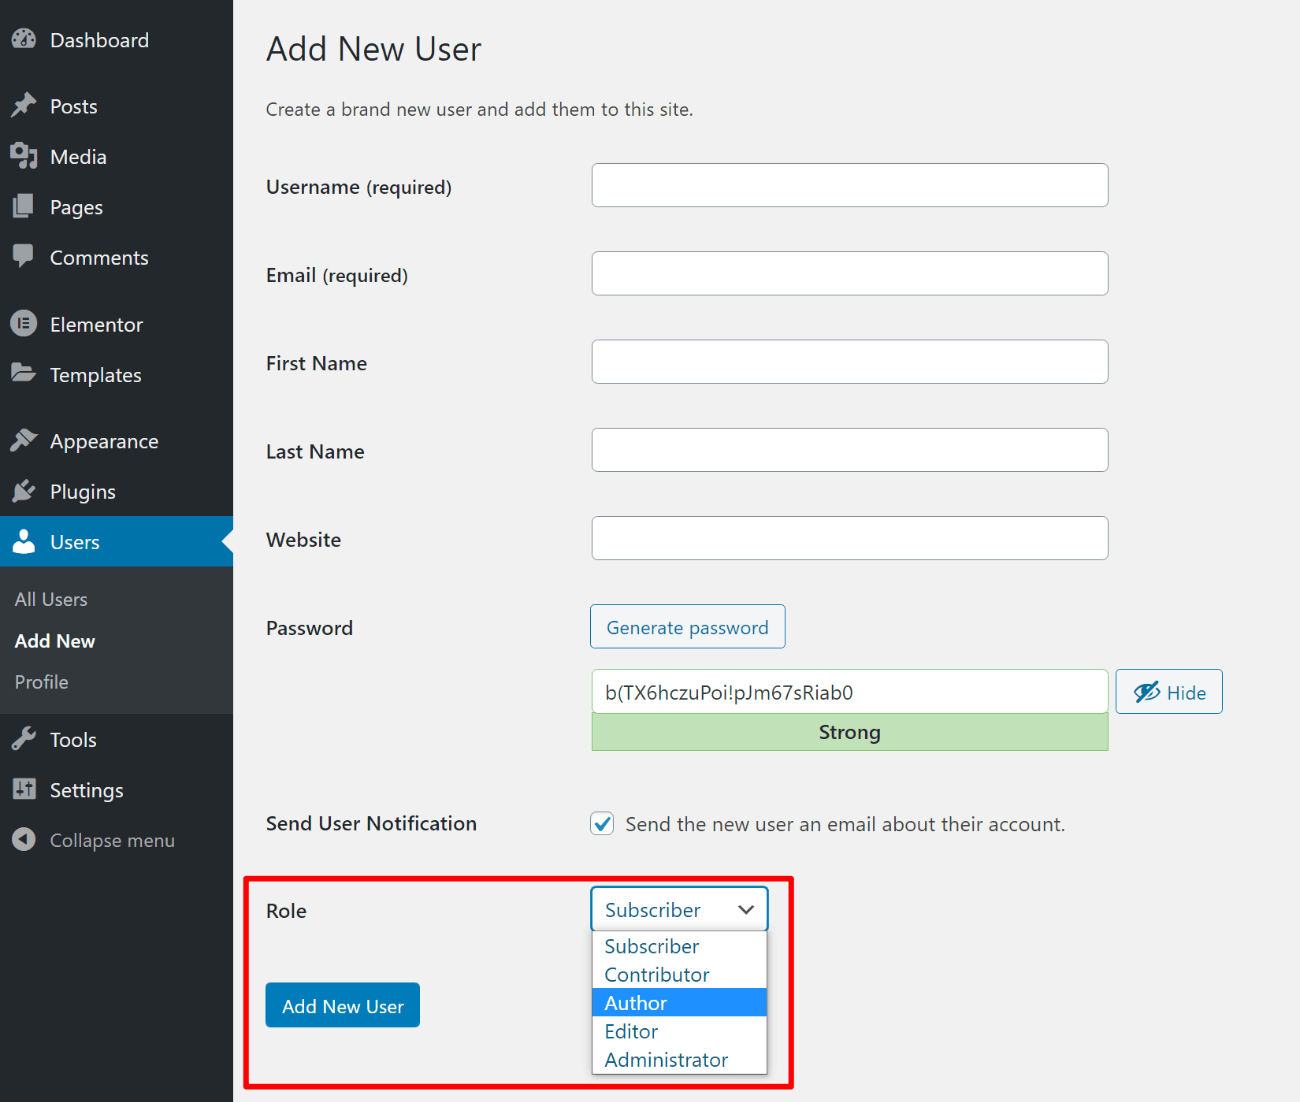
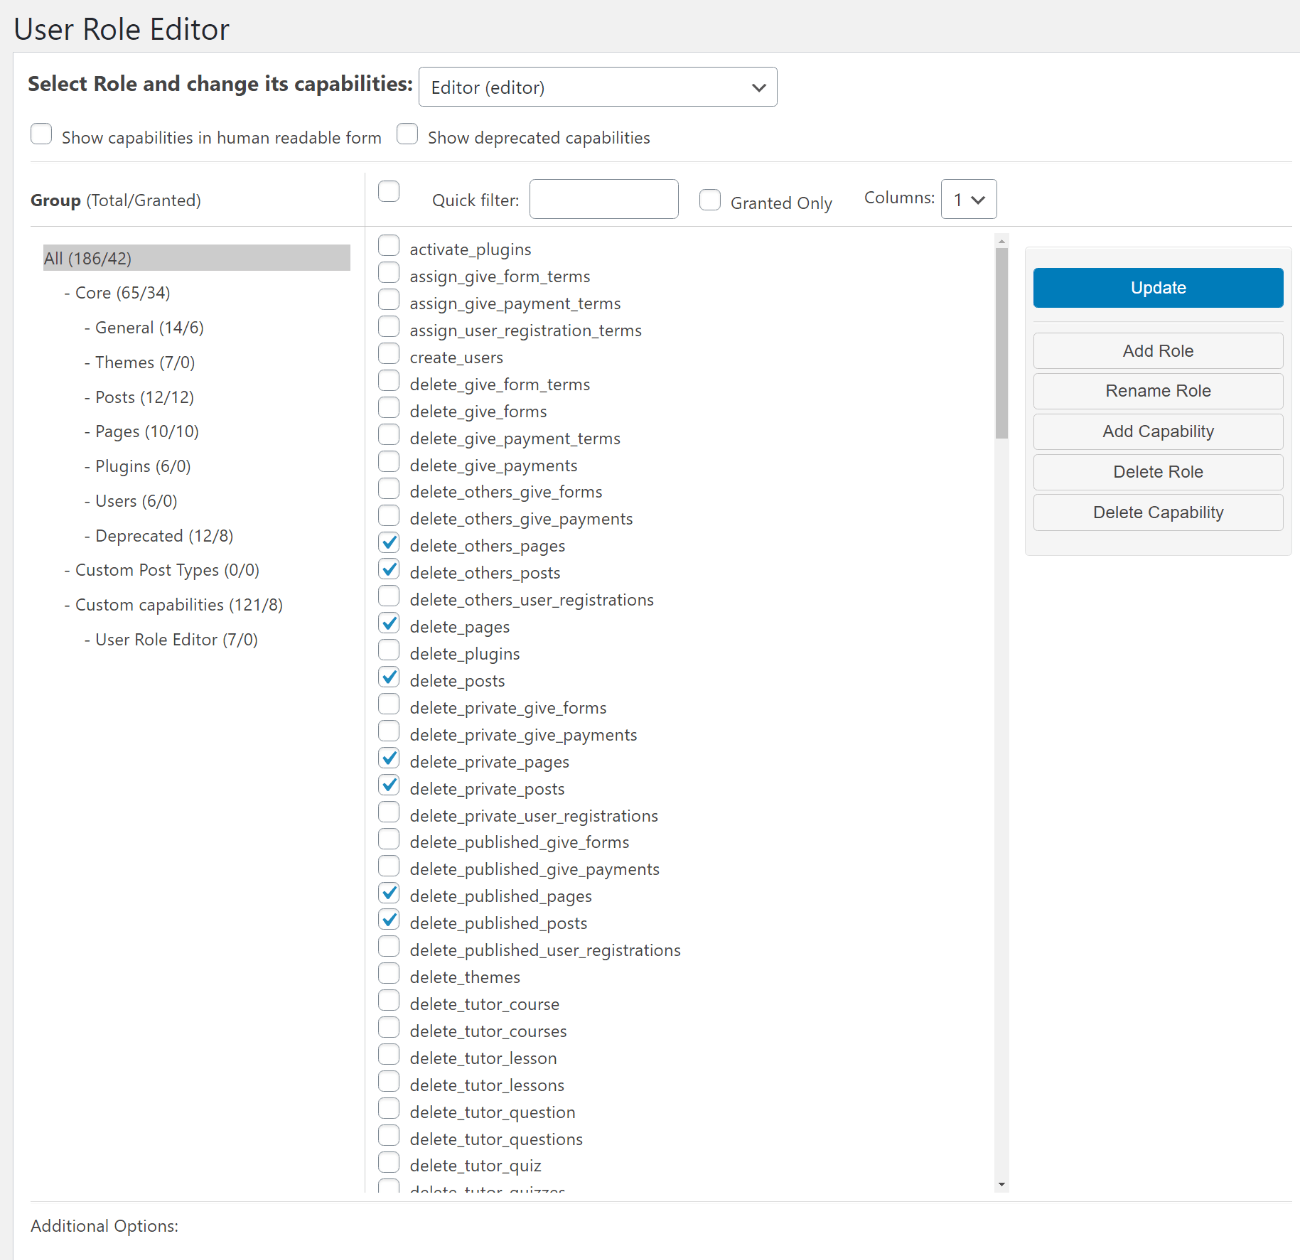
You can also create your own custom user roles with custom capabilities (or edit the existing roles), which can be really useful for multi-author blogs. To achieve this, you can use the free User Role Editor plugin.
For example, by default, authors are able to edit their own already-published posts, which you might not want. With User Role Editor, you could remove this capability so that authors cannot edit posts once they’ve been published.
2. Assign Multiple Authors to a Single WordPress Post
This one won’t apply to all situations, but is something a lot of multi-author blogs might need to deal with, especially media publishers or news organizations. For example, at the NY Times, it’s common to see multiple bylines on an article, especially larger pieces with lots of reporting.
By default, WordPress only lets you assign a single author to each piece of content. However, with the right plugin, you can adjust this functionality to allow multiple authors.
There are two popular options here:
- PublishPress Authors – has a free version that will work for most sites as well as a premium version with more features.
- Co-Authors Plus – a popular free option, but a little more suited to developers because you need to use code snippets to display multiple author bylines on the front-end of your site.
If you’re not a developer, I definitely recommend sticking with PublishPress Authors. You’ll get a new Authors option in the editor that lets you choose from any author on your site. You can either choose WordPress accounts or create standalone authors with no WordPress account, which is good for guest posts:
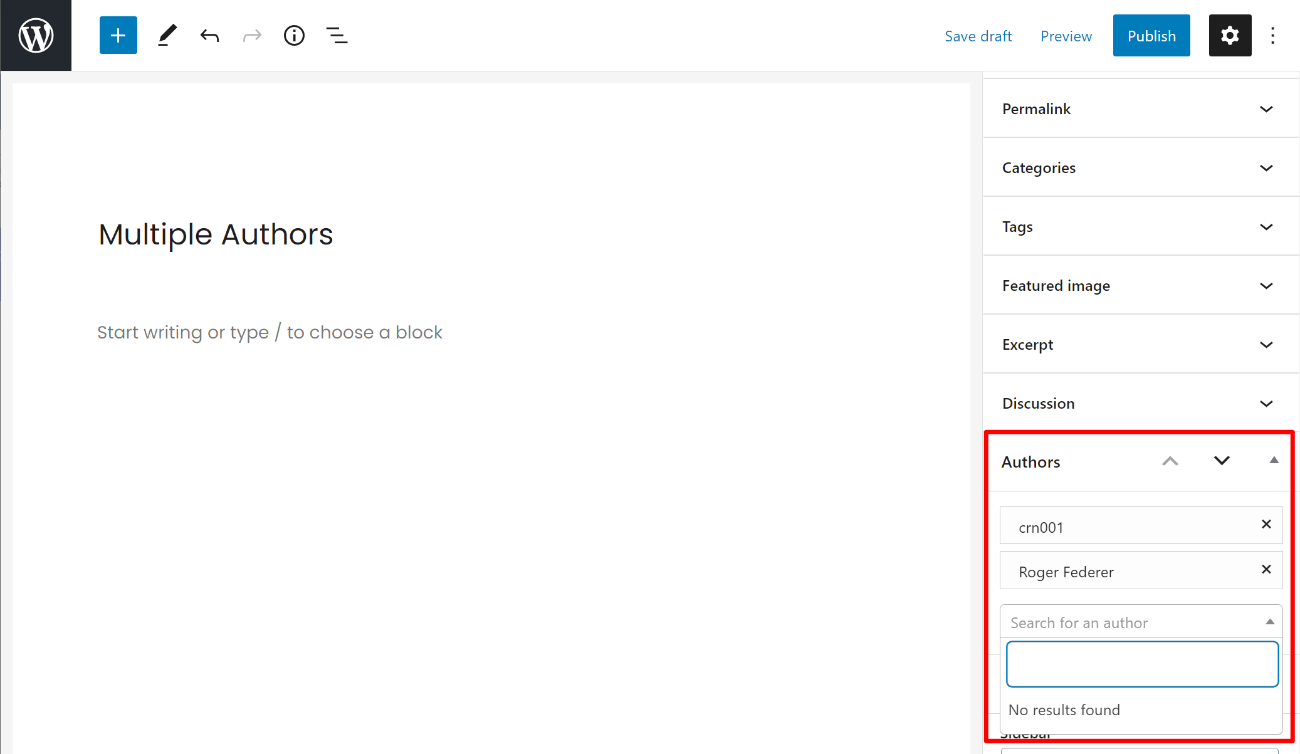
Both authors will automatically show up on the front-end of your site – no need to add any code.
3. Use a WordPress Editorial Plugin
One of the best ways to get a handle on a multiple author WordPress site is with a dedicated editorial plugin. Such plugins add a number of different features to help you manage all aspects of your editorial processes.
The most popular option here is the free Edit Flow plugin, which is maintained by Automattic (the same company behind WordPress.com and WordPress VIP, which works with a lot of big publishers). Edit Flow adds a number of modular features:
- Calendar – see a month-by-month view of your content.
- Custom statuses – add custom statuses for blog posts (more on this in the next section).
- Editorial comments – add threaded backend comments.
- Editorial metadata – store custom information about posts in the backend.
- Notifications – receive notifications for content you subscribe to.
- Story budget – track your content budget – useful if you’re paying authors.
- User groups – group authors by department or function.
Edit Flow is 100% free.
Another newer option is the PublishPress plugin, which comes in both a free and premium version. Because it’s a commercial venture, I think its interface is a little more polished than Edit Flow.
PublishPress offers pretty much all the features from Edit Flow, plus other useful features like:
- Slack notifications
- Custom user roles
- More detailed revision tracking
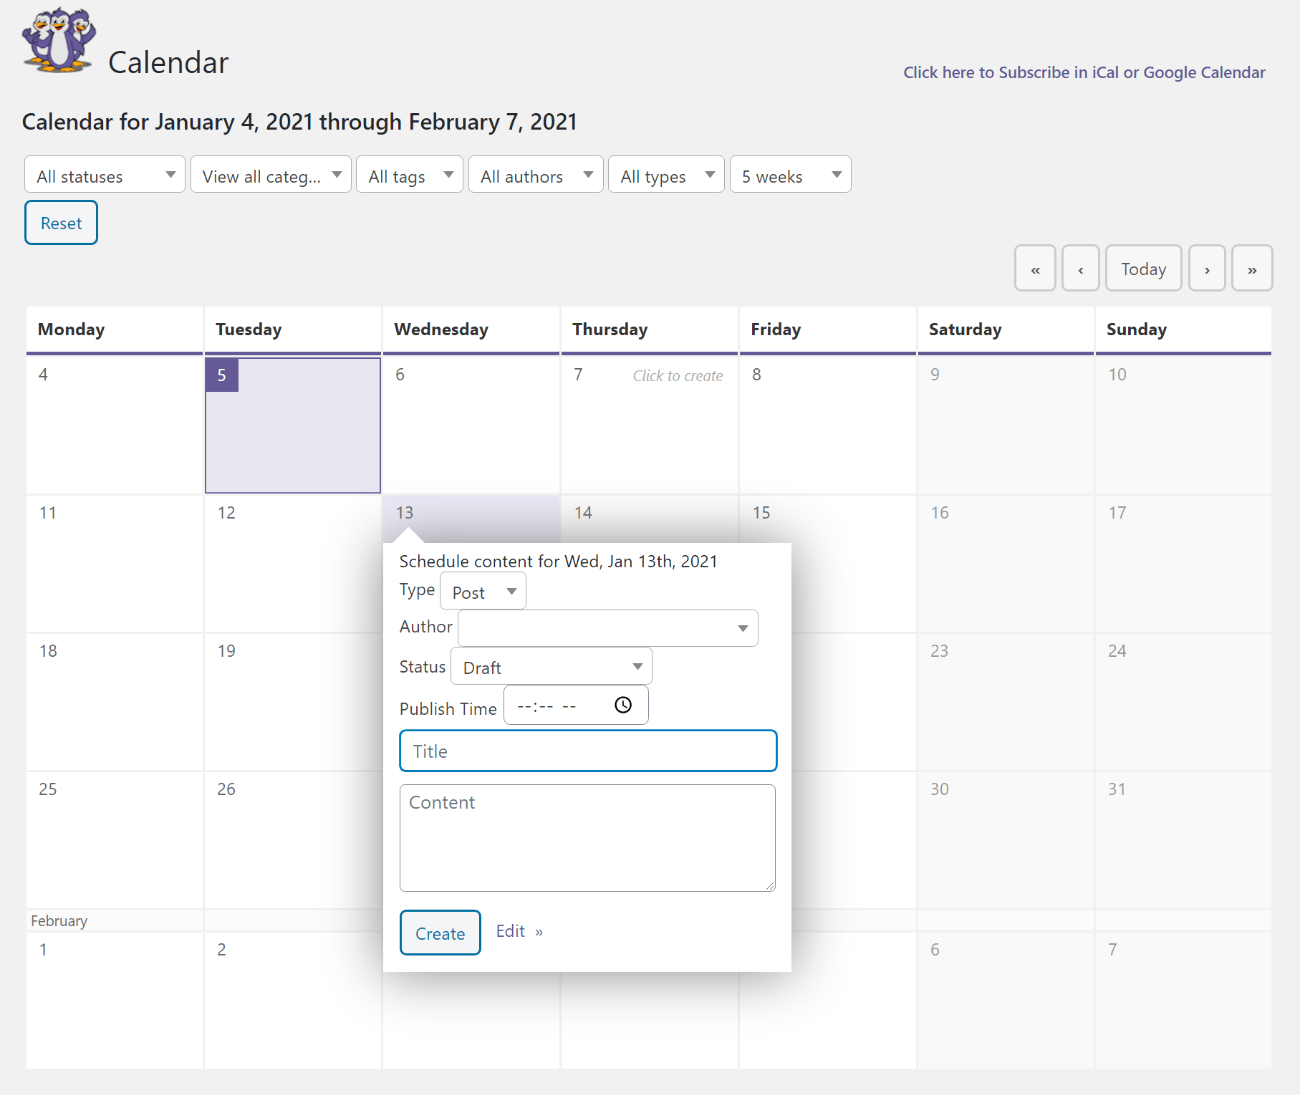
You can also easily migrate from Edit Flow to PublishPress. There’s a free version and you can upgrade to Pro for $79.
4. Add Custom Statuses If Needed
I mentioned custom statuses above with the Edit Flow plugin, but they can be a useful tool for multi-author blogs, so I think they deserve their own section.
Post statuses let you track the current status of a piece of content. WordPress already comes with default statuses for popular situations:
- Published
- Draft
- Scheduled
- Pending review
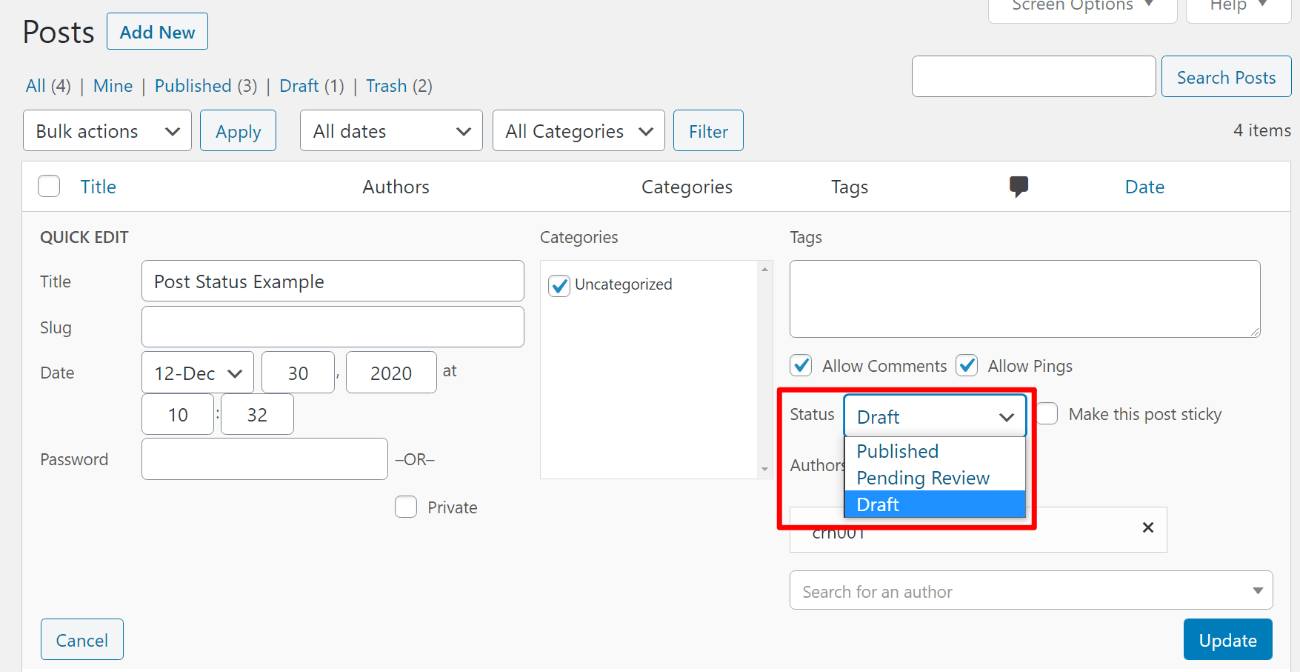
However, you can also create your own custom statuses that better fit into your editorial workflow.
Both Edit Flow and PublishPress let you create custom statuses, but you can also use a standalone plugin like Extended Post Status. You could then pair that with a plugin like Post Status Notifier Lite to receive notifications when a post is changed to a specific status.
For example, you could make sure you get notifications whenever an author submits a new draft or when a post is published to your live site.
5. Add a Custom Author Box
If you have multiple authors, you’ll want to give each author credit on their blog posts and also share a little information about each author so visitors know who they’re reading.
Some themes give you an option to add an author box to the end of each post that showcases the author, a profile picture, and maybe some basic biographical information. However, not all themes do, and some themes’ built-in features might be too limited.
To fix this, you can use a WordPress author box plugin. Check out our full post on adding an author box for all your options, but here are two of the best:
6. Consider Third-Party Project Management Tools for Content Ideas
In a section above, I’ve featured tools such as Edit Flow and PublishPress that let you manage your editorial calendar for multiple authors without leaving your WordPress dashboard.
These tools make it easy to manage content that’s in progress from inside your WordPress dashboard. They can also help with content ideation for multiple authors…however, I find that this can get a little confusing with multiple authors.
If you try to manage both content ideas and actual content inside your WordPress dashboard, it’s easy to create a really complicated system.
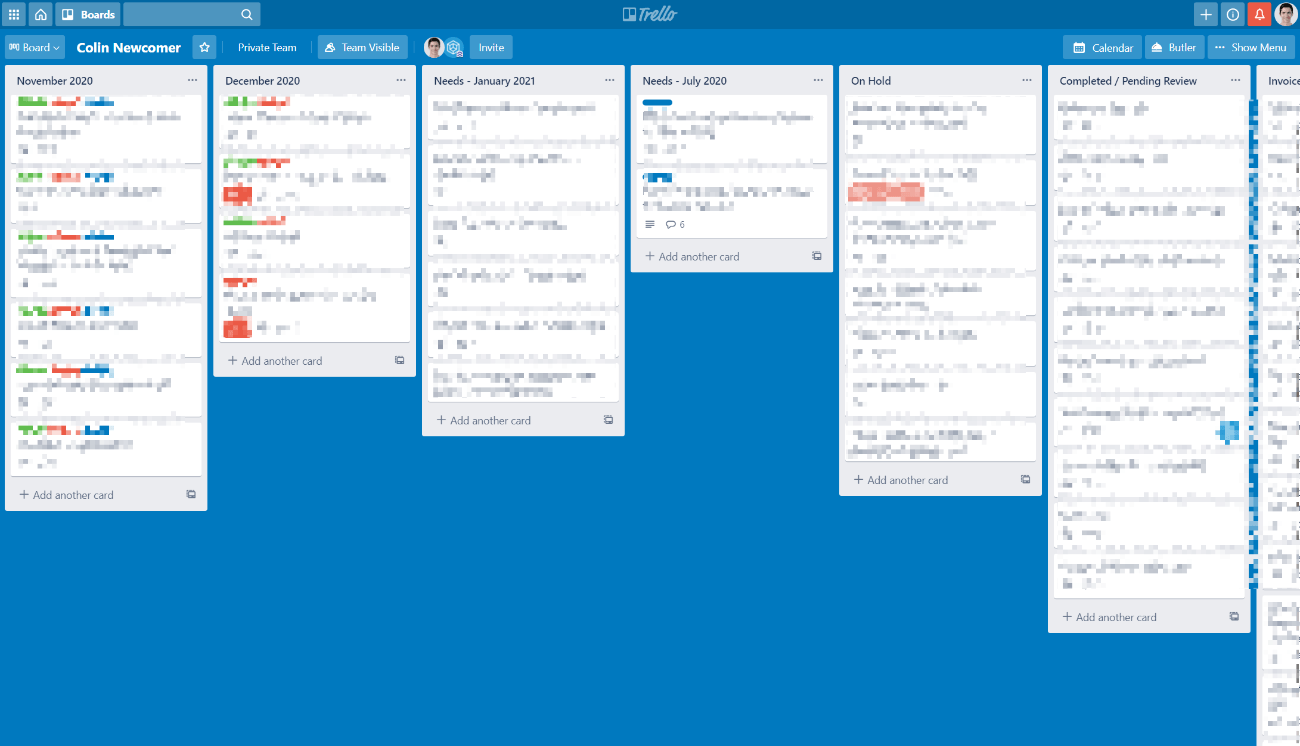
Instead, I think it’s better to split the process and use a third-party tool to manage content ideas and assign them to authors. Then, authors can use your editorial plugin once they’re actually working on the draft in WordPress.
My personal favorite here is Trello, which is also what we use at WPKube. You can create cards for each content idea and even add statuses if you want to stay organized:
Other good options are:
7. Set Up Checklists
Checklists are useful for all kinds of important things, from successfully flying planes to performing surgeries – that’s why Atul Gawande wrote a whole book about them. They’re also useful for your authors to remember what you want them to do.
As someone who contributes to multiple blogs, I know that it can be hard to remember guidelines for different blogs, especially if you have specific instructions.
A checklist lets each author quickly verify that they’ve performed important actions, which will also streamline your management processes.
Here are some useful plugins to help you create checklists:
Create Your WordPress Multiple Authors Site Today
WordPress makes a great option for multi-author sites, but you’ll want to set things up for success.
At the most basic level, make sure that you understand WordPress roles and capabilities to control what each user can do. You always want to give users the fewest number of permissions needed to do their job.
To streamline your content creation process, consider using a full editorial plugin such as Edit Flow or PublishPress. You also might benefit from integrating a third-party project management tool like Trello.
Finally, you’ll also find more niche plugins to help with specific parts of running a multiple author site. For example:
- PublishPress Authors lets you assign multiple authors to one WordPress post.
- Simple Author Box lets you add front-end bylines for each author.
- PublishPress Checklists lets you add a pre-publish checklist.
- Extended Post Status lets you create custom statuses (or you can do so with Edit Flow/PublishPress).
Finally, if you haven’t launched your site yet, make sure to follow our guides on how to make a website or launch a blog to get started. If you implement these multi-author tips when configuring your site, you’ll be ready to go on day one.
Still have any questions about working with multiple authors on WordPress? Ask in the comments!


Very well explained. Basically is, as you said, to be organized with your team in terms of calendar and in the dashboard of WordPress.