Did you come across the annoying ‘413 Request Entity Too Large’ error while trying upload a theme or a plugin file using your WordPress dashboard? Don’t worry, you’re not alone.
This error is quite common among WordPress users who use affordable shared hosting plans to host their website. In this guide, we’ll show you how to fix this issue by yourself using a few different methods.
What Is ‘413 Request Entity Too Large’ Error?
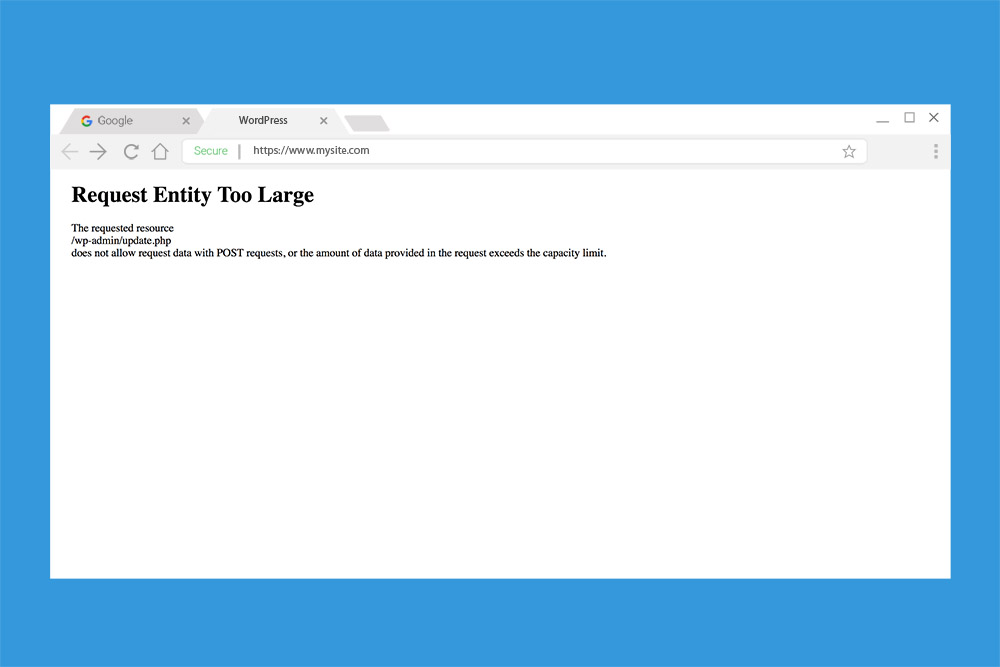
The ‘413 Request Entity Too Large’ error usually occurs in WordPress when you’re trying to upload files such as themes and plugin with larger sizes than the maximum upload size limits set for WordPress.
To avoid excessive usage, your web hosting provider sets limits on the sizes of files you can upload and the time your website is allowed to execute PHP scripts. Errors like ‘413 Request Entity Too Large’ occurs when you try to upload files or execute scripts beyond these default limits.
While these limits are set for your own good, it can often get in the way of your website development. In such cases, you can take matters to your own hands and fix it.
How To Fix It
You can fix this error by simply increasing the max upload size limits set for WordPress. Or, you can avoid the error altogether by using an FTP client app to upload larger files.
We’ll show you how these solutions work.
Method 1: Use An FTP Client App
WordPress is a software that comes with certain limitations. After all, it’s only a content management system. You need to use more advanced tools for performing heavy tasks like uploading big files.
An FTP client app is the perfect tool you can use for uploading larger files into your website and server. FileZilla and WinSCP are both great free FTP apps you can use to access your server.
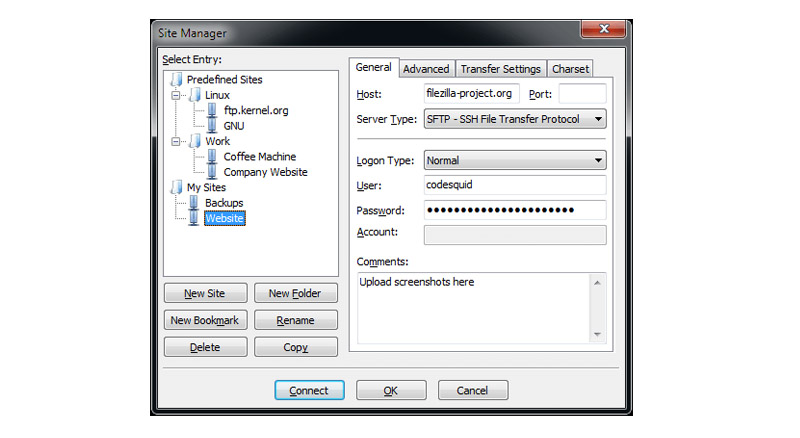
Download and install the software on your computer. Then use the FTP app to login to your server using the root access username and password given to you by your web hosting provider.
To upload themes and plugins, navigate to the WP-Content folder using your FTP app and simply drag and drop the files directly into the Themes or Plugins folder.
This way, you won’t be limited by any upload size limits.
Method 2: Use CPanel PHP INI Editor
Of course, using an FTP client won’t fix the problem. Especially if your site is managed by multiple authors, they may eventually run into the same error. You can fix this by increasing the default upload size limits for your website.
One of the easiest ways to increase your website’s max upload size limit is to create a PHP.ini file in your server with custom parameters that extend the default limits set by WordPress.
To do this, usually, you have to access server files and create the PHP.ini file manually. We’ll show you a simpler way to approach this process.
If you’re using a shared or a managed WordPress hosting service, then you’ll have access to CPanel. On your CPanel, you’ll find an app called PHP INI Editor under the Software category. This tool allows you to easily create and edit your PHP.ini file. Here’s how it work.
Step 1: Access CPanel
You can access your website’s CPanel by logging in to your web hosting account. Or, simply type CPanel at the end of your domain name (eg: yourwebsite.com/cpanel).
Enter the CPanel username and password given to you by your web hosting provider to login to the CPanel. These login details are usually included in the welcome email that you receive after signing up for a hosting account.
Step 2: Open PHP INI Editor
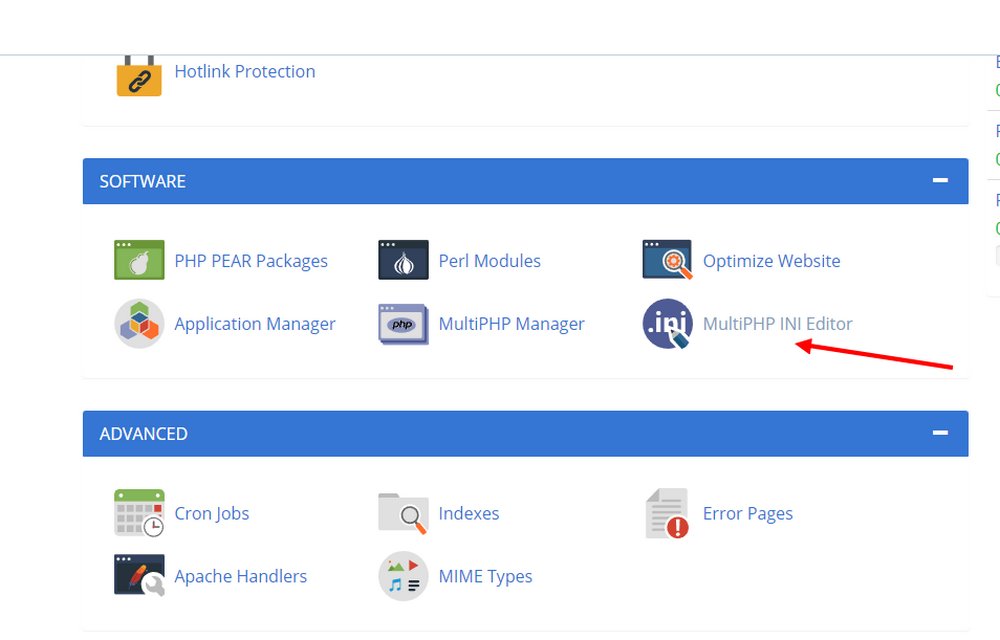
Find the PHP INI Editor in your CPanel. It can be found in the Softwares section of the CPanel.
Then open the app and choose your website from the list as the location.
Step 3: Customize The Parameters
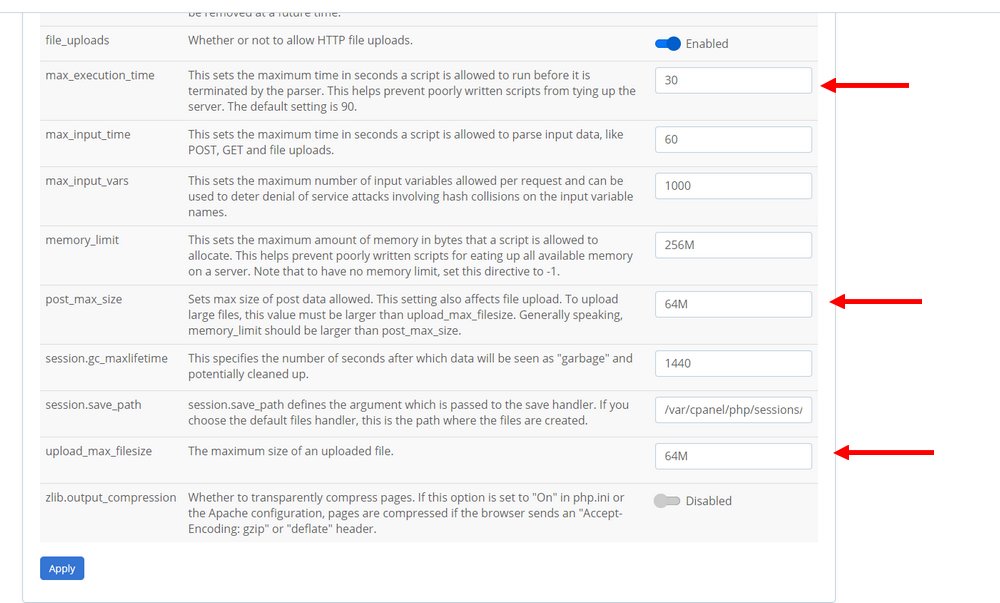
In the PHP INI Editor you’ll find all the default parameters set for your account. Find the following parameters in your editor:
upload_max_filesize
post_max_size
max_execution_time
Edit the values for these parameters by setting 64M for both upload_max_filesize and post_max_size. Set 300 for the max_execution_time parameter.
Remember to click Save once you’re done editing.
Note: Your CPanel may look slightly different from the one shown in the screenshots. Some the parameter names may also be slightly different in your PHP INI Editor.
Method 3: Edit .htaccess File
If customizing the parameters in the PHP.ini file didn’t work, you can try editing the .htaccess file using the same technique. Although, this requires editing the file manually.
Step 1: Access Your Server
In order to find the .htaccess file, you need to first access the website files hosted on your server. You can access your server using an FTP client app or using the CPanel.
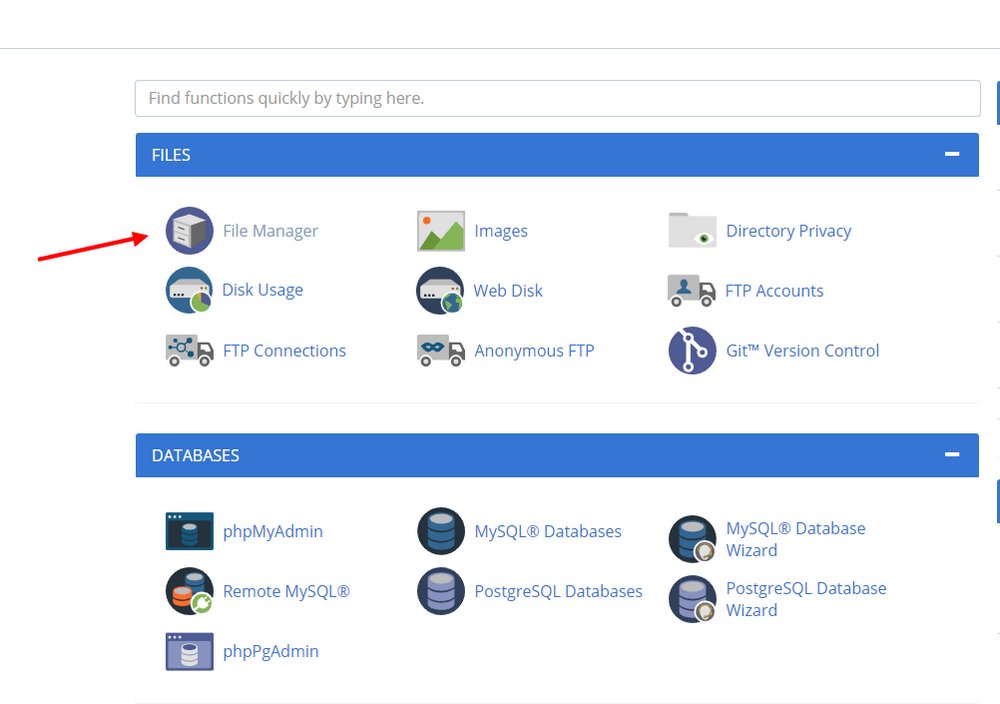
Follow the instructions we’ve provided in the previous methods to access your server. To access your server files in CPanel, use the File Manager app.
Step 3: Find And Edit .htaccess File
Once you’re inside the server, navigate to the public.html folder.
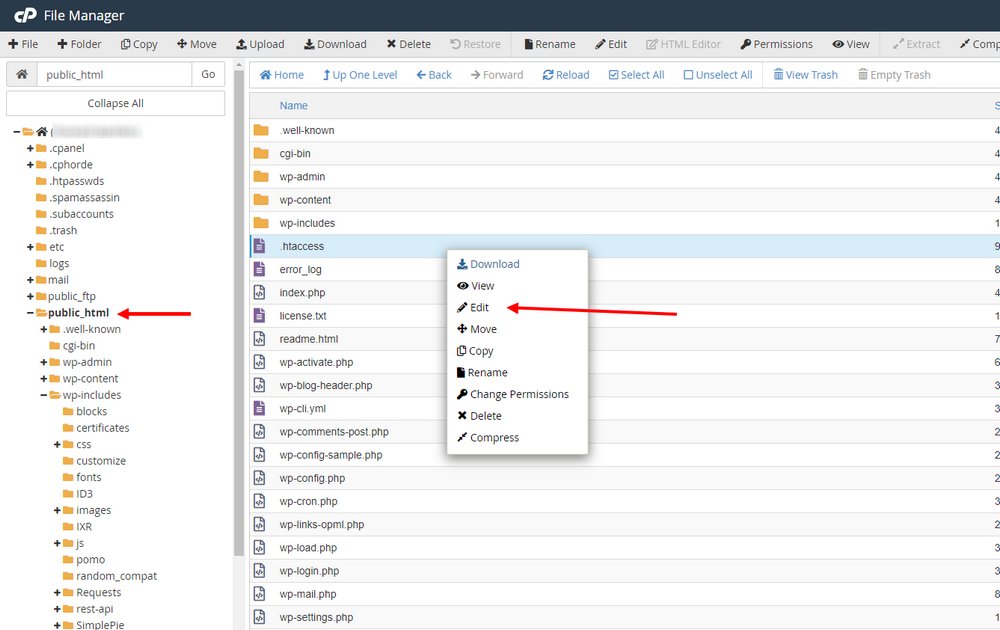
On this folder, you’ll find a file named .htaccess. Right-click on this file and choose Edit to customize the file.
Note: Always create a backup copy of the files before editing.
Step 3: Copy And Paste The Parameters
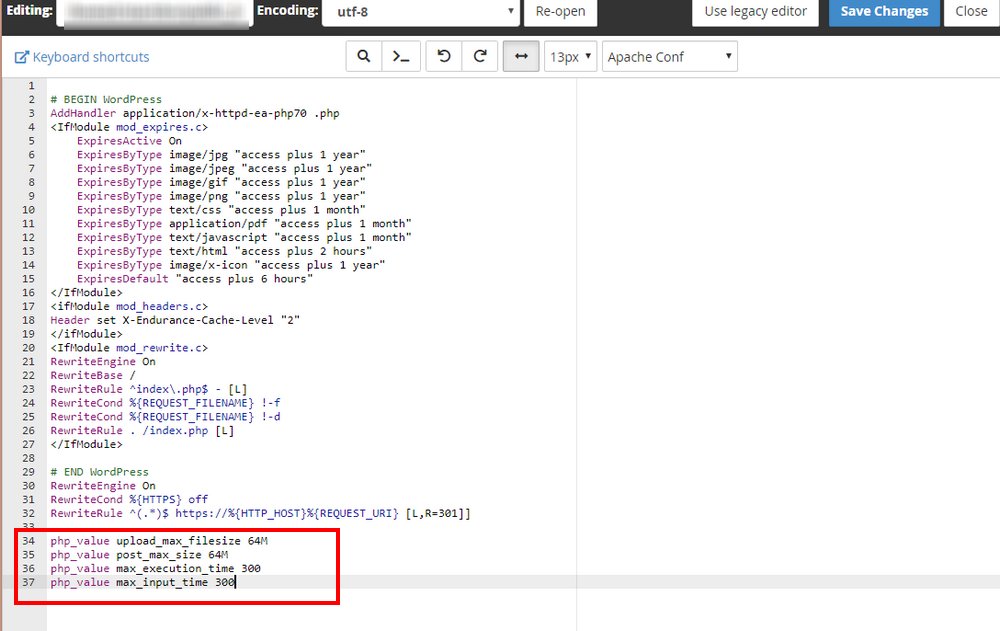
Copy the following parameters and paste them at the end of your .htaccess file.
php_value upload_max_filesize 64M
php_value post_max_size 64M
php_value max_execution_time 300
php_value max_input_time 300
Click Save to save the changes.
This will set custom values for your max upload size and execution time limits, allowing you to upload files of larger sizes.
In Conclusion
These methods should help you solve the error. Remember not to perform all these methods all at once. Try one solution at a time.
If you’re still encountering the error after following the above solutions, then you may want to contact your hosting provider and ask for their support since it may be a server-side issue. Or consider moving your website to a better managed WordPress hosting platform.


Leave a Reply