The WordPress core code is updated pretty regularly and in most cases you’re going to want to make sure you upgrade to the latest stable version as soon as possible. Using the latest version of WordPress ensures that you have access to all the latest features and any security holes that have been discovered since the last update have been patched.
However, despite extensive testing, it’s impossible to discover every bug and sometimes some do get through. More often, plugins don’t play nicely with the newer version of WordPress and it can take some time for plugin developers to catch up and release a new version.
For these reasons, you may wish to revert to an earlier version of WordPress until these issues are sorted out. The same is true if you install a new version of a plugin or theme and have a problem with it.
Usually rolling back versions should only be done temporarily until bugs are fixed and you can go ahead and update to the latest version again.
Before You Downgrade
Before you go ahead and downgrade the WordPress core code, you should be sure that’s definitely the best course of action. It’s normally plugins that cause bugs, rather than WordPress itself and if so, the problem can usually be resolved by deactivating the plugin causing the problem until an updated more compatible version is released.
If you’re sure it’s the WordPress core code that’s causing problems, or the plugin is vital to your site, or it’s a theme compatibility issue, then downgrading temporarily is probably your best option until the bugs are ironed out
Before you downgrade, it’s important to do a full backup of your site and database in case anything goes wrong. There are several plugins that can handle this for you.
Downgrade WordPress with WP Downgrade Plugin
The WP Downgrade plugin can handle the downgrade for you by forcing the installation of a specified WordPress release.
The plugin runs just like the normal WordPress installer so it’s very easy to use. You simply choose the version of WordPress you want to install and it’s downloaded directly from wordpress.org and installed as normal. As always, remember to do a full backup before using this plugin!
Check which version of WordPress you’re currently using. You can see this information in your dashboard:

In most cases you should downgrade to the last update before the one you installed. You can see all the version release numbers at the WordPress Release Archive.
Find the version you want to downgrade to and type it into the settings on the WP Downgrade plugin:
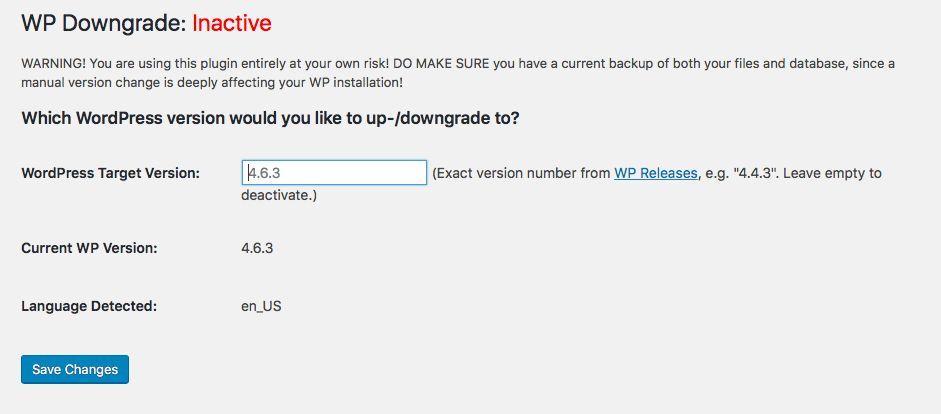
You can then click the “Save Changes” button to run the installation of the previous version of WordPress.
Downgrading WordPress Manually
If you’d rather handle the process manually, or your site is so messed up that you can’t even get into your admin panel, you can follow these instructions to downgrade without the help of a plugin.
1. Download WordPress
you’ll need to grab a copy of the WordPress version you were using before things went wrong. You can download every version of WordPress from the official release archive. Normally you’ll only want to go one step back and download the version just before the one you installed last. If you install an older version of WordPress, you could be opening up your site to security flaws.
2. Deactivate Plugins
You should then deactivate all your plugins from the Plugins page on your dashboard and logout of WordPress:
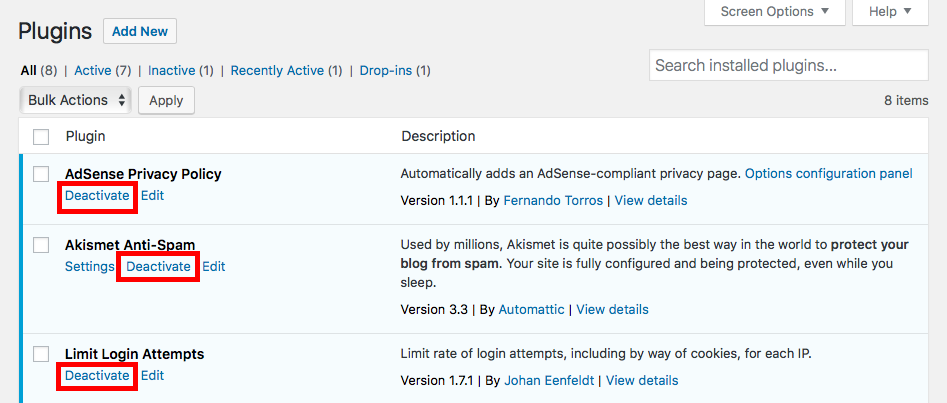
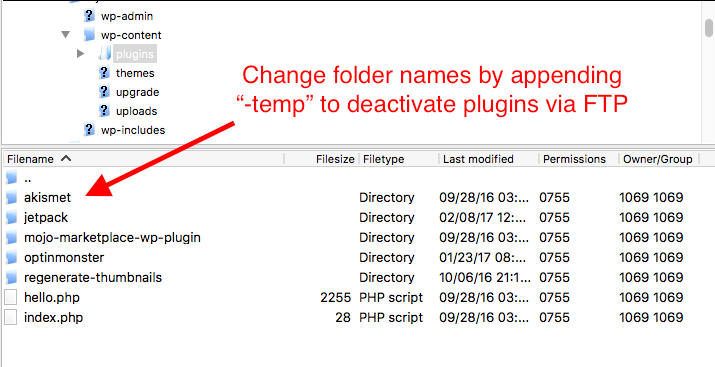
If you can’t log in to your site, don’t worry – you can complete the next steps without deactivating the plugins and all will probably be fine. If a plugin is causing issues, you can deactivate it by temporarily changing the plugin folder name via FTP:
3. Delete Core WordPress Files and Upload Fresh Copy of WordPress
Use an FTP client to access your WordPress site on the server and delete the wp-admin and wp-includes folders only. You can then upload the contents of the WordPress version you downloaded (except the wp-content folder), which will copy over all the existing files
Make sure you do not upload the contents of the wp-content folder as this could affect your site content.

4. Finishing the Re-installation
WordPress is then essentially reinstalled as an older version and you can login as normal. You’ll see a message saying you need to update your database (just as you would with a normal upgrade) and assuming this completes normally, you’re ready to go.
You may also need to rebuild your permalinks if you’re getting 404 errors on your posts after reinstalling WordPress – you can find this option in Settings > Permalinks. Just select a different permalinks option in your settings, save the change, and then revert back to your original option and save again. This should sort out the problem.
5. Disable Automatic Updates
The final step is to disable automatic WordPress updates to stop WordPress from upgrading itself again. You’ll want to disable all automatic updates until you’re sure everything is compatible and working properly again. You can then upgrade manually and turn auto updates on again when you’re ready.
You can also disable auto updates by editing your wp-config.php file to include the following line of code:
define( 'AUTOMATIC_UPDATER_DISABLED', true );
You can also use the Advanced Automatic Updates plugin to have easier control over automatic updates of the core code, plugins, and themes on your WordPress site.
Downgrading WordPress Plugins and Themes with WP Rollback
Generally, WordPress plugins are not as thoroughly tested as the core code, so it is much more likely that you may have a problem when upgrading to a new version of a plugin. This is often due to conflicts with other plugins or incompatibilities with the theme you’re using. Many themes now have plugins embedded into their code so if you install the same plugin separately, it can also cause problems.
If you need to rollback to a previous version of a plugin or theme due to a software bug, make sure you let the developer know about the bug so it can be fixed for the next release.
The easiest way to downgrade plugins and themes is by using the WP rollback plugin.
Using this plugin is very simple. You simply install it and use the interface to search for the plugin you want to rollback. You can then choose the version you want to install and re-install the plugin in one click.
Of course as with any major site updates, make sure you backup everything first and it’s best to test out on a local version of your site or staging environment before you do anything on the live site.
As with the WordPress core code, you’ll normally only want to roll back to the previous release as it can introduce security problems to install old plugin versions.
This plugins also only works with plugins and themes that are in the WordPress repository. If you’re using a premium plugin or theme, or one downloaded from another repository such as Github, you’ll need to download the older version of the code and install it manually.
Before you rollback a plugin or theme, you should deactivate automatic updates in WordPress. This will stop the plugin or theme from updating itself again until you’re sure the problems you were having with the latest version are fixed. You can do this with the Advanced Automatic Updates plugin mentioned earlier, or you can add the following lines of code to your theme’s function.php file:
add_filter( 'auto_update_plugin', '__return_false' );

add_filter( 'auto_update_theme', '__return_false' );
How to Rollback a WordPress Plugin
After you’ve installed the WP Rollback plugin, go to Plugins in your WordPress admin panel and you should see a new link next to “Deactivate” and “Edit” – “Rollback”. If there’s no rollback link, it means the plugin couldn’t be found in the WordPress repository and you’ll need to do a manual install of an earlier version of the code.

Click the Rollback link and you’ll be taken to a screen where you can choose the version of the plugin you want to rollback to. You’ll also see a note letting you know which version you have installed currently:
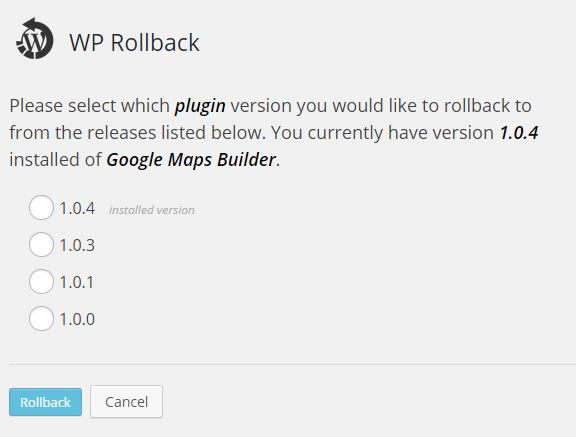
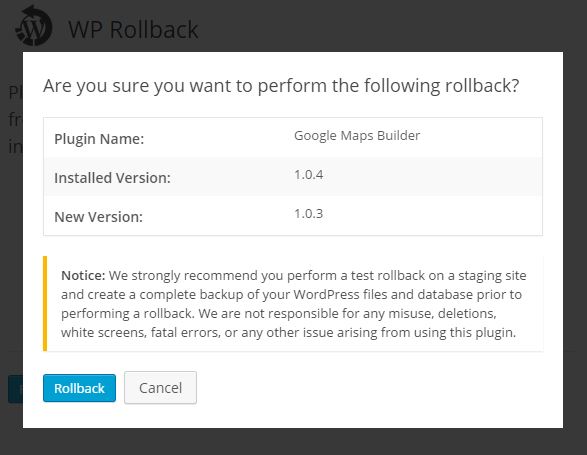
Once you select the version and click the Rollback button, you’ll get a confirmation screen reminding you to backup. If you’ve not backed up yet, go and do it now!
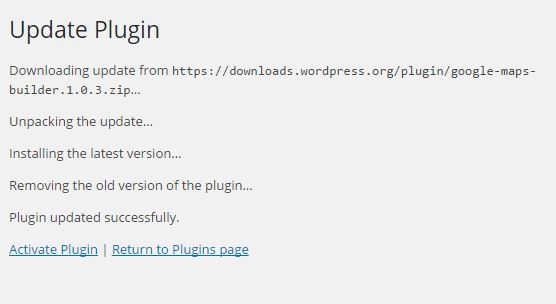
You will then see a message that looks like the standard update screen, which should confirm that your plugin has been “updated” to the version you selected:
How to Rollback Themes
The procedure for installing a previous version of your theme is very similar to rolling back plugins. Go to Appearance > Themes in your dashboard and click “Theme Details” of the theme you want to rollback. You’ll see a pop-up with buttons for “Activate”, “Live Preview” and “Delete”. If the theme is available in the WordPress repository, you should have an additional button, “Rollback”.
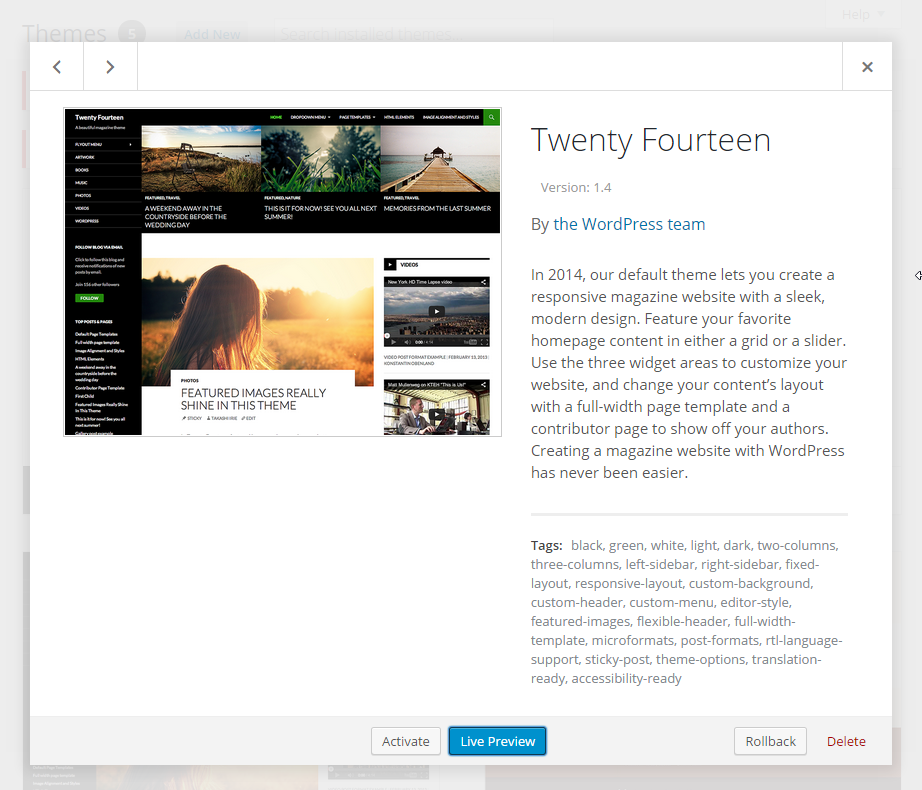
Click the rollback button and you’ll be taken to a screen that allows you to see what version you have installed currently and choose a different version to install:
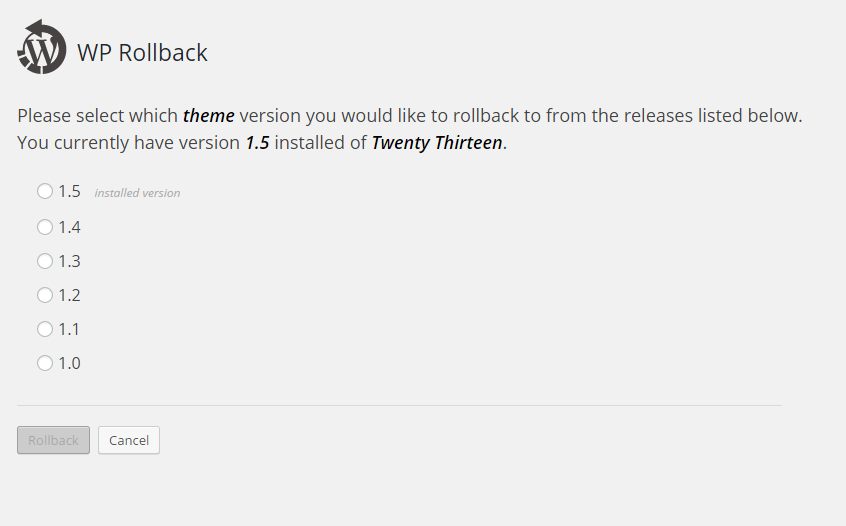
Just as before, you’ll get a confirmation theme checking if you really want to rollback, and then the standard WordPress theme update message.
How to Downgrade Plugins and Themes Manually
If you downloaded your theme or plugins from somewhere other than the WordPress repository, you’ll need to perform a manual rollback.
1. Backup Your Site
Start by making a full backup of your whole WordPress site including all the content and the database.
2. Download Previous Version of Plugin or Theme
You’ll then need to download the older version of code for the plugin or theme you want to downgrade. You can usually get this from the developer website or from the repository you originally downloaded it from. Look for a link to “all versions” or “older versions”.
3. Rename Your Plugin or Theme Folder
Once you’ve downloaded the .zip file, log into your site with FTP and navigate to your wp-content folder. Go into either the themes or plugins folder, depending on what you’re wanting to rollback.
Change the name of the folder for the theme or plugin that you want to downgrade. I normally add “-temp” to the filename. This makes it easy to restore the original version again if something goes wrong.
4. Install the Previous Plugin or Theme Version
Now go back into your WordPress admin panel.
If you’re installing a Plugin, go to Plugins > Add New and click the “Upload Plugin” button.
If you’re installing a theme, go to Appearance > Themes, click the “Add New” button, and then the “Upload Theme” button.
You can then find the plugin or theme .zip in the location you downloaded it to and let WordPress run the install as normal.
Activate the plugin or theme and check that everything is working properly. If you’re confident that everything is ok, you can then go back into your ftp client and delete the folder for the theme or plugin that you renamed earlier.
This procedure should work in most cases if the plugin hasn’t made significant changes to your database. If you do get errors then you may need to restore your entire WordPress database. This is why it is so important to create a new backup before you carry out any updates.
Hopefully any problems should be sorted once you’ve restored your site from backup but if you come across this situation it’s best to contact the developer of the plugin for advice on how to proceed.
Summing Up
In general, using outdated versions of WordPress as well as plugins and themes should be avoided, but in some cases this is the only way to get your site up and running again if you run into problems after updating to the latest version.
If you do decide to downgrade, you can follow the steps I’ve explained here, which are pretty straightforward, but do make sure to backup beforehand. Many catastrophic WordPress problems can be avoided as long as you have a working backup to restore from.
If you use a lot of plugins on your site and frequently have issues with upgrades and errors, you might consider moving to managed WordPress hosting. These services will handle all the updates for you and easily restore your site if anything goes wrong so that downtime is minimized.




A plugin to automate this would be awesome. Thanks for recommending WP rollback plugin. I haven’t heard or tried it. Is it a free plugin?
WP Rollback works very well, for plugin rollback. It does not make sense to downgrade WP core.
Great explanation and help! Thanks! Saves me the grief of dealing with an upgrade when I’m not ready.
Thanks it really helped me
Awesome plugin! Went back one version and solved all my WP problems! Videos and a “masonry gallery” on my homepage didn’t stretch out, now they do again! Wanted to donate but the donate button doesn’t seem to work anymore.
i am not seeing the rollback feature for my selected theme. i need to undo the them update for Spangle Lite