ManageWP is a powerful tool that lets you manage multiple WordPress sites in one dashboard. The company was founded by Vladimir Prelovac in April 2010 and accepted its first users a few months later. Around 100,000 WordPress sites were being managed with ManageWP when it had its worldwide launch in January 2012.
Today, ManageWP is powered by a team of 29 people and over 10,000 active users who manage over 280,000 WordPress sites around the world. Over 1 million core updates and over 50 million plugin and theme updates have occurred inside the ManageWP dashboard since its launch in 2012.
It’s a powerful tool built by an innovative company that does its best to push out newer and better updates on a regular basis. Its biggest update to date is ManageWP Orion, the new and improved version of ManageWP.
What is ManageWP Orion and How Does it Differ from ManageWP Classic?

ManageWP Orion is ManageWP 2.0. It’s an entirely new beast rather than a simple update. The main difference is the infrastructure it uses. Classic used a WordPress installation with a master plugin. Orion uses an in-house solution hosted by Amazon Web Services.
AWS uses cloud servers, which was ManageWP’s primary reason for making the switch. Cloud servers have the ability to scale when its base resources are used up, making it easier for them to handle reading and writing to the over 280,000 sites managed with ManageWP.
The new infrastructure also gave the team a chance to introduce new scripts and technologies, such as AngularJS, NodeJS and Symfony, that make Orion faster and more efficient to use.

The other major difference between Classic and Orion is the fact that the cloud servers from AWS enable ManageWP to store your backups in the cloud. Classic, along with popular backup plugins, had to rely on the site’s web server for backups.
The problem with this occurs during the process of creating a backup. Using the site’s own server uses valuable resources, which can have a negative impact on site speed. It also makes it difficult to back up large sites.
ManageWP’s used its new cloud-based infrastructure to completely redesign the way Orion handles backups. You’ll start with an initial backup. When you create a backup after that, the tool will simply act as another visitor to your site to query files and databases.
Basically, it’ll only backup the changes you’ve made since the previous backup. If the initial backup is 500MB, it’ll only backup the 5MB of changes you made after creating the initial backup rather than backing up the same files over and over again and creating a 500MB file every time.
The idea behind this is to make backups quicker and more reliable. Here are a few percentages and numbers ManageWP has collected from their own tests:
- 97% success rate when creating backups as opposed to the 50-80% success rate when creating backups with ManageWP Classic and popular backup plugins.
- 90% success rate when restoring sites from backups.
- Double the success rate when creating clones.
Orion uses an off-site storage system to store your backups to save on resources and to minimize the risk of creating a security flaw. You can also connect your account to a third-party storage service, such as Google Drive, AWS S3, OneDrive or Dropbox, if you want to keep copies for yourself.
You can do a lot with ManageWP Orion, so let’s get into it.
Adding Websites to the ManageWP Orion Dashboard
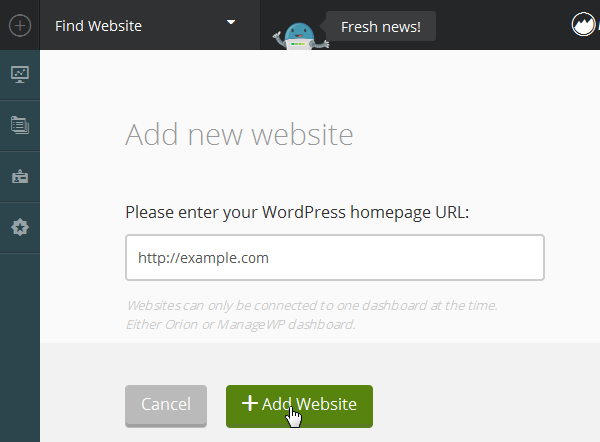
Adding a website is easy with the ManageWP Orion dashboard. When you first create an account and sign in, all you need to do is click the Add Website button.

Enter the URL of the website you want to add in the textbox, and click Add Website.
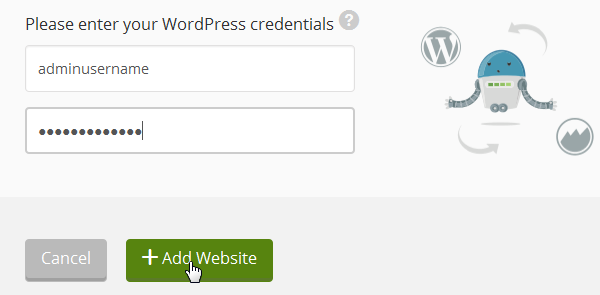
Enter that site’s admin username and password, and click Add Website.
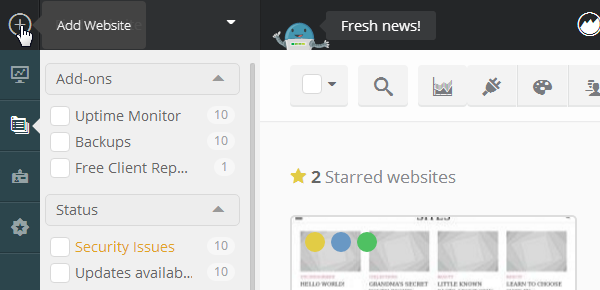
Adding a website to the dashboard installs the ManageWP Worker plugin in the WordPress installation of that website. If you ever need to add another website, use the + symbol in the upper, lefthand corner.
The ManageWP Orion Dashboard
The ManageWP Orion dashboard uses more visual cues to tell you what states your websites are in, and the new dashboard uses 30% less clicks to perform the same tasks.
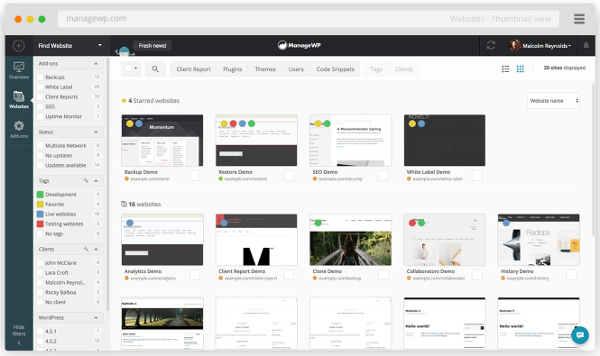
The top-right corner contains three elements. The far left element is a Sync button, which retrieves the latest information about your sites. Use this button to sync them on demand.
The middle element, the one that contains your name and Gravatar image, contains a drop-down menu that gives you access to the Settings page, Billing page and a number of additional features.
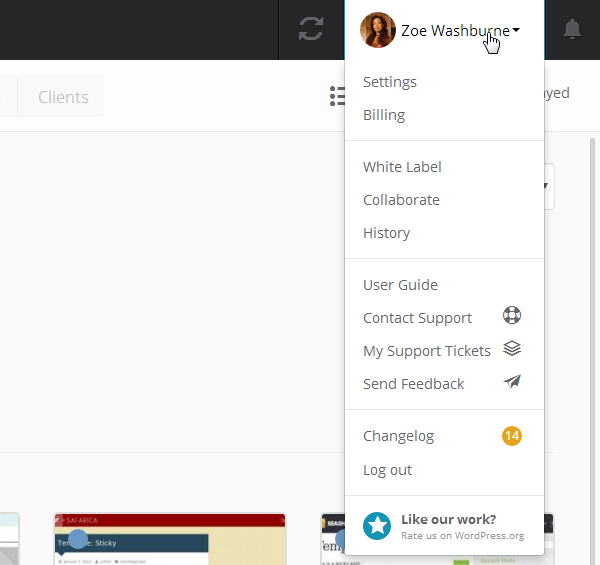
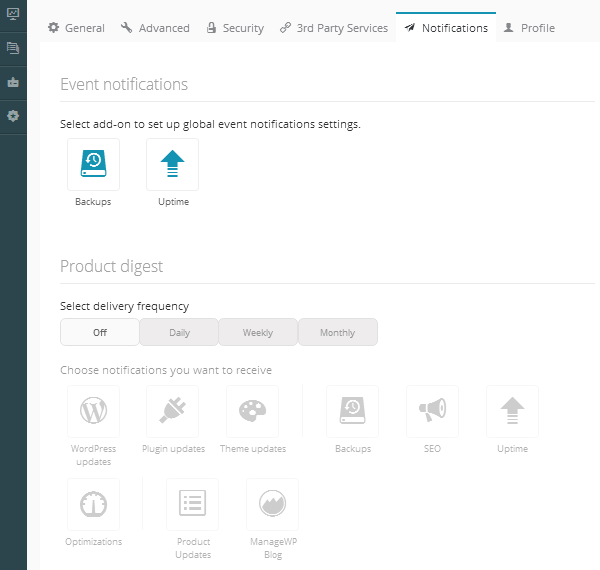
The third element is a simple notification bell. You can change which types of notifications you receive and how often you receive them by going to Settings > Notifications.
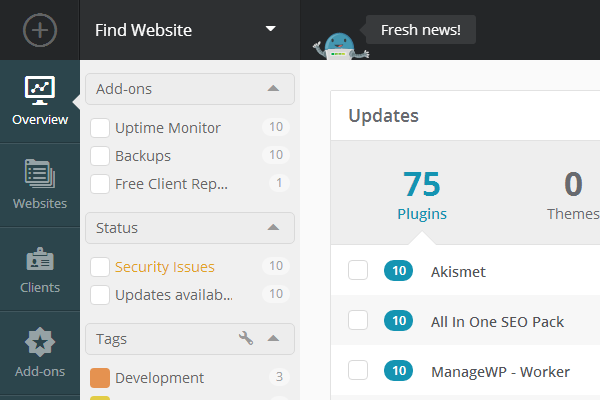
The left side contains different ways for you to view the websites you’ve connected to your account.
The Updates Panel
The most useful part of the Overview tab is the Updates panel.
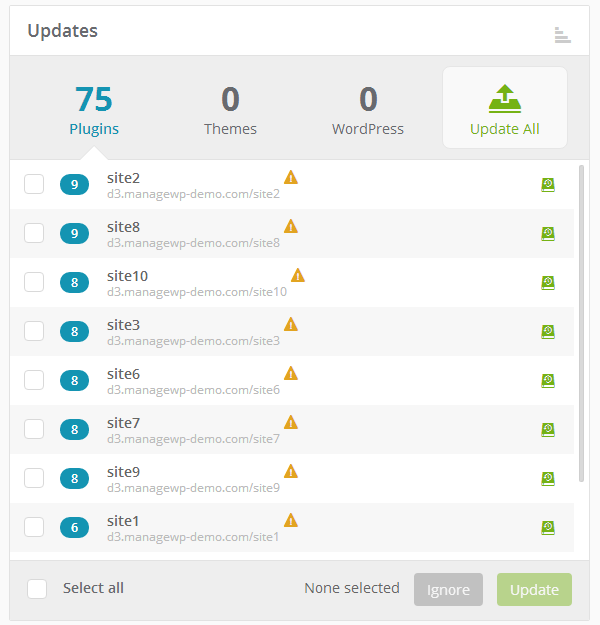
This panel lets you see which plugins, themes and WordPress core files need to be updated as well as which websites need the updates. You can click Plugins, Themes and WordPress to switch between each tab in the panel.
You can click on each individual site to see exactly which plugins and themes need to be updated.
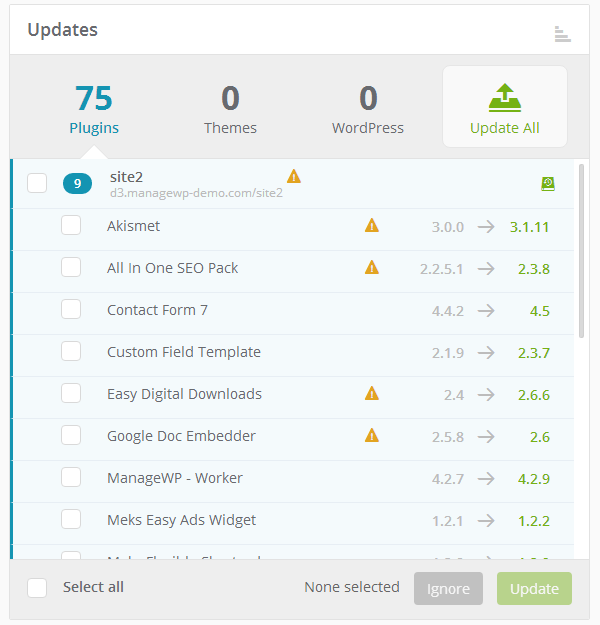
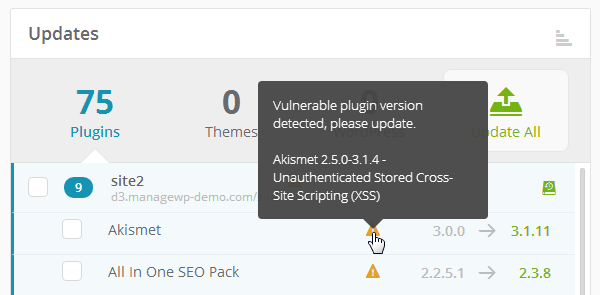
The orange warning triangles are meant to alert you when a plugin, theme or core file has a vulnerability.
The green hard drive icon lets you know a backup has been created for that site. It also lets you know when the backup was created if you hover over it.
![]()
You have a few different options in terms of performing updates:
- Click the Update All button to update all plugins, themes and WordPress core files on all sites.
- Select individual sites, and click Update.
- Click on an individual site, select the plugins, themes and WordPress core files you want to update, and click Update.
The Rest of the Overview Tab
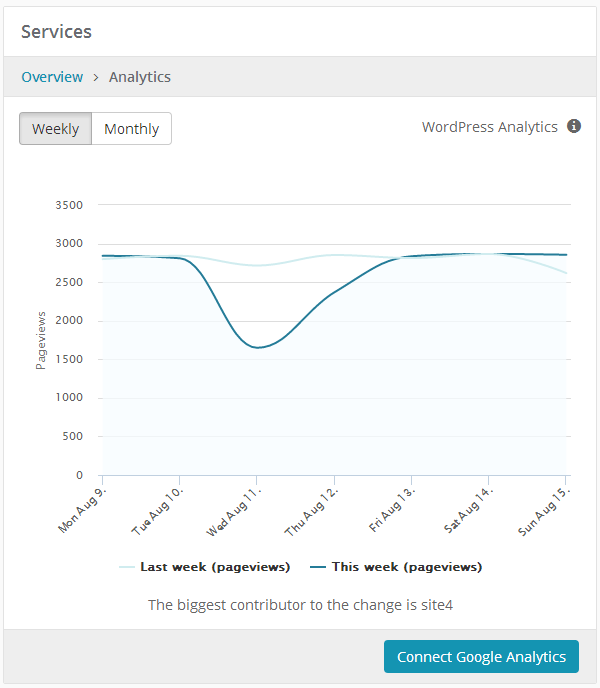
The rest of the Overview tab is fairly straightforward. There’s a Services panel that gives you quick access to overviews of your Backups, Uptime results, SEO results and Analytics.
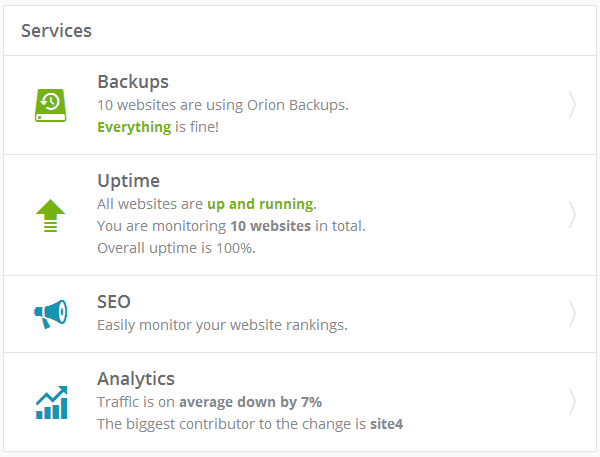
When you click on one of the services, you’ll find a basic overview of how your sites are performing.
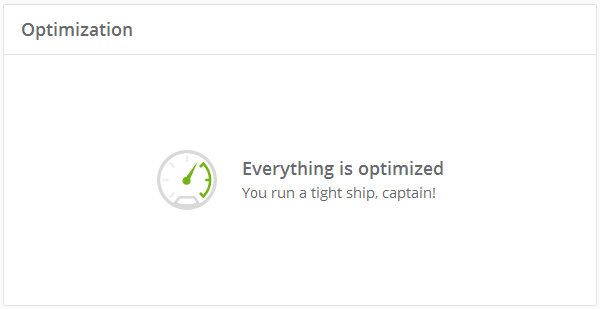
There’s an Optimization panel that lets you know how optimized your websites are.
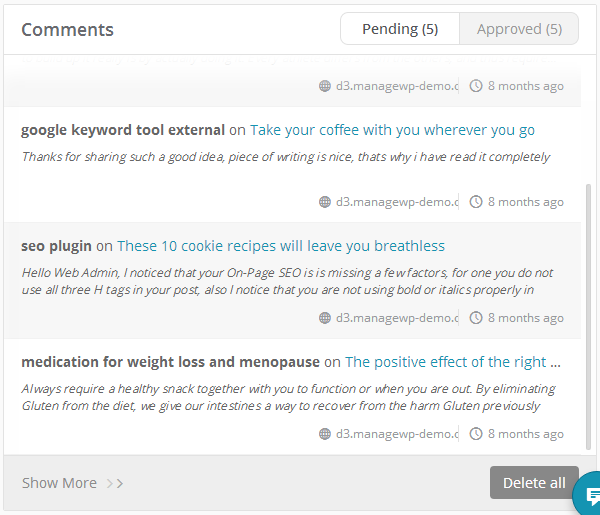
The last panel gives you a simple way of managing comments.
The Websites Tab
The Websites tab contains a number of different visual cues that let you see what states your sites are in with a single glance. You can “star” specific websites so they display at the top of the page.
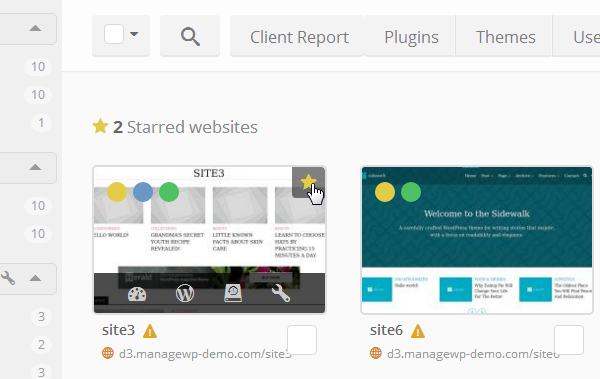
You can also tell when a plugin has a vulnerability by looking for the same orange warning triangle you saw in the Overview tab. Each website also has a wire globe next to it. This globe will be an orangish brown color when updates are available for a site.
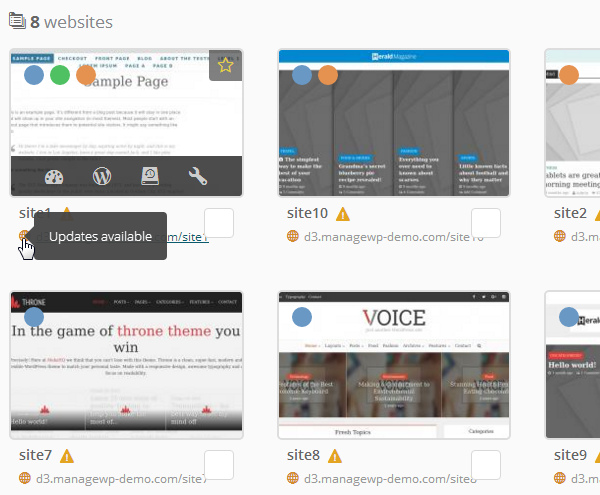
It’ll be green when everything is up to date.
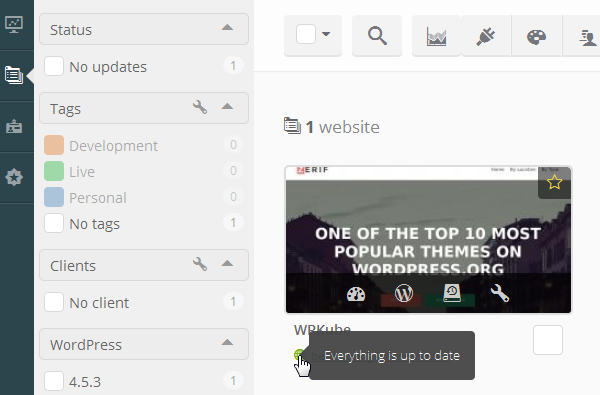
Tags
You can also create tags to label the sites you manage by type, which gives you a visual indication of what each website is for and whether it’s live or in development. All you need to do is look for which colors it’s tagged with.
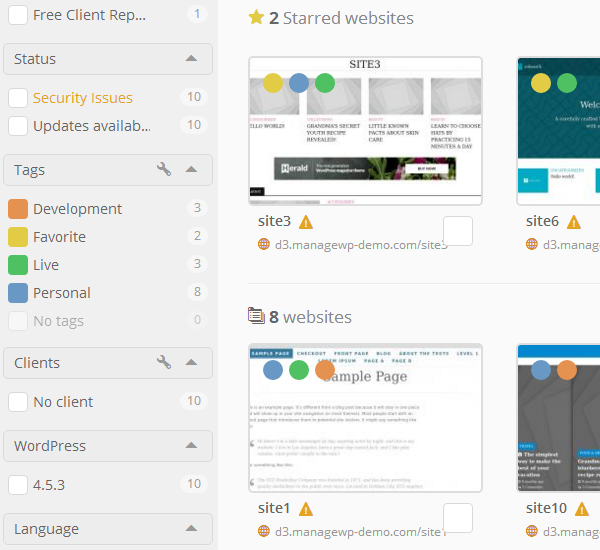
If you want to create your own tags, all you need to do is click the wrench icon associated with the Tags heading in the sidebar, and click Create Tag.
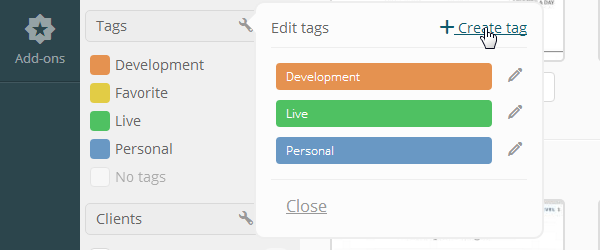
You can enter a name and select a color for your tag from there.
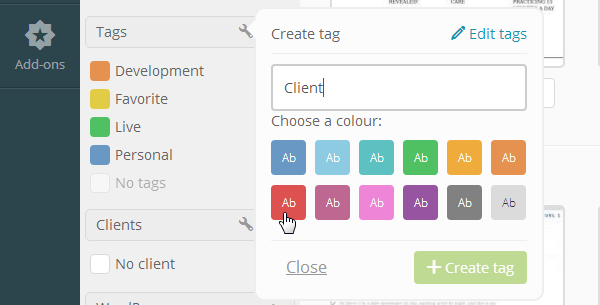
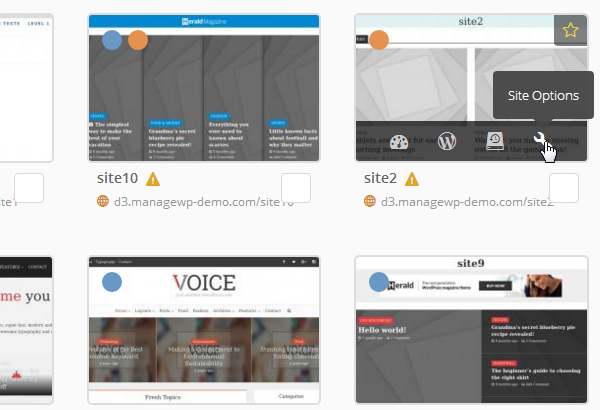
If you want to assign a new tag to a site, hover over it, and click the Site Options wrench icon.
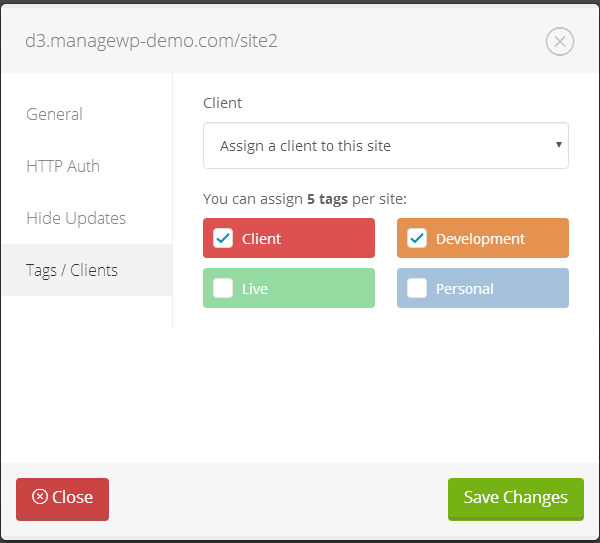
Open the Tags/Clients tab, and assign or unassign whatever tags you want to and from that particular site.
Clients
You can also see how to assign new clients to sites in the image above. This is a feature for professional WordPress businesses who develop and manage client sites.
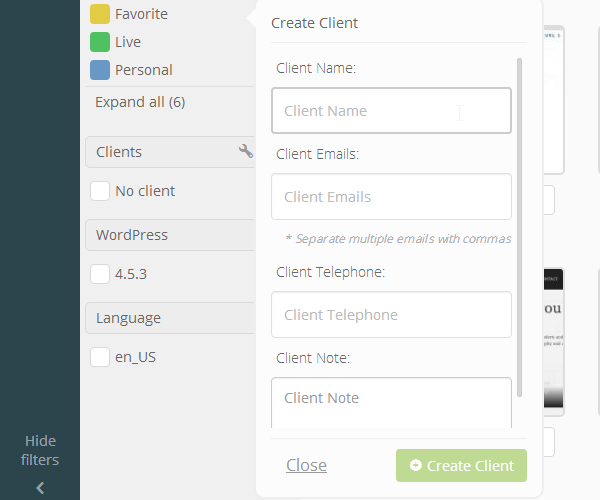
If you want to create a new client, click the wrench icon associated with the Clients heading in the sidebar, enter your client’s information, and click Create Client.
Other Dashboard Elements
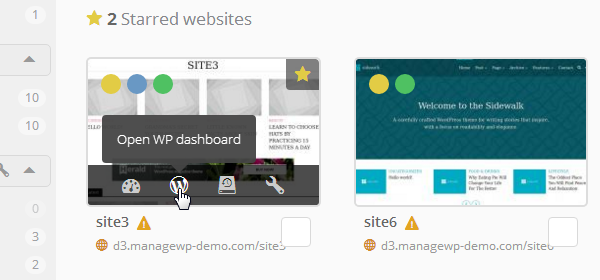
You can also hover over any site and click the WordPress logo to access that site’s WordPress admin dashboard.
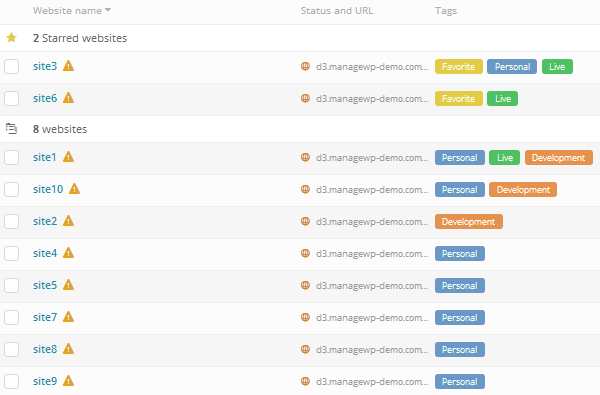
Lastly, you can change how your sites are displayed. The previous images used the Thumbnail View display setting. Here is the List View display setting.
Website Dashboard
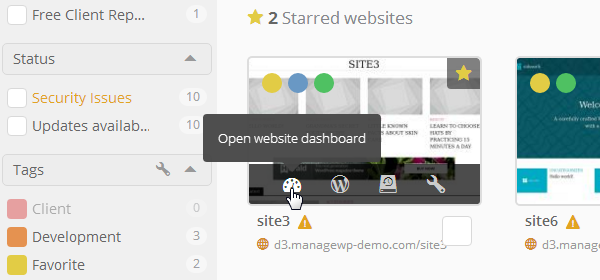
Every website has its own individual dashboard. Hover over a specific website, and click the Open Website Dashboard icon to open its dashboard.
The website dashboard page is similar to the Overview tab.
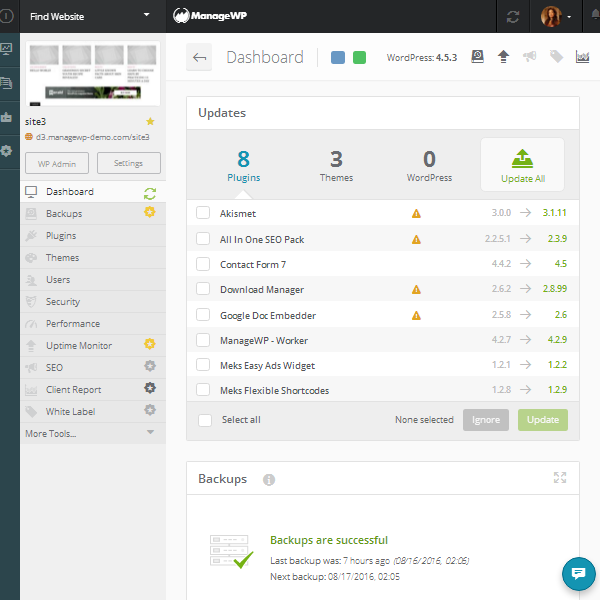
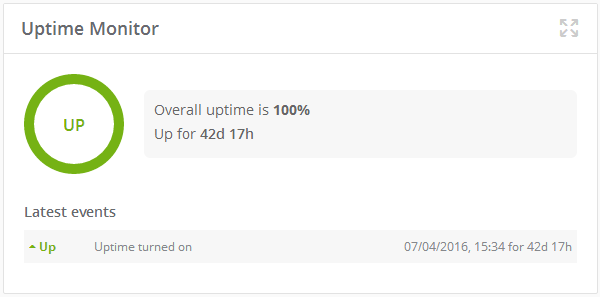
The image above shows you how you can manage plugin, theme and WordPress core updates as well as backups, but you can also view your site’s uptime performance using the Uptime panel, but only if you have the premium add-on activated.
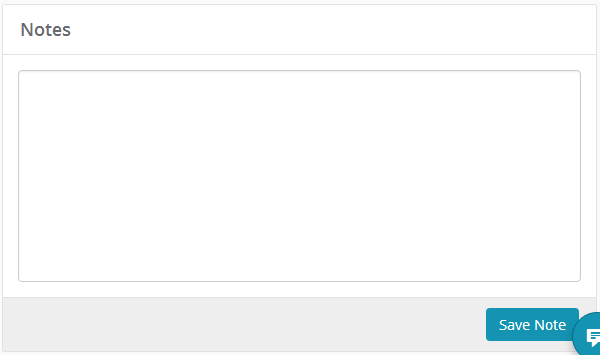
The Optimization, Analytics and Comments panels are also here. They’re joined by an SEO panel that lets you monitor the site’s ranking when you activate the premium add-on. They’re also joined by a Notes panel that lets you add any reminders and work diary entries you have for a particular site.
Backups
There are a number of additional tools you can access using the sidebar in the website dashboard.
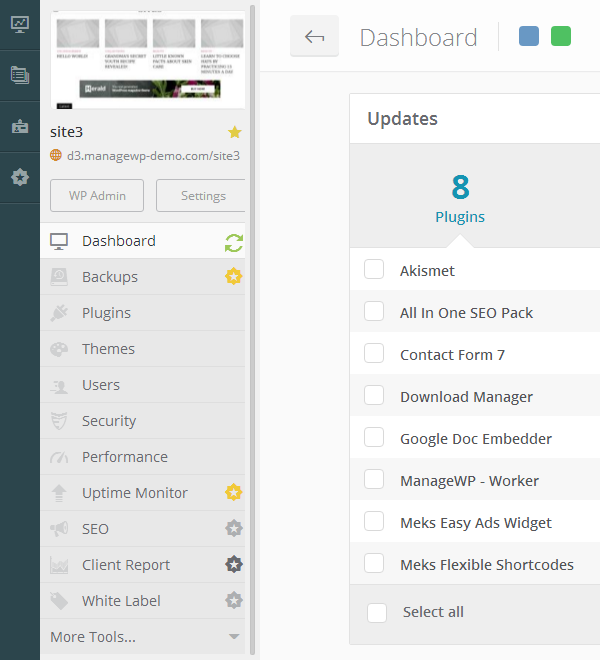
The first tool is the Backup tool. Every free account comes with a monthly cloud backup, which includes off-site storage, a one-click restore feature and the ability to exclude files and folders. Here’s what you’ll have access to if you activate the premium backup add-on for your site.
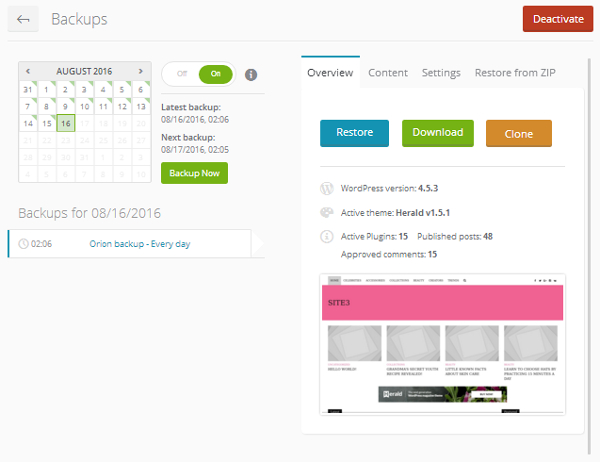
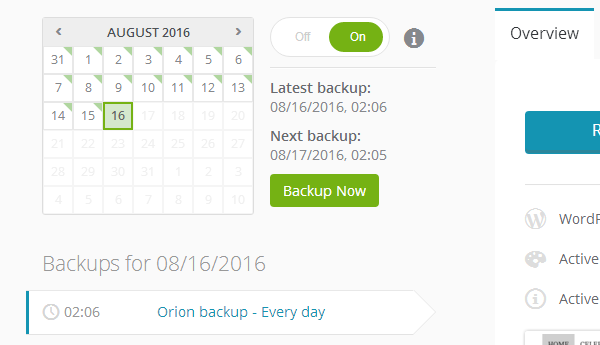
The first section lets you turn automatic backups on and off. It also indicates which day(s) of the month a backup has occurred on by inserting a tiny green arrow in the top-right corner of the day. You’ll also notice a Backup Now button, which allows you to back up your site on demand.
The other side has three buttons, one labeled Restore, one labeled Download and one labeled Clone. These are fairly self-explanatory, but they essentially enable you to restore your site with a backup in one click, download backups for your own safe keeping and clone your site.

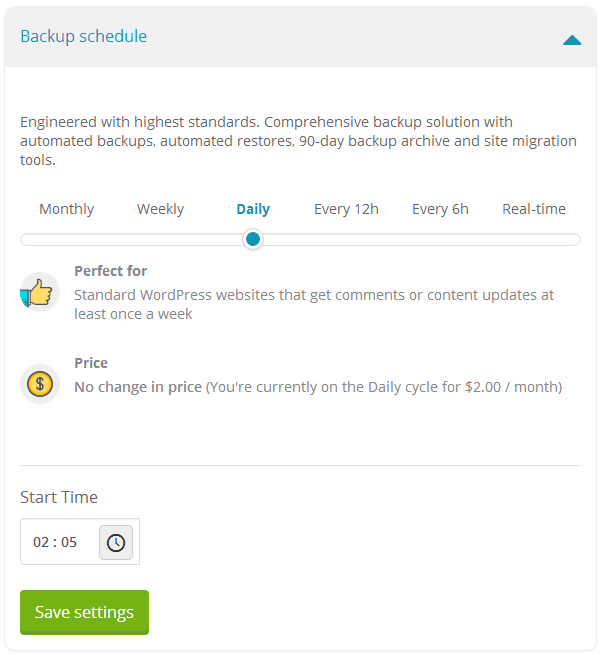
You can change your backup settings by selecting how often they should be conducted, which region they should be stored in, which content to include and more.
Plugins & Themes
The Plugins and Themes tools can be pretty useful. They let you add new plugins and themes, activate them, deactivate them, delete them, and update them.
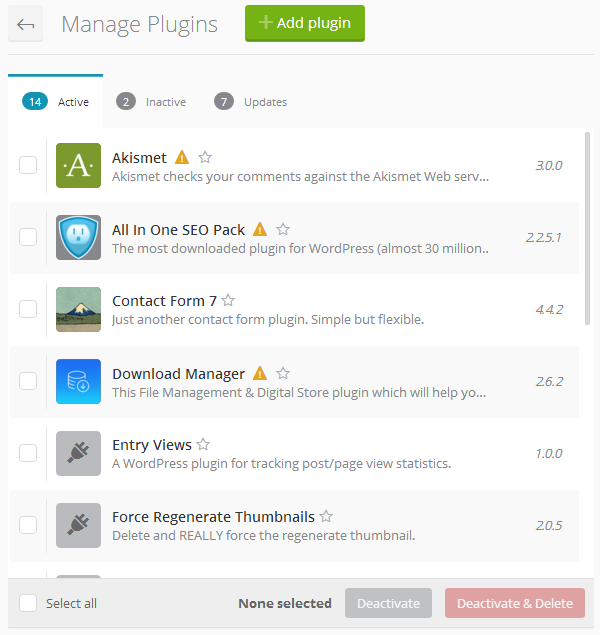
The orange warning triangle makes another appearance to let you know when a plugin or theme has a vulnerability, and the “star” feature is back to let you prioritize certain plugins and themes.
Users
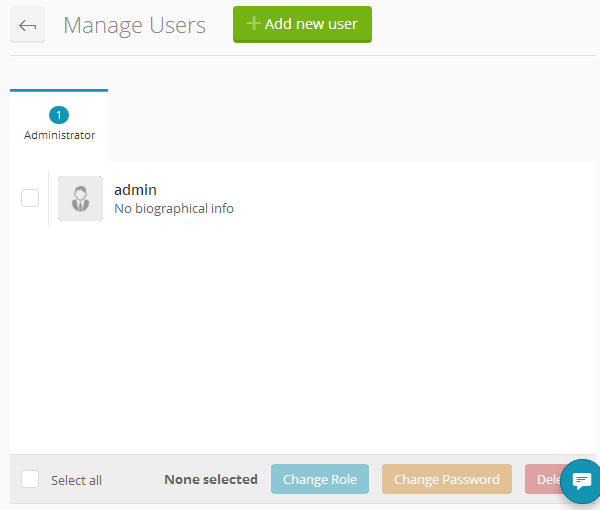
The Users tool lets you add new WordPress users and manage current ones.
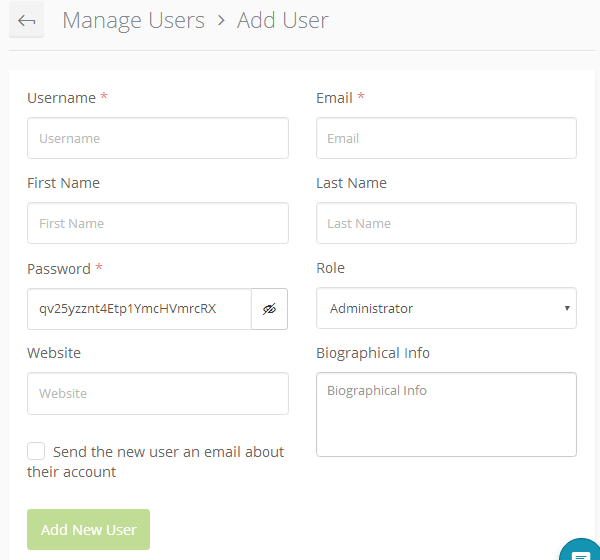
The Add New User screen is similar to the one you’re used to in the WordPress dashboard.
Security
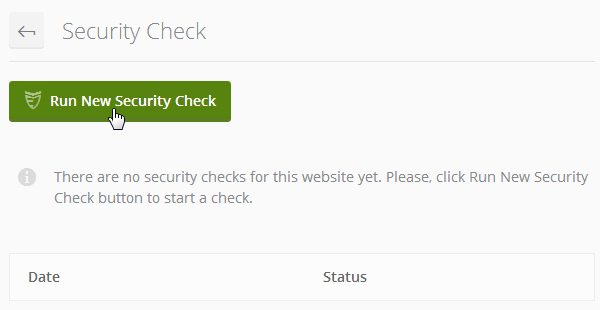
The Security tool lets you perform a security check on your site using Sucuri. All you need to do is click the Run New Security Check button at the top of the page.
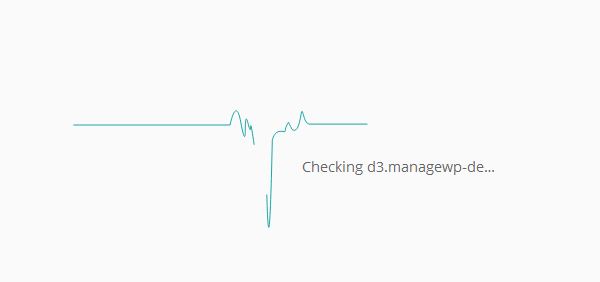
It uses an animation similar to a heart monitor to let you know the check is running.
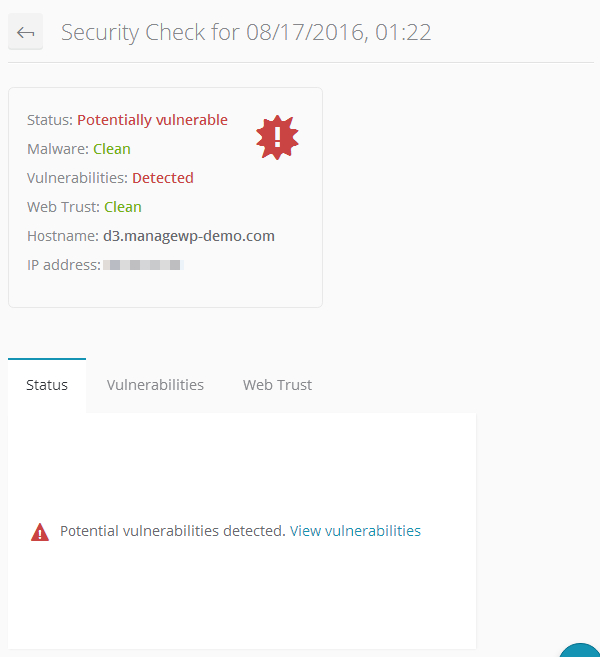
It gives you an overview of how secure your site is when it’s finished.
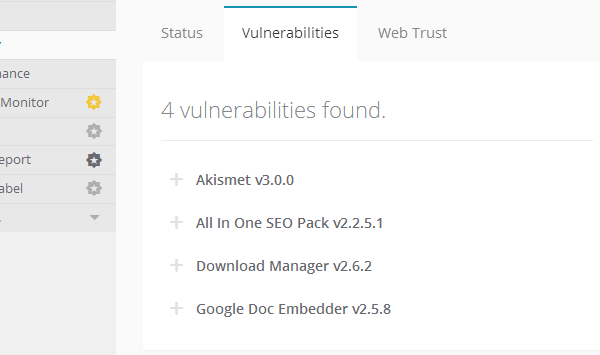
If your site has vulnerabilities, click over to the Vulnerabilities tab to see what they are.
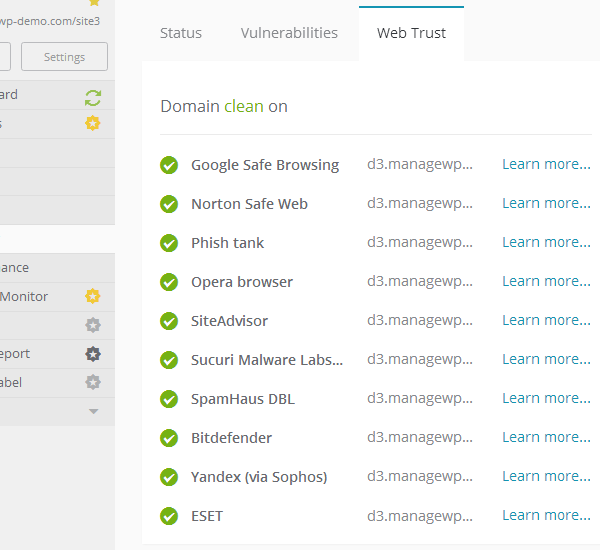
The Web Trust tab tells you how certain sites and services view your domain.
Performance
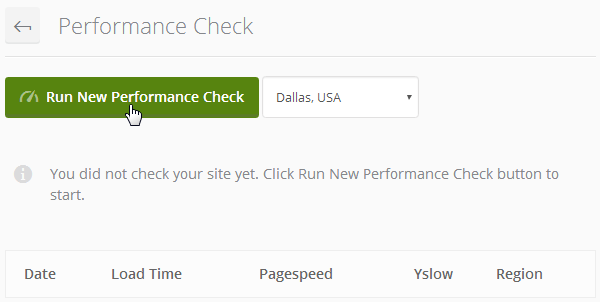
The Performance tool lets you see how your site is performing when tested with various datacenters in various locations around the world. All you need to do is click the Run New Performance Check button at the top of the page.
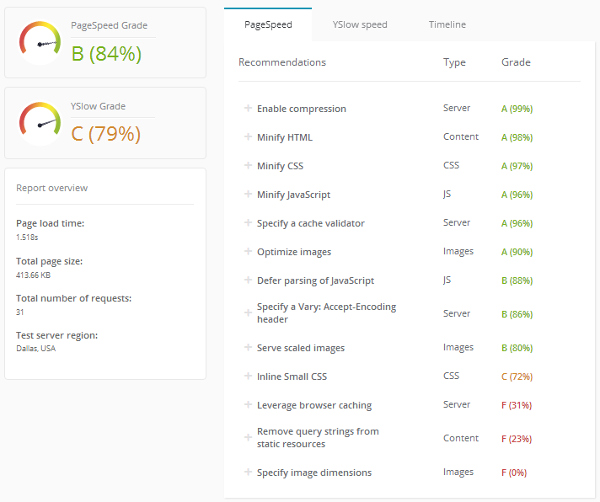
Here are a few of the results you’ll see after your performance check is over.
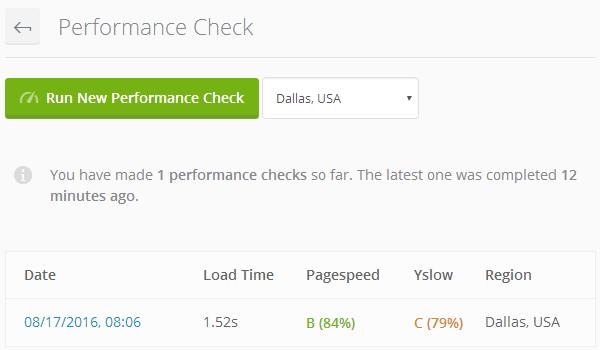
The Performance Check home screen keeps a record of the performance checks you’ve conducted over time. You should see a basic summary of the results from your first performance check when you return to the home screen.
Uptime Monitor
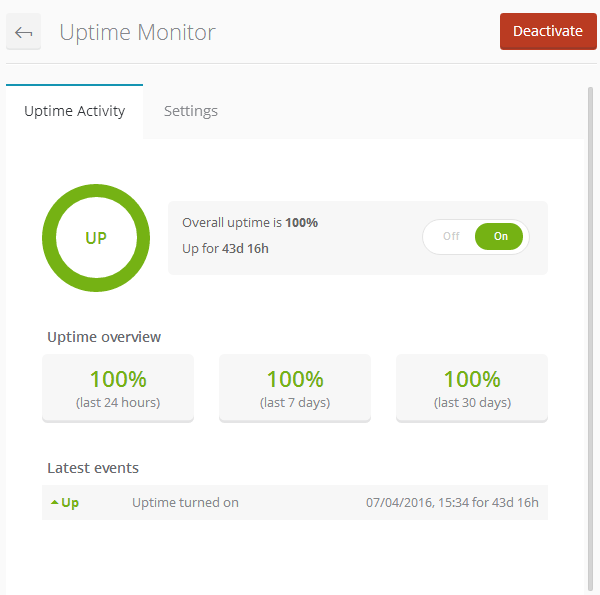
The Uptime Monitor is another premium add-on you can purchase and activate on a per-site basis. It’s a basic tool that monitors the percentage and time your site has been up and active for with no downtime.
The Settings tab lets you choose a time for the monitoring interval setting as well as how much of a delay there is for the tool to send you a notification when a site is down. You can also turn notifications off.
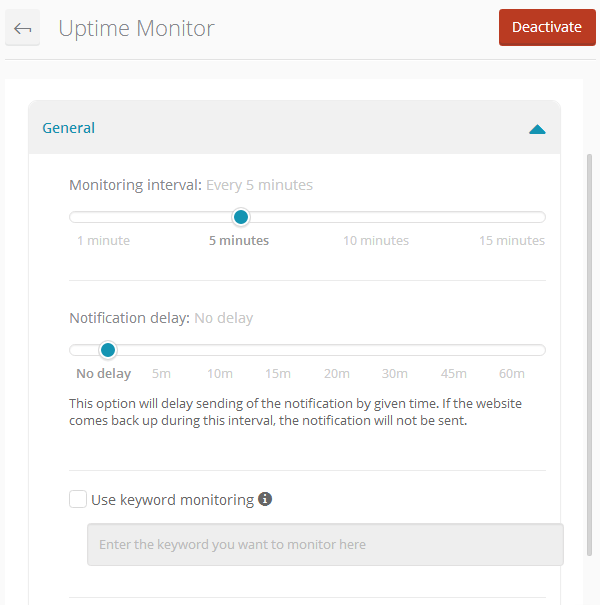
Notifications are on by default, and the default delay is No Delay.
Client Report
The Client Report is a free add-on, but it has a premium version. It lets you create a report that summarizes the services you’ve performed for your client in a certain amount of time. Here’s what the New Report page looks like.
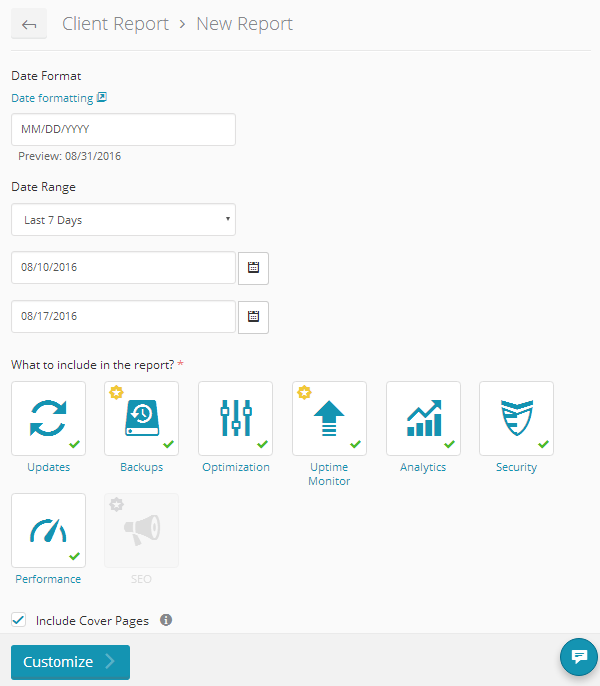
You can omit any service from your report by unchecking the green checkmark associated with it. The Include Cover Pages selection is checked by default. ManageWP has created cover pages for all of the services you can include in your report. These are designed to make your report look professional.
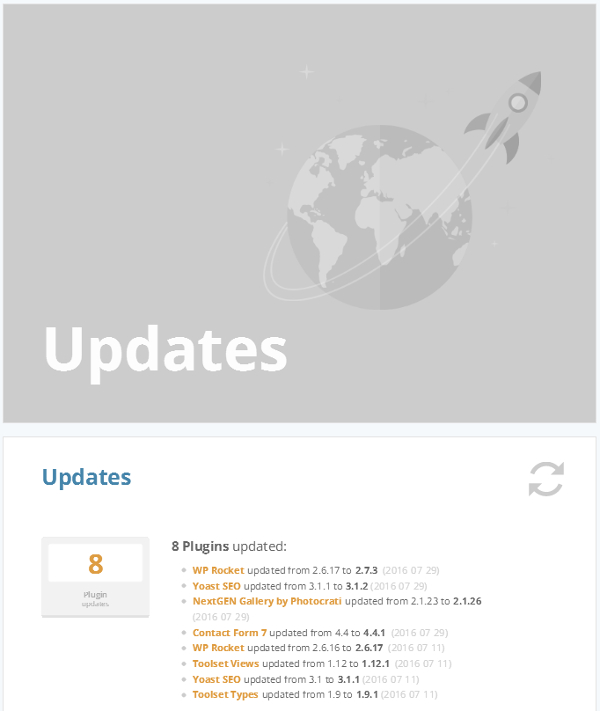
You can also make customizations to your client report by editing its title, adding an introductory message, adding an outro message and adding a custom logo.
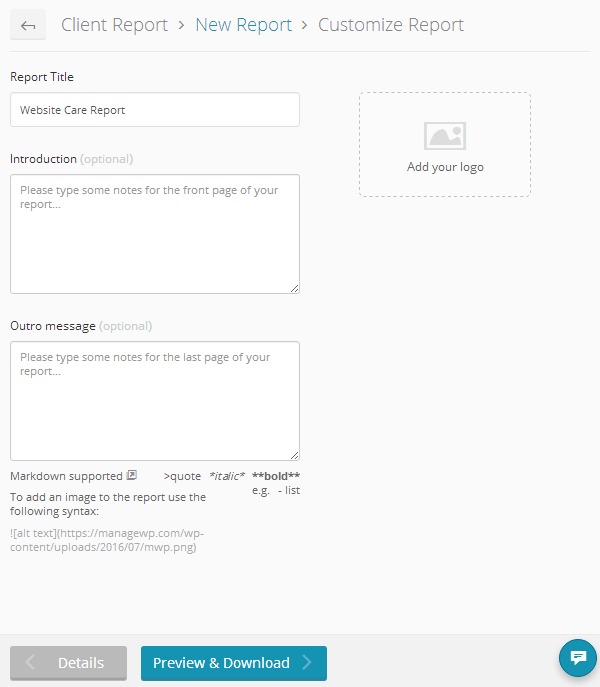
The premium version for this add-on removes the ManageWP watermark, lists your email address as the “Sent From” setting, includes automations, allows HTML downloads and more.
White Labeling for Businesses
The white labeling tool is meant for businesses who manage dozens of WordPress sites for clients. The main purpose of this tool is to allow you to rebrand the ManageWP Worker plugin as your own to make it appear as though it’s your own plugin.
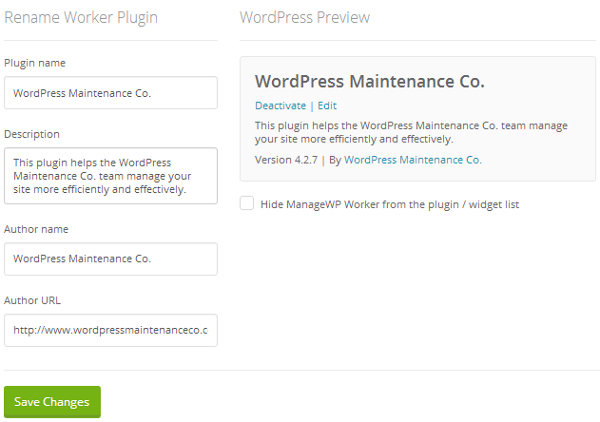
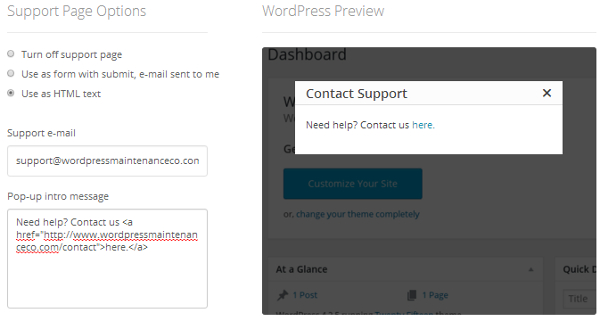
The tool even lets you turn on a Support Page setting that gives your clients a simple way of contacting your support team when they need help.
Final Thoughts
ManageWP Orion provides an efficient way to manage multiple WordPress sites in one place, which can streamline the day-to-day processes of any WordPress business. Not only does this let you provide a more reliable service to your customers, it also frees up enough time for you to take on more customers, especially if WordPress maintenance is your business’ bread and butter.
The service is free for an unlimited number of websites, and it jam packs a number of different free services inside of this pricing model. Premium add-ons are available at a couple of dollars each, and they’re available on a per-site basis, allowing you to buy as many as you need or as little as you need. Businesses that manage more than 25 websites can take advantage of ManageWP’s bundles.
Click here to create an account if you want to check this service out yourself. Signing up and adding your first website takes mere minutes.






Leave a Reply